Programming and Web Development
- PHP
- How do I update root certificates in Apache/PHP/cURL environment
- What are the differences between addslashes(), mysql_escape_string() and mysql_real_escape_string()
- PHP and ODBC
- Speed of unpack() in PHP
- Configuring PEAR on Windows
- How do I use cURL in PHP on Windows?
- Passing command-line arguments into PHP
- Using SSL socket in PHP under Windows
- PHP Resources
- PHP error reporting
- PHPXref vs PHPDocumentor
- Create a PHP unit test case using SimpleTest
- PHP Commenting Style
- phpMyAdmin Security
- PHP
- How can I make phpMyAdmin avoid sending MySQL passwords in the clear?
- PHP ODBC Setup Guide
- Performance of array_shift and array_pop in PHP
- JavaScript
- Javascript
- Numeric Validation JavaScript
- The advantages of Javascript
- jQuery Tutorial
- Which Javascript framework should I use?
- jQuery and JavaScript Coding: Examples and Best Practices
- Java
- Java
- XML and Java
- Converting Java content into AJAX (Javascript and XML)
- Create a Java class that is only comparable to itself
- Removing old Java versions
- Java Server Faces
- SQL
- MySQL Resources
- PostgreSQL Resources
- Why doesn't mysqlshow work for databases or tables with underscores in their names?
- What is mysqlshow good for?
- How can I search/replace strings in MySQL?
- Microsoft Access, OpenOffice and MySQL
- SQL joins
- Get rid of default annoyances in MySQL Workbench
- Who uses PostgreSQL at UCLA?
- Why NoSQL Matters
- Git and Version Control
- Subversion
- Revision Control
- Revision Control Systems Compared
- Installing Subversion on Windows
- GIT info
- What are some document management services/document version control applications out there?
- svn: Working copy '<filename>' is missing or not locked
- CSS and Web Design
- Learning about CSS
- What sort of menus can I make with CSS?
- Top Ten Web Design Mistakes of 2005
- The importance of "!important" in CSS
- CSS Design Concerns for IE6, IE7, and Firefox
- Forcing a page break with CSS
- What's a solid starting point (global reset) for a CSS file?
- UX Team ( UCLA Library - Digital Initiatives & Information Technology )
- Hi, are there any UCLA style resources or style guides for websites?
- UX Resources
- What to do when CSS stylesheets refuse to apply
- Web Accessibility Resources
- Sass versus LESS
- My webserver has died! How do I bring it back online in a hurry?
- XML
- Plone
- Why is it important to use short names in Plone?
- Plone CMS Resources
- Plone 4 Tips and Tricks: Table of Contents
- How do I identify the stylesheets in Plone?
- How to get rid of icons in Plone
- Importing and exporting a Plone site
- Installing Plone v3.2 on Mac OS X 10.5
- Remove highlighting of search terms in Plone
- Is there a permission that allows a user edit content that s/he does not own in Plone?
- Why can't I add a photo using AT Photo in Plone?
- Shibboleth For Plone
- How do I get started with designing new/existing layouts in Plone?
- Backing up and packing Plone's database file (Data.fs)
- Zope/Plone usage statistics
- Should I use plonecustom.css when changing the layout for my Plone site
- Changing number of displayed news/events in Plone portlets
- Search across multiple Plone instances
- How can I undo changes in Plone?
- How do I remove the icons in Plone?
- How do I change the header image in Plone?
- Why are my excluded Plone items still showing up in navigation?
- Plone and Zope Screencasts
- How to add new slots in Plone
- Restricting Plone portlets to show up only on certain pages
- Can Plone display content from another site inside it?
- How can a rotating banner image be done in Plone?
- How do I make dynamic dropdown/pullup menus in Plone?
- How do I enable the advanced mode of the TinyMCE editor for Plone?
- Why aren't my font colors / scripts / Flash / Java applets showing up in my Plone site?
- Importing existing HTML content into Plone
- How do you enable short names in Plone?
- Plone 4 Tips and Tricks
- Shibboleth
- Why does Shibboleth sometimes return different names for students than class roster?
- Will Shibboleth say this is a UCLA person, so that we can limit some content to just UCLA?
- Shibboleth Apache Multiple Virtual Host Configuration (using Moodle as an example)
- Campus Resources for Registrar Data, ISIS, Shibboleth
- IAMUCLA Shibboleth Set-Up Guides
- Is it possible to set up a survey using Shibboleth logins?
- Shibboleth
- Can Shibboleth log all attributes retrieved?
- Lucene
- Lucene spans
- Lucene term documents and term positions
- Pure negation query in lucene
- Why are Lucene's stored fields so slow to access
- Lucene
- Compiling Lucene with GCJ
- Apache log shell scripts
- What is Ajax web programming?
- Programming articles to read
- What is AOL Server and ACS?
- ColdFusion
- Python Resources
- .NET Programming
- What is Haskell?
- What is HTML and how can I learn it?
- Mapping Resources
- Perl resources
- Programming Securely
- WSRP
- XML and Python
- I am trying to develop an application using AJAX. Where do I find out more information?
- What are Favelets / How can I modify my browser on the fly?
- Why URLs shouldn't change
- How to get rounded corners on web pages
- a:visited property not working in Firefox, but working in IE
- The Document Object Model (DOM) and what it's good for
- Setting REMOTE_USER Apache variable in scripts
- What are Microformats?
- What are some tips for making solid web forms?
- Technical Cheat Sheets
- How to prevent "hotlinking" of your images on a web site
- How do I find what Perl modules are installed on my system?
- In a web application, how can I flash an image after a user presses a button?
- CAPTCHA alternatives
- How to find broken links in your web site
- How can I get standard cross browser font-sizes?
- What's an easy way to set up a WAMP test environment?
- On a UNIX / Linux system, how do I view which shared libraries a program needs?
- Security Testing your Apache Configuration with Nikto
- How do I easily install the software for a LAMP server
- SPML
- pubcookie
- IMS
- Hibernate
- eduPerson
- How do I count the number of times a word or phrase occurs in a string?
- Django
- How do I use Perl to create an animated gif from a large number of images?
- How do I force an image to reload on a web page?
- Web Development Standards - Best Practices
- Including sites in main UCLA search engine
- One-stop Ruby on Rails packages
- url
- SSL Configuration Generator
- iOS Programming
- Apache 2 Virtual Hosts File
- How to provide your own customized WAYF page
- Building an OpenSocial Gadget with GWT and Hosting on Your Website
- Calling makeRequest in GWT to Get External Data for an Opensocial Gadget and Creating an Overlay
- Passing Parameters to an OpenSocial Gadget Hosted in Regular HTML
- Has anyone tried CouchDB?
- "Requested URL not found" when using Apache with mod_alias and mod_rewrite
- Suspendable Requests for LAMP systems?
- Debugging Web Applications with Selenium
- ENVI 4.6 and 4.6.1 Java problems
- ENVI 4.6 or 4.6.1 Help does not work
- Mobile Web Resources
- Provisioning and Managing Windows Clients
- Do you know of anyone at UCLA using Drupal right now?
- Scope of environment variables in shells and shell scripts
- Free/open source information retrieval libraries
- How to create a Python class from a SOAP WSDL
- Passing command-line argument into a DOS (including Windows) batch file
- Google Sitemap Generator
- Code Beautifiers And Formatters
- Configuring MediaWiki to Search for Three Letter Words
- Configuring Short URLs in MediaWiki
- csh and single quotes
- Python and SOAP
- What is SQLAlchemy
- About IAMUCLA
- shrinking text
- Google Chart API
- Simplifying web-based processes with CoScripter
- Manual setting of filename and type in a dynamically-generated web page
- What characters can go into a valid HTTP URL?
- Find Google Stats about your website
- Google Font API
- Setting up XAMPP for email feature development
- Sass Variables for UCLA Color Palette
- Steps for Cloning a Repository in SourceTree
- web scraping tools
- Mac OS X - Local Web Development Environment Setup
- robots.txt
- Cross Browser Testing
- has anyone tried wolfram programming cloud?
- ELK Stack
- Top Programming Languages
- How to Easily Recognize Web Colors from RGB Codes
- DevOps Resources
- Microsoft Test Lab Guides
- Regular Expressions
- Regular expression use cases
- Microsoft VHD Test Drive Program
- html entity conversion website
- Google Code Playground
- Is There Such a Thing as Free Software? The Pros and Cons of Open-Source Software
- Authentication via Proxy
- Intel chipset (BIOS) RAID migration
- SSL Certificate and Subject Alternative Names (SAN)
- Cloud Computing
- Accessibility Demonstration Videos
- Find Peak Hours of Your Websites with Google Analytics
- In-Common SSL Cert Installation on Apache 2.2
- Migrate to a virtual Linux environment with Clonezilla
- Alternatives to Google Analytics
- Stanford Self-Help Web Design Resources
- User Testing Tools
- Deploying FileVault2
- How to make a Favicon.ico
- What kind of test can SimpleTest do?
- Web Services
- Eclipse
- Web Developer and Designer Resources
- Who is using Ruby on Rails at UCLA?
- Web Services Resources for Programmers
- Where can I find other programmers at UCLA?
- What is your favorite techie interview question?
- As a UCLA programmer, where do I get data about electronic reserves?
- JSR223 Scripting Pages in Java Web Applications
- Ruby on Rails Resources
- OpenACS (Open Community Architecture System)
- SAML
- SOAP
- WebDAV
- WSDL
- Usability Testing
- REBOL Resources
- XACML
- What is code generation?
- What can I use to do load testing or functional testing of my web server?
- What is Identity 2.0 and as a web developer, why do I care?
- Does UCLA have free access to O'Reilly and Associates programming books online?
- Where can I find free web programming tutorials and sample code?
PHP
How do I update root certificates in Apache/PHP/cURL environment
Following is the instruction for dealing with the new ISIS’ SSL certificate authority (effective 4/21/2006), Geo Trust, in a UNIX or Windows environment using Apache/PHP/cURL. The instruction can generally apply to any new SSL certificate authority.
UNIX
If your web application is getting an error with ISIS login, try the following:
1. Your PHP was probably compiled with cURL, i.e, —with-curl=/usr/local/curl-7.12.0. Our cURL is installed in /usr/local/curl-7.12.0, but yours can be any arbitary path. Find out what is it.
2. Your cURL came with the default CA bundle file, which contains root certificates for all the well known certificate authorities at the time cURL was installed. Our file is /usr/local/curl-7.12.0/share/curl/curl-ca-bundle.crt, which is the default location for the default compilation of cURL. If you compiled cURL with a custom location for this file, find out what is it and that’s the one you will update.
3. Looked for the new ISIS certificate authority from Geo Trust in /usr/local/curl-7.12.0/share/curl/curl-ca-bundle.crt. Basically all the following 3 lines should be in curl-ca-bundle.crt:
Equifax Secure Global eBusiness CA-1
Validity Period: Mon Jun 21, 1999 to Sun Jun 21, 2020 (GMT)
Certificate Fingerprint (MD5): 8F:5D:77:06:27:C4:98:3C:5B:93:78:E7:D7:7D:9B:CC
If any of these lines are not in curl-ca-bundle.crt, you need to update your curl-ca-bundle.crt.
4a. If you don’t have any local certificates in curl-ca-bundle.crt, you can replace the entire curl-ca-bundle.crt. Save the old curl-ca-bundle.crt and get cacert.pem from http://curl.haxx.se/docs/caextract.html. Replace curl-ca-bundle.crt with cacert.pem.
4b. If you have some local certificates in curl-ca-bundle.crt, get cacert.pem from http://curl.haxx.se/docs/caextract.html and extract “Equifax Secure Global eBusiness CA” certificate from cacert.pem by extracting the lines between and including:
Equifax Secure Global eBusiness CA
and
END CERTIFICATE
Make a copy of the current curl-ca-bundle.crt and then append this piece of new certificate data to curl-ca-bundle.crt.
5. Restart your Apache server (the PHP module in Apache reads curl-ca-bundle.crt at startup).
6. Test login to ISIS.
Windows
cURL in Apache/PHP on Windows doesn’t read a CA Bundle at startup and must be set by the application. On Windows adjust your CA Bundle file as above for UNIX. If you don’t have one already read this.
What are the differences between addslashes(), mysql_escape_string() and mysql_real_escape_string()
addslashes() escapes single quote (’), double quote ("), backslash (\) and NUL (\x00).
mysql_escape_string() and mysql_real_escape_string() escapes the characters above plus: CR (\r), LF (\n) and EOF (\x1a). Apparently (according to the manual), MySQL wants these characters escaped too, but my experiment shows otherwise (i.e. MySQL doesn’t care if these characters are in a string).
Suppose:
$value = 'bar'; // 'ba' and then CR-LF and then 'r'
print “insert into pairs values (‘foo’, ’” . addslashes($value) . “’)” gives:
insert into pairs values ('foo', 'ba\r\nr')
print “insert into pairs values (‘foo’, ’” . mysql_real_escape_string($value) . “’)” gives:
insert into pairs values ('foo', 'bar')
In this case, the execution result should be the same, but the statement itself is different.
For other EOF, the execution result and statement are identical for both functions.
mysql_real_escape_string() is available on PHP 4.3.0 or above. mysql_escape_string() is deprecated and you should use mysql_real_escape_string() instead, as it takes the current character set into account when escaping characters.
addslashes() should be enough for single-byte strings. For multi-byte strings though,
mysql_real_escape_string() does provide better security. See this article for details.
PHP manual on:
PHP and ODBC
While looking for something else in the Moodle Forums, I found these links that refer to the underlying way Moodle connects to databases using ODBC.
“adodb just harnesses the underlying PHP functions for whatever type of connection you use, so it helps to be familiar with how they work.”
(Links taken from this Moodle Forums post. http://moodle.org/mod/forum/discuss.php?d=74133)
Please add more, if you find any.
Speed of unpack() in PHP
I needed to extract a list of integers from a binary string. I was curious to know if PHP’s unpack function is fast compared to a custom function, so I wrote a test for it.
<?php$filename = '<some large file>';$unpack_time = 0.0;$unpack_time2 = 0.0;$unpack_custom_time = 0.0;$fp = fopen($filename, 'rb');while (!feof($fp)) { $content = fread($fp, 1048576); $start = microtime(true); $array = unpack('N*', $content); $stop = microtime(true); $unpack_time += ($stop - $start); $start = microtime(true); $array = unpack('V*', $content); $stop = microtime(true); $unpack_time2 += ($stop - $start); $start = microtime(true); $array = unpack_custom($content); $stop = microtime(true); $unpack_custom_time += ($stop - $start);}fclose($fp);print "\$unpack_time = $unpack_time\n";print "\$unpack_time2 = $unpack_time2\n";print "\$unpack_custom_time = $unpack_custom_time\n";function unpack_custom($content) { $len = strlen($content); $result = array(); for ($i = 0; $i + 3 < $len; $i += 4) { $result[] = (ord($content[$i]) << 24) + (ord($content[$i + 1]) << 16) + (ord($content[$i + 2]) << 8) + ord($content[$i + 3]); } return $result;}?>
The printout: (The numbers are the number of seconds needed to convert the file’s content into integers. The file I used was 2.67 MB in size.)
$unpack_time = 1.34654474258$unpack_time2 = 1.44259476662$unpack_custom_time = 127.910765171
The result matches my earlier experiment, from which I have learned that custom functions are much slower than PHP’s built-in ones. Whenever possible, use the latter. By do that, you also have less code to write and debug.
Configuring PEAR on Windows
PEAR is the PHP Extension and Application Repository. Applications written in PHP often include references to external libraries and PEAR is a way to manage these. On Windows if PEAR hasn’t already been configured log in to the server and run go-pear.bat in the PHP directory (C:\php in this case). This adds the PEAR settings to php.ini:
include_path=“.;C:\php\pear”
It also creates “pear.bat” which can be used to search for and install components. For instance:
pear search Requestpear install HTTP_Request
If you use the Apache Web Server after running go-pear.bat it’s necessary to restart Apache (as with any other changes to php.ini).
How do I use cURL in PHP on Windows?
To configure cURL to be able to run in PHP uncomment this line (remove the semi-colon) in the php.ini file:
;extension=php_curl.dllApparently in UNIX systems Apache will read cURL’s curl-ca-bundle.crt file at startup and cURL will be able to use that information. The regular Windows Apache version does not have a full cURL installation, merely the .dll (as referenced above). It will not read curl-ca-bundle.crt in the folder with php_curl.dll and it will also not read curl-ca-bundle.crt in Apache’s configuration folder. To get this functionality under Windows in your application you must set the CURLOPT_CAINFO option to point to the location of a Certificate Authority Bundle file like this:
curl_setopt($ch, CURLOPT_CAINFO, ’C:/accessible/by/apache/cacert.pem);Once this is done you will be able to verify SSL certificates by setting the VERIFYPEER option to true (the default for later versions of cURL) like this:
curl_setopt($ch, CURLOPT_SSL_VERIFYPEER, true);A good CA Bundle file can be found on this page. If you have problems you may need to update your CA Bundle file. In particular, the SSL Certificate for the Test ISIS Server cannot be read using curl-ca-bundle.crt from the latest full cURL version for Windows.
Passing command-line arguments into PHP
Say you have a PHP script and you want to pass command-line arguments into the script, e.g. calling the script like this:
php script.php datafile.txt 10 100
PHP stores all command-line arguments in an array:
$argv 0 => “script.php”
$argv 1 => “datafile.txt”
$argv 2 => 10
$argv 3 => 100
Then you can process the arguments:
if (!isset($argv1) {
print “Usage: php script.php  [ ]\n”;
exit(1);
}
$filename = $argv1;
…
See the article Using PHP from the command line for details.
Using SSL socket in PHP under Windows
Problem
If you try to open a socket (fsockopen, pfsockopen) with SSL in PHP 4.x under Windows, the operation might fail with the following message: Warning: fsockopen(): no SSL support in this build
This problem occurs even if phpinfo() shows openssl as loaded and the command php -m shows openssl as one of the loaded module.
Cause
To use SSL in sockets, PHP core must be compiled with OpenSSL, which is not the case with the binary available at php.net. On the other hand, the openssl module only enables the OpenSSL functions (functions prefixed openssl_). According to the bug report linked below, “OpenSSL support enabled” that phpinfo() states just means that the openssl extension is available.
Solution
This problem has been identified and labeled “won’t fix” in the offical PHP distribution (details). You have the following options:
- Upgrade to PHP 5.x, which does not have such problem.
- If you are using PHP 4.3.x, you can download a (unofficial) SSL-enabled php4ts.dll.
- Use PHP’s curl extension (which is supported by the Windows binary from php.net) instead.
PHP Resources
PHP is a web programming language that can be compiled into the Apache web server and with its persistent connections to MySQL it makes for a very popular and fast web programming environment.
- PHP Cheat Sheet
- Documenting PHP
- Joseph Vaughan’s favorite articles on PHP security
-
MVC frameworks for PHP (things like Ruby-on-Rails)
- Laravel: https://laravel.com
- Cake: http://www.cakephp.org
- Symfony: http://www.symfony-project.com
- CodeIgniter: www.codeigniter.com
- Debian packages for bleeding-edge versions of PHP and other LAMP-related packages: http://www.dotdeb.org
- PHPunit – Unit Testing for PHP
- http://codepad.org/ – test snippets of code in PHP and many other languages.
PHP error reporting
Error levels
name value description example 1 example 2 E_ERROR 1 Fatal run-time errors notdefined(); E_WARNING 2 Run-time warnings 1 / 0; E_PARSE 4 Compile-time parse errors +-; E_eval(‘+-;’); E_NOTICE 8 Run-time notices print $i_am_not_defined; E_CORE_* varies generated by PHP core E_USER_* varies generated by trigger_error E_ALL 2047 EverythingCustom Error Handler
It can only catch E_WARNING, E_PARSE, E_USER_ERROR, E_USER_WARNING and E_USER_NOTICE. If something else happens, PHP’s default error handler takes place.
functional my_error_handler($errno, $error, $file, $line) { ... handle the error ...}
set_error_handler(‘my_error_handler’);
Apache
In Apache, you can customize how it responses to a particular HTTP status code. It can show a message or load a specific page. e.g. (from Apache’s doc)
ErrorDocument 500 /cgi-bin/crash-recoverErrorDocument 500 "Sorry, our script crashed. Oh dearErrorDocument 500 http://xxx/ErrorDocument 404 /Lame_excuses/not_found.htmlErrorDocument 401 /Subscription/how_to_subscribe.html
However, when executed as an Apache module PHP returns a HTTP status code of 200 (OK) even if there is an compile or run-time error. (Not sure if it’s a bug or a feature, since this behavior is not mentioned anywhere else.) Therefore, one cannot use Apache’s custom error capability for PHP errors.
Instead, either use a custom error handler (see above) or have PHP wrap the message inside some specific HTML code (see below).
Pretty-printing Error Messages
Config keys error_prepend_string and error_append_string are used to determine the HTML code that prepends or appends an error message.
e.g. To display each error message inside a box, put these in php.ini:
; String to output before an error message.error_prepend_string = "<fieldset>An error has occured. Please notify the <a href=\"mailto:admin@yourname.com\">administrator</a> with the following error message: <br>"; String to output after an error message.error_append_string = "</fieldset>"
To make the change effective to a directory instead of system-wide, put these in .htaccess:
php_value error_prepend_string "(... starting tags ...)"php_value error_append_string "(... ending tags ...)"
Note: Because any compile-time error stops the compilation, there will be at most one box.
PHPXref vs PHPDocumentor
Introduction
There exists a wide array of PHP documentation tools on the web available free for download. Two of the most popular ones are PHPXref and PHPDocumentor. Here, I outline the differences between the two to help you decide which one you should use.
The following information was taken from http://phpxref.sourceforge.net/ and http://www.phpdoc.org/.
Similarities
The greatest similarity between the two tools is, of course, their ability to read PHP documents and output information about them in another format, namely HTML. Both of these documentors highlights elements of the source in order to increase readability. PHPXref has also adopted the PHPdoc commenting standard to give additional information about pages, while recent versions of PHPdocumentor has adopted PHPXref’s ability to cross reference source code.
The Strengths of PHPXref
- PHPXref is programmed in Perl which is directly run by your machine. In that way, it is potentially faster than PHPdocumentor which does the processing through PHP itself.
- The HTML output of PHPXref is very neat – it implements a bit of javascript to provide neat rollover visuals on additional information.
- Perhaps the strongest feature of PHPXref is its ability to provide information even without PHPdoc comments.
- Very easy to use and set up. You simply drag the files you want information about in a source folder, run the command prompt, and grab the documentation from the source folder.
- Although I haven’t tested it, PHPXref mentions that they provide information about SQL tables.
The Strengths of PHPDocumentor
- Provides both a web and a command line interface.
- Can output in CHM, HTML, and PDF!!
- The interface allows a lot more customization than PHPXref. It can generate the resultant documentation in your own web interface (or you can choose one of their pre-built ones) in addition to choosing the source directory and the output directory. This level of customization is really what makes PHPXref more difficult to use than PHPXref which decides those things for you.
- Has an active community with a well-detailed online documentation.
#Can create class inheritance diagrams (Not tested) - Their documentation IS the standard. Expect new features and updates.
- Bundled with Zend Studio, a popular web development software.
Summary
Perhaps the main reason to use PHPXref is its ability to provide information without PHPdoc comments. This ability gives PHPXref a speed advantage if you want quick documentation without having to go back and comment lines and lines of code (although you should consider getting around to it!). This type of development favors procedural programming to an extent.
Personally, I like PHPdocumentor’s ability to create PDF’s and its online documentation. Another cool feature is perhaps the ability to infer class inheritance straight from the source code. The rest of the features of PHPdocumentor is just eye candy.
Keep in mind that PHPdocumentor will have immediate support for PHPdoc style commenting. New versions of PHP may create a need for more commenting standards that PHPdocumentor will be quick to adopt.
I suspect that in the future, PHPdocumentor will continue to adopt useful features from other documentation tools. But in reality, the major differences between PHPXref and PHPdocumentor have been neutralized – using either one will likely suffice for your needs.
Create a PHP unit test case using SimpleTest
You can download SimpleTest at https://sourceforge.net/projects/simpletest/
Suppose you have a PHP file called math.php that contains functions that you want to test.
<?function square($x) { return $x * $x;}function cube($x) { return $x * $x * $x;}?>
Then you can write a test case in another file, say mathtest.php.
(Suppose you have downloaded and extracted SimpleTest to C:\simpletest.)
<?phpif (!defined('SIMPLE_TEST')) { define('SIMPLE_TEST', 'C:\\simpletest\\');}require_once(SIMPLE_TEST . 'unit_tester.php');require_once(SIMPLE_TEST . 'reporter.php');require_once('math.php');class TestOfLogging extends UnitTestCase { function TestOfLogging() { $this->UnitTestCase(); } function testSquare() { $this->assertEqual(16, square(4)); }}$test = &new TestOfLogging();$test->run(new TextReporter());?>
(Each function named test* in this class represents a test case and will be run automatically by SimpleTest.)
Run the test case with the command php mathtest.php. As the square function is written correctly, the test case will pass.
testofloggingOKTest cases run: 1/1, Passes: 1, Failures: 0, Exceptions: 0
Try changing the square function and see what happens.
PHP Commenting Style
Any programmer can tell you that good commenting in your source code is an integral part of programming. Whether the language you’re dealing with is an interpreted language like Javascript or compiled like C++, good comments lead to better readability and better flow of logic.
Developers of the Java programming language have come up with a strict commenting standard for Java to interface with a program called Javadoc. Not only does this standard remind the programmer to make appropriate comments, it also allows Javadoc to parse the strict comments into HTML documentation. The success of Javadoc carried over PHP with the creation of PHPDoc. The commenting syntax of PHPDoc is widely supported in the PHP community. Parsers for this standard include phpxref and phpdocumentor.
Basic Syntax
Here’s an example of PHPDoc style comments:
/*** This is a short description** This is a longer description of the element that* I will comment. It can run over to as many lines* as necessary. Notice the asteriks at the beginning* of each commenting line.*/
All PHPDoc comments begin with /** on its own line at the top and ends with a */ at the bottom. Each line of commenting is denoted by the single asterik at the beginning of each line. By convetion, PHPDoc comments begin with a short description followed by a longer description. Let’s look at a more realistic example where we wish to comment on a dispenseIceCream() function:
/*** Dispenses desired flavored ice cream** Called upon when user has entered their* favorite ice cream. The function checks* if the desired flavor is available in the* amount desired. If so, then it dispenses* the ice cream.** @access private* @param int $flavor Flavor of the desired ice cream* @param int $amount_desired Amount of ice cream user wants* @return $string Name of the flavor. Returns error string if not available*/private function dispenseIceCream($flavor,$amount_desired){ ...return $name_of_flavor;}
I’ve thrown a lot of new things in the above code, but the syntax should be somewhat self-explanatory. First, you should have noticed the @ tags. Tags in PHPDoc tell the parser exactly what you are going to be describing in your comments. Notice that each tag has its own parameters, separated by a space as in the @param tag. Tags are, in essence, the strength of PHPDoc.
@access tells the parser that the following element we are commenting on (the dispenseIceCream function) is a private function. @param gives the parser information about the parameters that the function takes in. Finally, @return provides information about what kind of output to expect out of the function.
Each tag in PHPDoc has its own syntax. For more information, look at the documentation
Useful Tags
Using every single tag in PHPDoc leads to the issue of overcommenting and obscurity of the actual code! Here, I outline what I deem to be useful tags to place in your document (tag info from phpdocumentor):
@access (private | protected | public)
The access tag will allow the documentation to clearly state how an element should be accessed. This is important for programming design purposes.
@param datatype $paramname description
I consider this tag to be one the most important tags in PHPDoc. It allows a quick look at how the input of a function should be formatted in order to use it.
@return datatype description
Similar to the @param tag, when dealing with functions, one of the things a programmer cares to look for is what this function will output.
@uses (please refer to documentation for proper syntax)
This tag allows actual linking and backlinking to another element! Its a neat feature that allows someone browsing the documentation to quickly see related functions or variables the element uses. The syntax is a bit tricky, so please study it.
@var datatype description
A nice tag to comment on important variables.
Other Tags to Note
@global datatype $globalvariablename | description
Global variables should be given more attention to. This tag should be used with @var.
@ignore
For whatever reason, you may not want PHPDoc to parse the following element. the @ignore tag (with no parameters) does just that. You can go ahead and give it a description if you feel its necessary.
@static
Similar to @access, program design is one of the things programmers may want to reference in your code. The static tag whether a a certain class of method should be treated as static.
@staticvar
Same as @static, except for variables.
inline {@link URL description}
This in-line tag is very useful whenever you wish to reference something outside within your descriptions. It creates a link to the URL you specify within the documentation. There are other inline tags, but this one is the most versatile (but possibly not the easiest to use).
phpMyAdmin Security
PHP
-
PHP
- eXtremePHP and http://pear.php.net/ These code bases will be useful in rolling the PHP out more quickly – Jose
- A higher level PHP web application framework is the Horde framework http://www.horde.org/ – Jose
- http://www.phpoki.org/
How can I make phpMyAdmin avoid sending MySQL passwords in the clear?
Although phpMyAdmin is an excellent tool for administering MySQL databases, you don’t want to expose your MySQL usernames and passwords to sniffing over the wire by sending them “in the clear.”
The solution, if you are running https, is to simple edit the config.inc.php file like this. The default is FALSE.
$cfg[‘ForceSSL’] = TRUE; // whether to force using https
PHP ODBC Setup Guide
Guide to setting up php-odbc for connection to Registrar database. Example for RedHat EL 5.
Create file tds.datasource.template:
[Registrar]
Driver  = FreeTDS
Description  = UCLA Registrar (SRDB)
Trace  = No
Server  = srdb.registrar.ucla.edu
Port  = 1433
Create file tds.datasource.template:
[FreeTDS]
Description     = v0.63 with protocol v8.0
Driver          = /usr/lib/libtdsodbc.so
Make sure Driver points to an existing file.
Run the following command:
sudo yum install php-odbc
sudo odbcinst -i -d -f tds.driver.template
odbcinst -i -s -f tds.datasource.template
sudo cp ~/.odbc.ini /etc/odbc.ini
Test the connection:
<?
$conn = odbc_connect(‘Registrar’, $username, $password);
$result = odbc_exec($conn, “EXECUTE CIS_facultyCourseStudentsGetAlpha2 ‘254049110’, ‘081’”);
?>
Note on programming: do not nest odbc_exec() calls! Make one call, copy records into array, odbc_free_result() it, and then move on. Second odbc_exec() will fail otherwise.
More info on settings at http://www.unixodbc.org/doc/FreeTDS.html
Performance of array_shift and array_pop in PHP
We have confirmed that array_shift is much slower than array_pop in PHP.
Code:
<?
// Create an array with 100000 elements
$array = array();
for ($i = 0; $i < 100000; $i++) {
$array[] = rand();
}
// Remove the last 1000 elements using array_pop
$start = microtime(true);
for ($i = 0; $i < 1000; $i++) {
array_pop($array);
}
$stop = microtime(true);
printf(“array_pop takes %.5f seconds\n”, $stop – $start);
// Add back 1000 elements
for ($i = 0; $i < 1000; $i++) {
$array[] = rand();
}
// Remove the first 1000 elements using array_shift
$start = microtime(true);
for ($i = 0; $i < 1000; $i++) {
array_shift($array);
}
$stop = microtime(true);
printf(“array_shift takes %.5f seconds\n”, $stop – $start);
// Add back 1000 elements
for ($i = 0; $i < 1000; $i++) {
$array[] = rand();
}
// Remove the first 1000 elements by reversing the array and popping 1000 elements
$start = microtime(true);
$array_rev = array_reverse($array);
for ($i = 0; $i < 1000; $i++) {
array_pop($array_rev);
}
$stop = microtime(true);
printf(“array_reverse + array_pop takes %.5f seconds\n”, $stop – $start);
?>
Result:
array_pop takes 0.00089 seconds
array_shift takes 15.15544 seconds
array_reverse + array_pop takes 0.03934 seconds
JavaScript
Javascript
Javascript, also known as ECMAscript, is used to make web browsers perform certain actions before returning to the web server. It depends on web browsers behaving the same. This was problematic for a long time, but is getting much better. Here are a few Javascript resources.
- http://www.javascript.com/
- JavaScript Puzzlers: A 37 Question JavaScript Quiz
- JavaScript Tools of the Trade: JSBin
- JavaScript: The World’s Most Misunderstood Programming Language – Douglas Crockford © 2001
- His more recent book JavaScript: The Good Parts – Douglas Crockford © 2008
- The Young Developer’s Guide to Debugging JavaScript
By ANDRE BEHRENS – N.Y. Times - JavaScript Language Resources
- JavaScript Weekly – A free, once–weekly e-mail round-up of JavaScript news and articles.
- Select All_ JavaScript for Forms Posting to an Array
- WYSIWYG Editors written in Javascript
- http://jquery.com/
- Frequently Misunderstood JavaScript Concepts by Michael Bolin, October 28, 2013
- Learn to play Javascript by playing this game – Code Combat
- (new) Speaking Javascript by Dr. Axel Rauschmayer – free HTML version – March 2014
- (new) You Don’t Know JS book series – free online, or you can buy them – Feb. 2015 It is simultaneously a simple, easy-to-use language that has broad appeal, and a complex and nuanced collection of language mechanics which without careful study will elude true understanding even for the most seasoned of JavaScript developers.
UCLA KB Articles tagged with Javascript
Numeric Validation JavaScript
Series I : Validation (AJAX Presentation CWP)
Several people have asked me to discuss some of the details from the AJAX presentation from our last Campus Web Publishers (CWP) meeting.
In this article, which is part of the AJAX presentation series, I will share some validation functions I have used to validate the grid. In addition to validating the field, notice how it maps the arrows keys to give the user a Microsoft Excel like feel.
Validating a numeric field
function NumbersOnly(Object) { if(CurrentCellClicked) { if((event.shiftKey && event.keyCode == 9) || event.keyCode==37) { event.returnValue=true; return ; } else if(event.keyCode==9 || event.keyCode==39) { event.returnValue=true; return ; } } if(event.keyCode == 36 || event.keyCode == 35 || event.keyCode == 46 || event.keyCode == 8) event.returnValue=true; else if((event.shiftKey && event.keyCode == 9) || event.keyCode==37) { var t = parseInt(Object.nextField); if(t > 2) { t = GlobalForm['c'+(t-2)]; if(t.disabled) { GlobalForm['c'+(t.nextField-2)].select(); GlobalForm['c'+(t.nextField-2)].focus(); } else { t.select(); t.focus(); } event.returnValue = false; } } else if(event.shiftKey) event.returnValue = false; else if(event.keyCode==9 || event.keyCode==39) { var t = GlobalForm['c'+Object.nextField]; if(t.disabled) { GlobalForm['c'+t.nextField].select(); GlobalForm['c'+t.nextField].focus(); } else { t.select(); t.focus(); } event.returnValue = false; } else { event.returnValue = ((event.keyCode >= 48 && event.keyCode <= 57) || (event.keyCode>=96 && event.keyCode<=105)); }}
Validating a currency field
function CurrencyOnly(Object) {
	if(CurrentCellClicked) {
		if((event.shiftKey && event.keyCode == 9) || event.keyCode==37) {
			event.returnValue=true;
			return ;
		}
		else if(event.keyCode9 || event.keyCode39) {
			event.returnValue=true;
			return ;
		}
	}
if(event.keyCode == 36 || event.keyCode == 35 || event.keyCode == 46 || event.keyCode == 8) event.returnValue=true;
else if((event.shiftKey && event.keyCode == 9) || event.keyCode37) { var t = parseInt(Object.nextField); if(t > 2) { t = GlobalForm['c'+(t-2)]; if(t.disabled) { GlobalForm['c'+(t.nextField-2)].select(); GlobalForm['c'+(t.nextField-2)].focus(); } else { t.select(); t.focus(); } event.returnValue = false; } } else if(event.shiftKey) event.returnValue = false; else if(event.keyCode9 || event.keyCode==39) {
var t = GlobalForm[’c’+Object.nextField];
if(t.disabled) {
GlobalForm[’c’+t.nextField].select();
GlobalForm[’c’+t.nextField].focus();
}
else {
t.select();
t.focus();
}
event.returnValue = false;
}
else {
event.returnValue = (event.keyCode == 110 || event.keyCode == 190 || event.keyCode == 109 || event.keyCode == 189 || (event.keyCode != 47 && ((event.keyCode>=45 && event.keyCode<=57) || (event.keyCode>=96 && event.keyCode<=105))));
}
}
Validating a Date Field
function DateOnly(Object) {
	if(CurrentCellClicked) {
		if((event.shiftKey && event.keyCode == 9) || event.keyCode==37) {
			event.returnValue=true;
			return ;
		}
		else if(event.keyCode9 || event.keyCode39) {
			event.returnValue=true;
			return ;
		}
	}
if(event.keyCode == 36 || event.keyCode == 35 || event.keyCode == 46 || event.keyCode == 8) event.returnValue=true;
else if((event.shiftKey && event.keyCode == 9) || event.keyCode37) { var t = parseInt(Object.nextField); if(t > 2) { t = GlobalForm['c'+(t-2)]; if(t.disabled) { GlobalForm['c'+(t.nextField-2)].select(); GlobalForm['c'+(t.nextField-2)].focus(); } else { t.select(); t.focus(); } event.returnValue = false; } } else if(event.keyCode9 || event.keyCode==39) {
var t = GlobalForm[’c’+Object.nextField];
if(t.disabled) {
GlobalForm[’c’+t.nextField].select();
GlobalForm[’c’+t.nextField].focus();
}
else {
t.select();
t.focus();
}
event.returnValue = false;
}
else {
event.returnValue = (event.keyCode == 109 || event.keyCode == 189 || event.keyCode == 191 || event.keyCode == 111 || (event.keyCode>=47 && event.keyCode<=57) || (event.keyCode>=96 && event.keyCode<=105));
}
}
Of course, date validation also requires:
function IsDate(DateObject) {
	var month, year, day;
	if(DateObject.value.length < 6) {
		var datePat = /^(\d{1,2})(\/|-)(\d{1,2})$/;
		var matchArray = DateObject.value.match(datePat); // is the format ok?
		if (matchArray == null)
			return false;
month = matchArray1; // parse date into variables
day = matchArray3;
year = (new Date()).getFullYear();
}
else {
var datePat = /^(\d{1,2})(\/|-)(\d{1,2})(\/|-)(\d{2,4})$/;
var matchArray = DateObject.value.match(datePat); // is the format ok?
if (matchArray == null)
return false;
month = matchArray1; // parse date into variables
day = matchArray3;
year = matchArray5;
}
if (month < 1 || month > 12) { // check month range
throw (new Exception(“Month must be between 1 and 12.”));
}
if (day < 1 || day > 31) {
throw (new Exception(“Day must be between 1 and 31.”));
}
if ((month4 || month6 || month9 || month11) && day==31) {
throw (new Exception("Month “month” doesn’t have 31 days"));
}
if (month == 2) { // check for february 29th
var isleap = (year % 4 == 0 && (year % 100 != 0 || year % 400 == 0));
if (day > 29 || (day==29 && !isleap)) {
throw (new Exception("February " + year + " doesn’t have " + day + " days!"));
}
}
if(year.toString().length>2) {
year = year = year.toString().substring(2);
}
DateObject.value = (parseInt(month)) + ‘/’ + (parseInt(day)) + ‘/’ + year;
return true; // date is valid
}
The advantages of Javascript
Introduction
Javascript is a browser-interpreted language that was created to access all elements of HTML and the browser. The processing is done entirely by the client-side browser which makes it very useful tool to handle processing which would have otherwise been checked server-side, thereby reducing overhead. Javascript is also used to increase user interaction, animate objects, create drop down navigation, grab data from databases, and more! If you are working with webpages in any way, javascript will help. In this article, I attempt to point out the advantages in learning this powerful language.
Making Magic with DHTML
You have probably encountered javascript through your years of web surfing without knowing it. Currently, the most popular implementation of javascript is the rollover. You know, when your cursor “rolls over” an image and it changes. Another popular use of javascript is drop down navigation menus. Javascript is used to create “magic” effects on webpages in conjunction with CSS (Cascading Style Sheets). The combination of HTML, CSS, and javascript is called DHTML for Dynamic HyperText Markup Language. The Dynamic in DHTML refers to how elements in the webpage appear to move or change, usually by user interaction. Not surprisingly, the brains behind these effects is javascript.
HTML was designed for web authors to quickly and easily create web pages. With only knowledge of HTML, designers will not have access to certain areas of the web browser. Examples include the status bar, browser information, browser window size, cookies, and browser history. Javascript is needed in those cases in order to access those elements and do things with them.
CSS can give properties to HTML elements that can’t be created through tags. CSS is also used in conjunction with Javascript in order to identify and categorize certain HTML elements. By systemitizing these elements, javascript can then access them much more easily.
If you are designing a website for public access, implementing some DHTML helps your audience and navigate interact with your pages.
Dynamic Data with AJAX
The “Dynamic” in DHTML is a bit of a misnomer in the sense that the content does not change. In some effects, the content is simply hidden from the audience and revealed later with javascript. True dynamic content would require some sort of access to external data such as a text file or a database. Unfortunately, since javascript was designed as a client-side tool, it is not the ideal way to fetch data for you. However, with a bit of clever programming, developers have come up with a solution that integrates javascript, XML, and PHP together. This technology is called AJAX – Asynchronous Javascript And XML.
The basic idea of AJAX is to use the event handlers of javascript to fetch external data from an external PHP/ASP page. This page, in turn, fetches the data from the database and generates an XML file with the content. The javascript parses the xml file and embeds the data straight into the HTML. While the backend programming may seem a bit complicated, the advantages of AJAX benefit both server and client sides.
Traditionally, dynamic data can only be generated by a page refresh. Not only does this interrupt the flow of your web applications, the server must also resend the entire webpage, resulting in unnecessary overhead. One of the major benefits of AJAX is that your web applications do not need to be refreshed. To the client, a simple button click generates dynamic data straight on the screen seemlessly. To the server, only the data that is requested by the client is sent. Furthermore, since the raw data is being parsed and processed through javascript, AJAX saves the server precious processing cycles. The result: dynamic, seamless webpages that are optimized for speed.
Javascript Form Validation
As I’ve hinted in the introduction, javascript can be used to validate HTML form fields. Let’s imagine a familiar scenario in which a server is at maximum and webpages are being served slowly. Imagine a innocuous client who forgets to type in the “at” on the email field of a form. He clicks submit and waits … and waits and … waits only to receive a cold “invalid input” message. Then he clicks the back button on the browser, which asks if he wants to retrieve the webpage again. The user has no choice but to say yes, and he waits…and waits.. and waits only to go back to the original screen and try again. Not only does all this waiting frustrate the client, the server was also bothered by having to do the check on the email field.
Javascript can act as the intermediary between the submitted form and server. In our imaginary example above, javascript steps in and immediately tells the client that he forgot the “at”. Only when the form is valid does the page go to bother the already-busy server.
Javascript is a completely object-oriented language. While the “script” in javascript may imply on-the-fly procedural programming, it has capabilities to create objects, methods, and even inheritance! This, along with dynamic data fetching through AJAX, allows you to truly create complex and powerful applications.
Conclusion
To learn more about javascript and all the aforementioned technologies, I highly recommend http://www.w3schools.com/ both as a tutorial and a reference. Be sure to read up on the DOM model to take advantage of the power of this language.
In the center of all of these web technologies is javascript. The language itself is simple in that you don’t need to worry about data types, compilers, or forgetting that semicolon! Javascript is also powerful in how integral it is to so many existing technologies. It saves server frustration, client frustration, and programmer frustration. The next time you create a web page, think about how might it be improved with javascript.
jQuery Tutorial
Learn the basic building blocks of jQuery in a two hour combination of videos, and interactive console challenges. – http://try.jquery.com/
Please list any other useful jQuery Tutorials you know of.
Which Javascript framework should I use?
So you’re tasked with creating a new web site or enhancing an old one and you need to provide some nice UI components or a RIA, the question is, what to use? We have faced this question at the Digital Libraries, and found the best approach for us is to define the requirements and audience of the application.
Usually, when asking around about js frameworks, the default answer is often jquery and in most cases jquery is a very good choice, but it also depends on what type of application you are building.
If you are interested in mimicking a desktop application feel, Ext-js might be a library to take a look at, which is a javascript library of almost Windows-like control widgets. An example of this might if your site has an admin portion, and needs very fine grained control such as trees, file and directory browsers, editable data grids, etc…
A nice comparison of several js frameworks is available here:
http://fictionalrealm.com/coding/2009/04/19/javascript-ui-framework-comparison-or-why-i-choose-extjs-jquery/
If you are looking to build an app-like web project for mobile and tablet devices, the Sencha Touch library looks to fit that niche.
jQuery and JavaScript Coding: Examples and Best Practices
When used correctly, jQuery can help you make your website more interactive, interesting and exciting. This article will share some best practices and examples for using the popular Javascript framework to create unobtrusive, accessible DOM scripting effects. The article will explore what constitutes best practices with regard to Javascript and, furthermore, why jQuery is a good choice of a framework to implement best practices.
http://www.smashingmagazine.com/2008/09/16/jquery-examples-and-best-practices/
Java
Java
Java is an object-oriented programming language that is intended to be runnable from many different operating systems without recompiling.
-
Essential Links
- Home Page: http://java.sun.com
- Downloads: http://java.sun.com/downloads/
- Forums: http://forum.java.sun.com/index.jspa
- Tutorials: http://java.sun.com/learning/tutorial/
- Community: http://www.theserverside.com
- Conference: http://java.sun.com/javaone/sf/
-
Open Source
- The Apache Software Foundation: http://www.apache.org/
- O’Reilly Open Source Java Directory: http://www.onjava.com/pub/q/java_os_directory
- Java-Source.Net: http://java-source.net/
-
Books
-
For Learning Java:
- Core Java, Volume I: Fundamentals by Gary Cornell, Cay S. Horstmann, Cay S. Forstmann
- Core Java, Volume II: Advanced Features by Cay Horstmann, Gary Cornell
-
For Reference:
- The Java™ Programming Language by Ken Arnold, James Gosling, David Holmes
- The Java™ Language Specification by James Gosling, Bill Joy, Guy Steele, Gilad Bracha
-
For Best Coding Practices:
- Effective Java by Joshua Bloch
- _ For Designing GUIs:_
- Java Look and Feel Design Guidelines: http://java.sun.com/products/jlf/index.html
-
For Learning Java:
-
Tools
- IDEs
- Eclipse: http://www.eclipse.org
- NetBeans: http://www.netbeans.org/
- Sun Java Studio Enterprise: http://developers.sun.com/prodtech/javatools/jsenterprise/index.jsp
- Sun Java Studio Creator: http://developers.sun.com/prodtech/javatools/jscreator/index.jsp
- Frameworks
- Java Server Faces: http://java.sun.com/javaee/javaserverfaces/
- Shale: http://struts.apache.org/struts-shale/
- Spring: http://www.springframework.org/
- Struts: http://struts.apache.org/
- Webwork: http://www.opensymphony.com/webwork/
- Tapestry: http://jakarta.apache.org/tapestry/
- Grails: http://grails.codehaus.org/
- RIFE: http://rifers.org/
- Trails: https://trails.dev.java.net/
- Hibernate: http://www.hibernate.org/
-
AJAX
- Prototype: http://prototype.conio.net/
- Script.aculo.us: http://script.aculo.us/
- Dojo: http://dojotoolkit.org/
- DWR: http://getahead.ltd.uk/dwr/
- Google Web Toolkit: http://code.google.com/webtoolkit/overview.html
- Java Server Faces: http://java.sun.com/javaee/javaserverfaces/ajax/tutorial.jsp
- Build
- Ant: http://ant.apache.org/
- Maven: http://maven.apache.org/
- IDEs
- Web Container
- Application Server
- JBoss: http://www.jboss.com/products/jbossas
- Geronimo: http://geronimo.apache.org/
- Portal
- Enterprise Content Management
- Alfresco: http://www.alfresco.com/
XML and Java
-
XML and Java
- Cocoon is a Java-based framework. It utilized pipelines and SAX events to create a verstile XML parsing architecture. The Cocoon web site is at: http://cocoon.apache.org/2.0/. Books are now coming out on Cocoon (check out Amazon). The O’Reilly web site has on-line articles on Cocoon: “Introducing Cocoon 2.0” (http://www.xml.com/pub/a/2002/02/13/cocoon2.html) , “Creating SOAP Services with Cocoon” (http://www.xml.com/pub/a/ws/2003/03/18/cocoon.html) —Jose
Converting Java content into AJAX (Javascript and XML)
If you have a program in Java or know how to program in Java and would like to convert your code to be used on websites as AJAX (Javascript and XML), Google Web Toolkit can help do it for you instead of doing so by hand.
The Web Toolkit offers alot of tools for creating webcontent from your Java apps and is perfect for me since I dont have any experience with Javascript or XML. If you know how to program in Java, make sure to check it out.
Create a Java class that is only comparable to itself
In Java 5 and above, how to create a Java class that is only comparable to itself? The answer is to extend Comparable<TheClass>. This works even if TheClass uses generics.
public class SelfComparableOnly<T> implements Comparable<SelfComparableOnly<T>> { ... public int compareTo(SelfComparableOnly<T> o) { // Compare itself to o } ...}
Removing old Java versions
Java is notorious for installing updates (current version as of this writing is version 6, Update 23) but not removing the old versions.
Finding a system with multiple Java versions (e.g. Java 6 Update 10, Java 6 Update 17, and Java 6 Update 20 all on the system’s Add/Remove Programs) is fairly common.
Java until recently did not provide for proper “upgrading” of old versions or cleanup of them. Fortunately Java 6 Update 23 does do this properly.
To remove older versions:
http://www.java.com/en/download/faq/remove_olderversions.xml
http://www.java.com/en/download/help/uninstall_java.xml
It is, unfortunately, fairly primitive— simply to to Add/Remove Programs or Programs and Features and remove them one at a time by uninstalling them.
Java Server Faces
Java Server Faces (JSF) Mark Norton came across a very handy web page which documents all of the standard JSF tags and includes examples in XML and graphics. http://www.horstmann.com/corejsf/jsf-tags.html
SQL
MySQL Resources
MySQL is a free, open-source relational database that has been used in thousands of websites, large and small. This is a contributed collection of resource links on MySQL. Feel free to add your favorites.
- Mike Franks – SSC
- Collection of Mysql links and articles http://www.sscnet.ucla.edu/mysql/
- Notes while learning Mysql http://www.sscnet.ucla.edu/mysql/notes.htm
- Article on GRANTing access http://www.devshed.com/Server_Side/MySQL/Access/print_html
- Article I don’t understand on storing hierarchical data in a relational database. //would this work with Mysql?\\ http://www.oreillynet.com/pub/a/network/2002/11/27/bioconf.html
- Quick Tips to Optimize MySQL
- 8 Reasons Not to Use MySQL
- 5 Reasons To Use MySQL
- Ian Roessle November 9, 2002 at 13:23:
- phpMyAdmin is a very useful tool for managing Mysql databases from the web. And this article tells how to Turn on phpMyAdmin’s hidden features
- Client-side database tools
- Aqua Data Studio is a database query and administration tool that allows developers to easily create, edit, and execute SQL scripts, as well as browse and visually modify database structures. My favorite features: auto-completing SQL editor, and Excel-like editing of SELECT resultsets – the software generates automatically the appropriate UPDATE commands. Written in Java and supported on Windows, OS X, Solaris and Linux. Comes with JDBC drivers for MySQL, MS SQL Server 7/2000, Oracle 8/9/10, PostgreSQL and Sybase, and you can add drivers for other DBs. Runs fast. Free for educational use.
- DBDesigner4 is a visual database design system that integrates database design, modeling, creation and maintenance into a single, seamless environment. I use it to visually layout and plan my database schemas. Free. Only on Windows and Linux
- Point-and-Click MySQL Adminstration – Linux Magazine – Feb. 1, 2007
- The MySQL Query Browser – Linux Magazine April 19, 2007
- Server-side Admin
- Performance Tuning Best Practices for MySQL – Google Tech Talks – 43 min – Apr 28, 2006 Recommended by Harry Mangalam, UCI on UC-CSC Mailing List “This is a bit dated, but since so many web services use MySQL, this may still be useful.. It’s 43 min long, but the guy has a lot of useful hints and if you let it run in the background, you’ll pick up some things that will help, especially if you’re confused about the diffs between myisam and innodb tables and how to tune each.”
- Quick and Dirty MySQL Performance Troubleshooting – Jeremy Zawodny, Monday, August 17th, 2009 Linux Magazine
- General documentation and training
- MySQL University provides free download of talks on various topics.
- Be productive with the MySQL Command Line
- Fun with the MySQL pager command
This article was originally posted on the UCLA Programmers Wiki.
PostgreSQL Resources
See Also:
PostgreSQL official website:
Modified versions:
Tuning Guides:
Graphical Admin Tools:
Web-based Admin Tools:
Why doesn't mysqlshow work for databases or tables with underscores in their names?
mysqlshow has a tricky feature that interprets SQL wildcard characters (*,?,%,_) as wildcards if they appear in the last argument you give it. While the first 3 characters don’t get used much (if at all) in naming databases, the underscore is a common word separator and could cause problems if you try to use mysqlshow. Instead of showing the details of a database or table, if the object of interest has an underscore in its name, mysqlshow will treat it as a search and display only the name of the one object it finds.
The trick to getting mysqlshow to display details is to add another argument at the end. mysqlshow only interprets wildcards in its last argument, so adding another one will tell the command to interpret the underscores literally and not as expressions for a search.
To get the database underscores_are_great to show its tables, type:mysqlshow underscores_are_great %
The ‘%’ on the end is a wildcard which will show all tables, which is what you want it to do.
This works for displaying individual tables too, just add a ‘%’ as a final argument.
See what else mysqlshow is good for
What is mysqlshow good for?
mysqlshow is a command-line tool included with standard MySQL distributions, similar to mysqladmin or other tools. mysqlshow is used to show summary information about databases and tables.
Here is its basic usage:mysqlshow [OPTIONS] [database [table [field]]]
There are four basic modes:
- No database given – all databases on the server are shown
- Database given only – all tables in that database are shown
- Database and table given – all fields in the given table of the database are shown
- Database, table, field given – only that field of the table is shown
There is also a search mode, which is activated if the last argument contains an SQL wildcard (*,?,%,_). In this mode, all objects at the level of the last argument are searched. For example, mysqlshow ucla c% matches all tables in ucla starting with the letter ‘c’.
Numerous options are available:
- -i shows extra information on the table view mode (when you specify only the database name), such as the storage engine, number of rows, creation and modification date.
- -v gives more info in all modes. In database listing mode, it shows the number of tables in each database. In table listing mode, it lists the number of columns. This option can be invoked multiple times for even more info!
- Many more (do mysqlshow —help) for a complete list for your version.
Gotchas:
- mysqlshow may not behave as you want if your database or table name has an underscore in it. See the fix here.
Also see the mysqlshow entry in the MySQL manual.
How can I search/replace strings in MySQL?
MySQL lets you replace all occurrences of a character or string of characters in a table with some other character or string.
UPDATE table SET field1 = REPLACE(field1, 'replace_that', 'with_this'), field2 = REPLACE(field2, 'and_that', 'with_this')
As an example, let’s say that you have a pets table and you want to change every cat into a dog:
UPDATE pets SET species = REPLACE(species, 'cat', 'dog')
This feature is also useful for transposing characters from one encoding to another. Here’s how to change Windows-style CRLF line endings into Unix-style LF line endings:
UPDATE users SET bio = REPLACE(bio, CONCAT(CHAR(13), CHAR(10)), CHAR(10))
Of course, you don’t have to replace all occurrences in a table if you don’t want to. Just supply a WHERE clause and only those rows will be affected.
Microsoft Access, OpenOffice and MySQL
Using ODBC it is possible to connect Microsoft Access (or OpenOffice) to a MySQL database. Access or OpenOffice can even be used as “front end” to MySQL.
The “MySQL Connector/OBDC” drivers are available at: <http://dev.mysql.com/doc/refman/5.0/en/connector-odbc.html>
Installation information and documentation is available for Windows, Mac OS X and Unix platforms.
WindowsXP: http://dev.mysql.com/doc/refman/5.0/en/connector-odbc-installation-binary-windows.html
MacOS X: http://dev.mysql.com/doc/refman/5.0/en/connector-odbc-installation-binary-macosx.html
SQL joins
Please add other helpful links:
SQL joins: a visual explanation
http://www.codinghorror.com/blog/2007/10/a-visual-explanation-of-sql-joins.html
Get rid of default annoyances in MySQL Workbench
By default, if you make any changes to table rows, there is an annoying 2-step confirmation dialog when you click Apply. It also prevents you from doing many mass UPDATEs and DELETEs (this is called ‘Safe Updates’).
Safe Updates is a good idea in principle, since it stops you from running a DELETE without a WHERE clause, for example. But at the same time it prevents you from running an UPDATE/DELETE with a WHERE based on a column other than an ID, which I find myself doing sometimes.
The confirmation dialog seems utterly pointless. You already have to click the ‘Apply’ button in the lower right corner to get your query to run, anyway.
To turn off these options:
These instructions are for version 5.2.47.
Who uses PostgreSQL at UCLA?
The purpose of this page is to create a directory of people who are using PostgreSQL and what advanced features they are using. Please try to mention how you have found certain features useful so that you can give other people ideas on how to better utilize the database.
Jason Fong
Database’s purpose: collecting large sets of data, and querying data (usually big long queries) to discover trends or other interesting results
Total database size: approximately 500 GB
Largest table: approximately 500 million rows
Advanced features in use:
- Procedural languages:
- PL/pgSQL
- PL/perl: This is very useful— it lets one run bits of Perl code inside of a query. This can also be used to create a Perl function index on a table so that the Perl code doesn’t even need to be run for future queries.
- Triggers: I use these for a number of things:
- Automated auditing: a table can have a trigger that inserts a row into a log table whenever any insert/update/delete occurs
- Duplicate row detection: A table can have a trigger on inserts that checks for a duplicate primary key and then compares the other column values to the matching row. If all the columns are the same, the insert can be dropped. If any column is different, then the rows can be merged (or the new row could be inserted into a seperate table to keep track of these duplicate primary keys with different column values).
Why NoSQL Matters
Useful survey of NoSQL (and SQL) technologies and a summary of the philosophy…
http://blog.heroku.com/archives/2010/7/20/nosql
Taken from email by Jose Hales-Garcia to Campus Web Publishers List
Git and Version Control
Subversion
What is Subversion?
Subversion is a version control system or SCM (software configuration management) tool. It is open-source and provides a feature set superior to that of CVS and Visual Source Safe. More information can be found at subversion.tigris.org.
Tools for use with Subversion
General tools
- The most popular and well-maintained Windows Subversion tool is TortoiseSVN. Tortoise is a Windows shell extension that integrates Subversion commands into Windows Explorer.
- NaughtySVN is a shell extension for the Gnome project’s Nautilus file manager.
- SCPlugin is a shell extension for Mac OSX, but as of this writing it is not up to date.
- RapidSVN is a cross-platform standalone Subversion GUI.
- SvnX is an OSX based tool similar to RapidSVN.
- ZigVersion – standalone client like svnX but some think it’s quite a bit easier to use.
- Subversion itself is cross-platform and features a very well-documented command line interface.
IDE integration
- Subclipse is a Subversion plugin for Eclipse.
- AnkhSVN is a plugin for Microsoft Visual Studio, but it is no longer in active development. TortoiseSVN is the recommended tool for Windows/Microsoft developers.
- Apple has some information for using Subversion with XCode
The Subversion Book / Documentation
- The entire O’Reilly book on Subversion is freely available online.
- Bernie Zimmerman has written a very simple tutorial about Installing Subversion on Fedora Core 3
- Software Carpentry – Version Control with Subversion – Screencast How To Video
- https://kb.ucla.edu/link/514
- Installing Subversion on Windows
- Subversion Best Practices
- Making the Most of Commit Hooks with Subversion – Linux Magazine, Oct. 9, 2008 – Registration Required
Revision Control
What is Revision Control?
Revision control (also called version control or source control) is a method of tracking changes between various versions of a digital document. This is typically used for software code, but can be used for any type of digital document. For example, this knowlege base article tracks changes between versions, as do Wiki sites.
Revision control for software is a vital part of Software Configuration Management or SCM. Bug tracking can also be considered a part of SCM.
Why should I (a programmer) use Revision Control?
The basic reasons are:
- Allows undoing and tracking of changes
- Makes it much easier to manage release and development versions of software
- Greatly facilitates more than one person working on a piece of software
- Promotes good programming practices
If you’re not convinced, read this article: Why do You Need A Version Control System? .
There is no reason not to be using Source Control, even if you are a single developer.
Links / Documents
- Wikipedia’s entry on Revision Control is a good introduction to the concept and has a very useful glossary.
- Eric Sink has written an excellent and in-depth series of articles on source control . The articles focus on general version control concepts rather than specific tools.
- CVS Best Practices apply to CVS as well as other Revision control systems.
- This knowledge base article features an article listing and comparing some popular revision control systems.
Revision Control Systems Compared
Comparison charts
There is an in-depth Version Control Systems Comparison available that covers many important features you might be looking for.
Popular Systems and their Pros/Cons
This list is by no means complete. For more in-depth information, refer to the link above.
Visual SourceSafe
SourceSafe is Microsoft’s own source control tool. If you do all of your development in Visual Studio, this is the easiest (but not necessarily best) tool for you.
Pros:
- Excellent integration with Microsoft Visual Studio (Ease of Deployment)
- Many microsoft developers already have access to it
- Relatively easy to use
Cons:
- Too simple for many users
- Commits are not atomic
- No support for changesets
- Not portable
- Proprietary and non-free
CVS
CVS is a very widely-used system. You should only use CVS if your environment has limitations that keep you from using SubVersion.
Pros:
- Portable
- Excellent tool support
- Open-source / free
- More features than SourceSafe
Cons:
- Dated – lacking many modern features
- No atomic commits
Subversion
Subversion is a newer open-source tool designed to replace CVS. It is superior to CVS in almost every way and is the best all-around open-source tool of its kind. There is an article in this knowledge base with more information about Subversion.
Pros:
- All the pros of CVS plus
- Atomic commits
- High performance
- Vast array of configuration options
- Handles binary files efficiently as well
Cons:
- Can be complex to setup depending on the configuration chosen
- No good Visual Studio integration yet
Perforce
Perforce is an easy to deploy and very feature-packed proprietary solution. It is used by Google. A free version is available, but it only supports a maximum of 2 users.
Pros:
- Excellent feature-set
- Atomic commits
- Very good IDE integration (including Visual Studio)
- High performance
- Handles binary files efficiently as well
Cons:
- Expensive
Others
One of the tools listed above will most likely be right for you, but they are not the only tools out there. There is no single best choice for a source control system. It is important to use the tool that is best for you. BitKeeper was used to manage the Linux kernel, Git (designed and developed by Linus Torvalds) is currently used to manage the Linux kernel, and ClearCase by Rational is also popular in many large companies.
Distributed Version Control Systems
- http://en.wikipedia.org/wiki/Distributed_Version_Control_System
- Why distributed version control
- Choosing a Distributed Version Control System
Thanks to Jose Hales-Garcia for his post on this on OSXForum .
Future Expansion
Someone with more information about Visual Studio Team System should add something about that.
Installing Subversion on Windows
- Download and install the Windows binary.
- Download and install svnservice.
- Because we will run Subversion as a service, C:\Program Files\Subversion\bin must be part of the PATH environment variable. The installation should have done this but double-check this.
- Create a repository:
svnadmin create “C:\IT\Subversion Repository” - Make sure file permissions on this folder are locked down. Edit the conf/svnserver.conf file:
[general]
anon-access = read
auth-access = write
password-db = passwd
[users]
${username1} = ${password1}
${username2} = ${password2}
${username3} = ${password3} - Run SVNService Administration and fill in location of Subversion bin folder and the repository you created above. Notice the port (3690). Listen Host: should be set to the FQDN of the server so that it can be accessed remotely. Start the service. Change firewall settings to allow connections to this port as desired.
- Install Tortoise SVN on a client computer.
- Create a project with the usual subfolders:
- branches
- tags
- trunk
External Links
- http://blogs.vertigosoftware.com/teamsystem/archive/2006/01/16/Setting_up_a_Subversion_Server_under_Windows.aspx
- http://www.stanford.edu/~bsuter/subversion-setup-guide/
GIT info
Please add other helpful links:
http://www.git-tower.com/blog/git-cheat-sheet-detail/
Interactive tutorial about branching – (Learning about git branching)
Mostly for beginners – (List of Git Tutorials from 2011)
Role specific command references for different types of git users- (Everyday git commands from kernel.org)
10 Tips to Push Your Git Skills to the Next Level – June 17, 2014
What are some document management services/document version control applications out there?
Two great options that we recommend are Git and SVN.
Git: http://git-scm.com/
Git is a free and open source distributed version control system designed to handle everything from small projects to very large projects with speed and efficiency. It offers a variety of exclusive features such as cheap local branching, convenient staging areas, and multiple workflows.
SVN: http://subversion.apache.org/
Apache Subversion is a full-featured version control system originally designed to be a better CVS. Subversion has since expanded beyond its original goal of replacing CVS, but its basic model, design, and interface remain heavily influenced by that goal. Even today, Subversion should still feel very familiar to CVS users. For more information on what CVS is, refer to the following link: http://ximbiot.com/cvs/
svn: Working copy '<filename>' is missing or not locked
Problem: While doing a svn update, you get the following message: “svn: Working copy ‘[filename]’ is missing or not locked”
Cause: The directory that the file [filename] is in needs executable (i.e. list) permission on for the user that issues the command.
Solution: Set the execution permission, e.g. chmod +x [dir_that_contains_that_file]
CSS and Web Design
Learning about CSS
CSS, or Cascading Style Sheets, have taken over the design end of websites, it seems. I’m not that good with them yet, so I’m starting to collect useful CSS Links.
- http://css.maxdesign.com.au/ – Great site to learn CSS. Straightforward to find available topics.
- http://www.csszengarden.com/ – an amazing demonstration of what can be accomplished visually through CSS-based design. Each link on the side shows exactly the same text with a completely different CSS design and layout.
- http://businesslogs.com/design_and_usability/my_5_css_tips.php
- http://del.icio.us/tag/css
Here is a list of Books that were recommended thru the CWP group.
1. Designing With Web Standards – Jeffrey Zeldman
2. CSS Definitive Guide OR http://proquest.safaribooksonline.com/0596527330
has a ton of info — better as a reference than to just read since it’s information overload – it covers all sorts of minute details on CSS and is guaranteed to give you a headache.(Sue)
3. CSS Cookbook by Christopher Schmitt -
4. The Zen of CSS Design: Visual Enlightenment for the Web is a great book for design ideas from a more artistic than technical standpoint.
6.Bullet Proof Web Design: Improving flexibility and protecting against worst-case scenarios with XHTML and CSS (Paperback) by Dan Cederholm (Author)
7. CSS Mastery: Advanced Web Standards Solutions (Paperback)
by Andy Budd (Author), Simon Collison (Author), Cameron Moll (Author)
Also, don’t forget that UCLA has access to Safari Online Proquest) which lists 5 or 6 books on CSS that you can read online for free from a UCLA computer (or using the VPN from off-campus).(Sue)
What sort of menus can I make with CSS?
There are practically no limits to what you can do with CSS, the trick is figuring out how to make it do what you want! Or another way of looking at it is: what sort of ideas can you come up with to use CSS in a new (and hopefully useful) way?
Here are just a few common things you’ll see sites do with CSS:
Tons of great examples can be found here: http://www.cssplay.co.uk/menus/index.html
Top Ten Web Design Mistakes of 2005
By Jakob Nielsen:
http://www.useit.com/alertbox/designmistakes.html
The importance of "!important" in CSS
Normally, CSS works by having the most recently-declared rule take precedence. However, this isn’t always the case. Rules can be followed by the expression “!important” to give them precedence over later rules.
This can come up a lot in systems like Plone, where a large amount of CSS has already been written, to which you make your own additions. The existing CSS may use !important rules which will override any rules you declare, no matter where you place them. Needless to say, this can be very confusing, since it goes against what most of us have been taught about CSS.
Most of the time, you’ll be using !important to get your new CSS to override some existing rules that have been declared !important. An example usage would be:p { font-size: 10px !important; }
This makes sure that later CSS, including user stylesheets that browsers sometimes apply, does not override this rule. However, many times you’ll want to override a rule that has already been declared !important. To do so, just make your new rule !important as well, and place it somewhere after the rule you want to replace.
Internet Explorer 6 and earlier versions do not recognize the !important rule. If you are trying to override someone else’s !important rules, this does not matter much, since your later rules will override them no matter what. However, if you are trying to create new rules that user stylesheets won’t override, you’re out of luck. IE7 should fully support the rule.
The official W3C word on !important can be found at: http://www.w3.org/TR/REC-CSS2/cascade.html#important-rules
Number 4 out of Ten CSS tricks you may not know mentions the lack of !important support in IE6, and how it can be used to feed it browser-specific code.
CSS Design Concerns for IE6, IE7, and Firefox
Below is the beginning of (hopefully) an ongoing collection of design-related CSS issues concerning different browsers. For this initial posting, I focus on Firefox, IE6, and IE7.
The good news regarding IE7 is that a lot of bugs were fixed. See the following for a list of fixes.
Unfortunately, those improvements leave a fairly large gap between how IE6 and IE7 render the same CSS. See http://kimblim.dk/csstest/ for a good look at CSS testing of Selector and Pseudo-selectors for Firefox, IE6, IE7b3, and Safari. You will notice that IE7 and Firefox display more similarly than IE7 does with IE6.
If you looked through the above site, you noticed that IE6 did not properly display any of the Selectors and Pseudo-selectors that were tested. In an effort to demonstrate some of the steps that can be taken to make the same page (or element within a page) display similarly across IE6, IE7, and Firefox, I listed some workarounds (min/max-width, inline vs. block-level elements) for a few of the tested Selectors and Pseudo-selectors. You will find them at: http://www.sscnet.ucla.edu/ssc/lederman/browser_design_issues_1.html.
Some general ways to deal with IE6:
In an effort to have your web pages validate, use Conditional Comments to write browser specific rules/code, etc. You can find more info at: http://msdn.microsoft.com/workshop/author/dhtml/overview/ccomment_ovw.asp.
When using Conditional Comments, make sure that the links for them come later than the main CSS file link in the coding, AND that the rules within the Conditional Comment have at least the same or higher specificity than any similar rules in the main sheet. Otherwise, the rules in the Conditional Comments will not override the main CSS.
Though not an ideal solution, hacks can be helpful at times. A list of CSS hacks.
Two common hacks, the Star HTML hack and the Underscore hack, both IE-specific, (you can see a list of common hacks specific to which browsers at http://www.centricle.com/ref/css/filters), can be avoided using the following approach:
Write a rule, adding the IE-specific declaration.
.title h3 { height: 21px; }After each rule, add a second rule using a child selector. This is key because IE6 will ignore this rule, but Firefox and IE7 will apply it.
.title h3 {height: 21px; }
.title > h3 {height: auto; min-height: 21px; }
Though this leaves your CSS a bit bloated, it is an approach that avoids using these two common hacks in favor of a CSS-based solution. I should note that I haven�t tested this approach yet using really complicated coding. I�ve read that the above method requires you to be operating in strict mode, however, I found the method to work just fine (as far as I tested it) while in transitional mode. Test away!
Forcing a page break with CSS
Here is a simple style sheet method for making a web page have page breaks, or form feeds in it.
Example:
Try going to the following example page and printing it. It will come out on two separate pages. http://www.sscnet.ucla.edu/test/formfeed.htm
Source Code:
1. <html><head><title>Form Feed Test</title>2. <STYLE TYPE="text/css"> P.newpage {page-break-before: always} </STYLE>3. </head>4. <body>5. <center><h1>Page 1</h1></center>6. <P CLASS="newpage">7. <center><h1>Page 2</h1></center>
Explanation:
- Line 2 is where you set up your style sheet definition.
- Line 6 shows what you put wherever you want a page break.
What's a solid starting point (global reset) for a CSS file?
Browsers often have different ways of rendering the same element. For example we expect lists to be left-indented. Firefox does this by applying a left padding of 40 pixels to an unordered list (<ul>). Either Opera or Internet Explorer acheives the same effect by applying a margin of 40 pixels.
Now this is fine and dandy if you don’t want to change that indent value.
Let’s say you test in Firefox want to pull the list back a little so you:
ul { padding-left: 30px;}
Looks good… until some other browser adds that 30 pixels of padding onto their 40 pixels of margin. Crap. The original solution proposed was simple and elegant:
- {
padding:0;
margin:0;
}
It also broke forms and obviously is not inclusive of everything for a true “global whitespace reset.” You can read more on this implementation (which was revised) on the now classic leftjustified.net post.
Yahoo! have their own CSS Reset, which has a broader scope. Not sure setting h1 through h6 at 100% is an improvement over default behaviour though. ^^
An alternate (still in progress) reset is up at Eric Meyers website, and has evolved through a couple comment heavy blog posts.
UX Team ( UCLA Library - Digital Initiatives & Information Technology )
The UX Team is charged by the UCLA Library Digital Initiatives & Information Technology leadership to improve the user experience of all library digital interfaces by
- Adopting an improved and systematic UX process on new projects/products
- Auditing and remediating legacy applications
- Maintain that capability by moving from Stage 3 to Stage 4 in the maturity model
- UX prior to coding
- Design as problem-solving process (driven by data, goals) not just style and form
- Increase repertoire of UX tools
- Expand UX team
- Achieve official designation
- add new roles and membership
- UX champion in upper management
UX Team
Joshua Gomez
Tinu Awopetu
Ashton Prigge
Sharon Shafer
Hi, are there any UCLA style resources or style guides for websites?
Edit: 9/7/2012
UCLA released Brand Guidelines 1.0 in March 2012. The document contains guidance on things like fonts, colors, tone, photography, and design. There are new colors and a lot of colors got discontinued, like all of the greys.
UCLA also released the templates for the web gateway in HTML only. They are available here: www.images.ucla.edu. UCLA employees will be able to log in via their Bruin Online ID. If you’re not an employee (ie you are student or a volunteer), you will need to register for an account.
—Sirinya Tritipeskul Matute, UCLA Fund
Here is the website for the UCLA Graphic Identity: http://www.identity.ucla.edu/
It has information on the UCLA Logo and colors.
I would suggest you visit The UCLA Campus Web Publishers (CWP): http://cwp.ucla.edu/
There you will find many resources including the above site.
UX Resources
https://www.reddit.com/r/userexperience/
What to do when CSS stylesheets refuse to apply
There are a number of common mistakes users make when writing CSS stylesheets that are difficult to debug. Because browsers differ in how picky they are about errors, pages may look fine in some browsers but wrong in others. A common symptom of these problems is large sections of your page that seem to have no styles applied to them at all.
One mistake when writing CSS is to comment your stylesheets using the hash sign (#), which is used in many languages such as Perl and Python to denote comments. In CSS, however, it’s used as an ID selector, meaning your “comments” will be interpreted as strange CSS. The proper way to comment CSS code is to use C-style comments, which begin with /* and end with */. They do not have to begin and end on the same line, but take care not to nest comments.
Another mistake is omitting the semicolon (;) after each attribute. You don’t need semicolons after selectors or brackets, just after assigning attribute values such as border: none;. Some browsers are fine without semicolons, others are not. To be safe, always use them.
Finally, try adding the phrase !important at the end of a rule that refuses to apply, right before the semicolon. (For users of IE 6 and below, don’t bother, this keyword isn’t supported.) See the importance of !important in CSS for an explanation why.
A great resource when debugging tricky CSS problems is the W3C CSS validator: http://jigsaw.w3.org/css-validator/
Here’s another: Will the browser apply the rule(s)?
Web Accessibility Resources
This article is a resource list to help Web developers design sites that are accessible to persons with disabilities. The list will evolve as technology changes, and also in response to issues raised by UCLA Web developers. It will be further supplemented by other materials produced by the UCLA Disabilities and Computing Program .
See also other articles in this Knowledge Base under the “accessibility” tag.
UC System Accessibility
“Accessible Web Design Resources ":http://www.ucop.edu/irc/itaccessibility/resources/ This will collect best practices for Web designers across the UC’s. For those already familiar with basic accessibility concepts, the Design Tips and Technical Topics pages will be the most immediately useful.
WebAIM
Web Accessibility In Mind (WebAIM) at Utah State University has emerged as a leading reference site for many accessibility topics.:
Introduction to Web Accessibility from WebAIM
Resources from WebAIM , including Evaluating Web Sites for Accessibility with the Firefox Web Developer Toolbar ;
The WAVE Accessibility Tool , and many more.
Others
World Wide Access: Accessible Web Design (University of Washington, DO-IT Program)
“Accessibility tagged articles from 456Berea Street blog ":http://www.456bereastreet.com/archive/categories/accessibility/ (current issues in accessibility and usability)
Sass versus LESS
Quoting, "One of the hot new trends in web design is CSS pre-processed languages and there’s two big ones vying for your attention—LESS and Sass. LESS and Sass are both ways of writing CSS code with a syntax that allows you to use features not yet available with Cascading Style Sheets (CSS), such as variables, nesting, conditionals, and more.
Pre-processed CSS languages add features to CSS that aren’t there yet—like variables, conditionals, and functions. They’re called pre-processed, because their final step is a processing, also called compiling, that converts the pre-processed language to regular CSS. In a nutshell, what you use on your site ends up being plain vanilla CSS, but comes as a result of processing the LESS, Sass, or other pre-processed language files you create." via Lynda.com blog
Review links—
- http://coding.smashingmagazine.com/2011/09/09/an-introduction-to-less-and-comparison-to-sass/
- http://css-tricks.com/sass-vs-less/
- http://www.hongkiat.com/blog/sass-vs-less/
- http://blog.lynda.com/2012/07/20/an-introduction-to-less-and-sass-pre-processed-css-languages/
Lynda.com has modules on the topic—
- CSS with LESS and Sass, http://www.lynda.com/CSS-tutorials/CSS-LESS-SASS/107921-2.html
- Responsive CSS with Sass and Compass, http://www.lynda.com/CSS-tutorials/Responsive-CSS-Sass-Compass/140777-2.html
Resources—
- http://sass-lang.com/
- http://lesscss.org/
- http://incident57.com/codekit/
- http://gruntjs.com/
- http://compass-style.com/
- http://css-tricks.com/semantic-class-names/
- http://codepen.io/
My webserver has died! How do I bring it back online in a hurry?
The obvious answer to this is to restore your backup onto a spare server. Or if it’s just a drive failure, the answer would be to restore your backup onto your spare drive. But since you’re reading this instead of restoring your backup, let’s assume that the situation is not quite so simple.
So here’s a hypothical situation:
You’ve just launched a new website and your web server has decided that now is the time for a drive failure. The rest of the server hardware is just fine, but you don’t have any spare drives lying around and you don’t want to venture out into the LA traffic to buy a new drive. Fortunately, you do have a recent backup of your data. Or if not, your disk is not quite dead yet and you’ve read my other article on how to make an emergency backup .
(There’s more than one way to go about this… but I’m just going to detail what I’ve done before)
Some simplifying assumptions:
- Your server was running Debian Linux… this is actually sort of flexible… the general idea still works with other Linux distros, but you may need to tweak some paths or configuration files
- You have (or can borrow) another server that has spare disk space and is capable of doing NFS exports (this server is currently in use and you can’t just switch it to the IP address of the server with the failed drive)
Here’s the plan:
- Download a Live CD version of Ubuntu Linux and boot the server with the CD. This way you won’t need a functioning hard disk for the server to keep working.
- Restore your backup to another server with enough disk space to hold your web and database data.
- NFS mount the backups to the server that is now running off of the live CD.
- symlink the web root, database data directory, and apache configuration files into where they were originally located
- restart the web and database servers
- cross your fingers and hope that it will work
The details:
Ubuntu
- I’m going to assume that getting and booting Ubuntu is not a problem… the standard download should be a live CD version
- General notes:
- the default password for the automatically logged on “ubuntu” user is blank
- to switch to root, type this: “sudo -s” … the password is the same as the password for the ubuntu user
- to install packages, use Synaptic (on the menu: System ? Administration ? Synaptic) or use apt-get from the shell:
apt-get install package_name
- After you boot into Ubuntu, there a few things you need to do:
- change the user password (I’m not sure if this is necessary, but a user with a blank password makes me nervous): to do this, just open a shell session and run passwd
- Change the network configuration to match your old server. There’s a graphical tool for this in the menu: System ? Administration ? Networking
- change the IP address information, DNS settings, etc. … also change the hostname
- Log off and log back on… but don’t reboot! (this seems to be necessary after changing the hostname or strange things happen)
NFS
- You’ll need to install a few extra packages on the live CD server: (also install whatever dependencies come up)
- For NFS:
- nfs-common
- portmap
- For MySQL, PHP, and Apache:
- mysql-common
- mysql-client-5.0
- mysql-server-5.0
- php5-mysql
- (note that this also installs PHP and Apache because they get pulled in as dependencies)
- For NFS:
- Setup a NFS export on the spare server (this is where you restored your backup to)
- If you don’t have a NFS server installed, here are the packages you need for Debian:
- nfs-kernel-server
- nfs-common
- portmap
- Server configuration:
- Add an export to /etc/exports:
/path/to/restored/backup 123.123.123.123(rw,async,no_root_squash,insecure_locks)- change the IP address to the address of the live CD server
- this configuration is fairly insecure… but it’s restricted to just one server, and this setup should only be temporary while you get a replacement drive
- reload the exports with this command:
exportfs -a
- Add an export to /etc/exports:
- If you don’t have a NFS server installed, here are the packages you need for Debian:
- Setup the client side of the NFS export (this is on the live CD server)
- make a directory to mount the restored data to:
mkdir /mnt/restore - edit your /etc/fstab file and add this:
spare_server_hostname:/path/to/restored/backup /mnt/restore nfs rw,rsize=4096,wsize=4096,hard,intr,async,nodev,nosuid 0 0 - mount it:
mount /mnt/restore
- make a directory to mount the restored data to:
Server and Filesystem Shenanigans
- The following is all done on the live CD server
- Stop the web and database servers:
/etc/init.d/mysql stop
/etc/init.d/apache2 stop
- Make symlinks:
- make a symbolic link to wherever your web root was originally located (erase any existing directory first)
- symlink to your database data directory:
cd /var/lib
rm -Rf mysql
ln -s /mnt/restore/var/lib/mysql - fix the debian mysql maintenance account password:
cd /etc/mysql
rm debian.cnf
ln -s /mnt/restore/etc/mysql/debian.cnf - symlink to your original apache configuration:
cd /etc
rm -Rf apache2
ln -s /mnt/restore/etc/apache2
- Fix any ownership weirdness:
- The user ID’s on the live CD and the original server may not all match up, so we need to make the ID’s match up with the live CD:
chown -R www-data.www-data /mnt/restore/path/to/webroot
chown -R mysql.mysql /mnt/restore/var/lib/mysql - note: don’t chown the symlinks because it’ll only change the symlink (and not the underlying files)
- The user ID’s on the live CD and the original server may not all match up, so we need to make the ID’s match up with the live CD:
- The big moment…:
- start up your servers:
/etc/init.d/mysql start
/etc/init.d/apache2 start - if you’re lucky, you’ll have no error messages
- Apache might give some errors for missing modules. You can either install the missing modules (using apt-get or synaptic) or disable the modules if they’re not used:
a2dismod name_of_module - Now go check that your site is actually working properly. If it’s not working… figure out what’s wrong and add your solutions to this article. (please! :-) )
- start up your servers:
XML
Introduction to XML in Flash - Making Flash Dynamic
The following pages will help you get started with using XML in Flash. You will learn the basics of what XML is and how it can be loaded into, used within and sent out of a Flash movie.
http://www.kirupa.com/web/xml/index.htm
This can also be used as an alternative to rotating images on web sites that normally rely on JavaScript.
XML Resources
-
Books
-
For Learning XML:
- CodeNotes for XML by Gregory Brill (Editor) ISBN: 0812991915
- XML In a Nutshell by Scott Means, Elliotte Harold – O’Reilly and Associates
-
For Learning XML:
-
Online Tutorials
- W3 Schools Good idea to disable popups because there’s a lot of advertising here.
-
Editors
- Oxygen – for OSX, Java app so should run anywhere.
This article was originally posted on the UCLA Programmers Wiki.
XML
-
XML
- Microsoft XML Notepad (free download) http://www.webattack.com/get/xmlnotepad.shtml
- XML is Too Hard for Programmers http://www.tbray.org/ongoing/When/200x/2003/03/16/XML-Prog
- Why XML Doesn’t Suck http://www.tbray.org/ongoing/When/200x/2003/03/24/XMLisOK
- XML Protocol Comparison Matrix http://www.w3.org/2000/03/29-XML-protocol-matrix
- How do we parse XML?
- Perl
- XML::LibXML, XML::Parser, XML::Twig, XML::XPath
- http://perl-xml.sourceforge.net/faq/
- http://www.oreilly.com/catalog/perlxml/
-
PHP
- “Parsing XML with PHP” article http://www.zend.com/zend/art/parsing.php
- Function Documentation http://www.php.net/manual/en/function.xml-parse-into-struct.php
- Water web services language http://www.waterlang.org/
- Apache -
- Perl
-
XML Editors
- A comprehensive list of XML schema editors and validators can be found at http://www.xml.com/pub/pt/2 —Jose
Plone
Why is it important to use short names in Plone?
Short names become apart of the URL for Plone sites. Instead of an auto generated URL, you can create an easy to remember URL. For example, say you created a “General Information” page, your URL can show up like this: generalinfo or general-info, as opposed to something like this: 2006-05-11.1561651564.
Also notice how underscores are not used in creating short names. The reason is for functionality: underscores disappear when you email the link (most word processors will format the text to become a URL so it’ll highlight and underline the text), the second reason is because it’s hard to explain to a person what an underscore is. Check out Plone’s road map for more in info: http://plone.org/products/plone/roadmap/73
To enable short name editing, see this article: https://kb.ucla.edu/link/217
Plone CMS Resources
Plone is an Open-Source Content Management System built on Python and Zope.
Departments at UCLA currently using Plone
- Office of Instructional Development
- Social Sciences Computing
- Psychology IT Department
- The School of Engineering
- UCLA Chancellor
- UCLA Executive Vice Chancellor and Provost
- For a list of sites using it UC-wide, visit http://plone.ucla.edu/links/ucplonesites/
Does Plone do what I’m looking for?
I’m evaluating a system to do X, Y and Z, can Plone do that? Is Plone the right tool for the job? http://plone.org/documentation/faq/is-plone-for-me
Useful Links
- http://www.plone.org/
- PHP with Plone
- Plone and MySQL Integration
- UCLA Plone Users Group
- UCLA’s Plone Mailing List
- Plone Support and Mailing Lists
- For those of you still trying to figure out where everything is in Plone and how to change its look – Tutorial
- 18 Things I Wish Were True About Plone by Alexander Limi – Co-Founder of Plone
- GloWorm A great tool that works similar to Firebug but for Plone. Check out the video. Amazing.
- The Future of Plone’s User Experience
- Weblion Penn State has done an amazing job at implementing Plone on their campus. Their support and documentation is amazing and they’ve done this through Weblion. I find myself constantly using their wiki (https://weblion.psu.edu/trac/weblion/wiki) for references on Plone. Mike Takahashi
- WebServerAuth – Shibboleth Integration WebServerAuth, which replaces apachepas and AutoMemberMakerPasPlugin, allows Plone to delegate authentication concerns to a web server like Apache or IIS. Using WebServerAuth, Plone can be configured so any user known to your LDAP, Kerberos, Shibboleth, or Pubcookie system—or any other system for which your web server has an authentication module—can transparently log in using enterprise-wide credentials.
Useful References for Plone and Zope
- The Definitive Guide to Plone – The complete book online. Great resource for Plone. Essentially the “Plone Bible”. Mike Takahashi August 19, 2005
- The Book of Zope – a good book to help get you familiar with Zope. It’s a little out dated (ignore the DTML references). However, it really goes into depth on the inner workings of Zope (acquisition, ZCatalog, roles, permissions, etc.) and is something everyone should learn if you plan to customize and develop your Plone site.
- Online, the The Zope Book
is a nice free resource. A little outdated, but the same principles still apply. Ignore the DTML sections as any customizations you do with Zope/Plone should be with TAL/Python. This section is a must for learning TAL (quoted with permission from Mike Takashi email Feb. 6, 2007) - http://del.icio.us/tag/plone
Plone Podcasts
-
Plone at Disney – Interview with Scott Kelley
“Users managing content with Vignette was becoming expensive from a licensing and training cost point. Installing Enfold Server to run Plone on Windows was the stategy Disney’s Enterprise Operations team took to offloading content creation and security management to individual business units. Then re-integrating the content back into their intranet.” - Rob Miller from Burning Man on Plone
- Alan Runyan on Plone and Enfold Systems
- Plone Impressions – A Video Podcast About Plone
Plone Presentations
Plone 4 Tips and Tricks: Table of Contents
Tiny MCE
Adding a color picker to the toolbar
How do I identify the stylesheets in Plone?
In Plone, you can list, debug, enable and disable and change the order of all the stylesheets by:
- go into ZMI (Zope Management Interface)
- go to Root Folder of your site
- click on portal_css (CSS Registry). There you’ll see a long list of all the CSS’s affecting your site
How to get rid of icons in Plone
Plone’s default style calls for an assortment of eye candy to decorate links, list items, and various other elements. Sometimes users don’t want to see these icons. Plone makes it easy to disable any of these individual elements, but sometimes tracking down all the icons can be difficult.
There are three places icons may appear in your site:
- Site actions (top right of the content pane, items such as print)
- Link decorations (for example, the globe next to external links)
- Portlet item decorations (such as events and news)
Disabling any type of icon must be done in the ZMI.
Disabling site action icons
In the ZMI, go to /portal_actions. You’ll see a list of all actions. Simply uncheck the “Visible?” checkbox for each icon you want to get rid of.
Disabling link decorations
Slightly more complex than site actions. In your ploneCustom.css, add a CSS rule for any link type you want to disable: set the background to “none” and the padding to zero. Here is an example:.link-parent {
@ background: none;@
@ padding: 0;@}
Here is a comprehensive list of all special link styles: “.link-parent, .link-user, .link-external, .link-https, .link-mailto, .link-news,
.link-ftp, .link-irc, .link-callto, .link-webcal, .link-feed, .link-comment”
You can simply turn this list into a CSS rule like so:.link-parent, .link-user, .link-external, .link-https, .link-mailto, .link-news,.link-ftp, .link-irc, .link-callto, .link-webcal, .link-feed, .link-comment {
@ background: none;@
@ padding: 0;@}
All your link icons should now vanish.
Disabling portlet icons
This is much trickier than disabling other icons. What you must do is customize whatever portlet whose icons you want to remove. Manually edit that portlet code to remove icon images. All portlets can be found in /portal_skins/plone_portlets. For example, to remove the icons from portlet_events, find this line: <img src="#" alt="" tal:replace="structure here/event_icon.gif" /> and remove it. Other portlets should have similarly-defined icons.
As you can see, there is no easy way to disable all icons at once in a Plone site, but hopefully this article will provide a good checklist for places to check.
Importing and exporting a Plone site
Zope has a feature that allows you to export files, folders, and even Plone sites using the Import/Export button. However, it’s important to note that this tool should not be used as a migration tool when moving an older Plone site to a newer one.
For example, you have a Plone 2.1 site that you want to export and then import into a Plone 3.x site, then upgrade it. This will not work.
Import/Export only works with identical systems. This means that both Zope instances must be identical. Down to the same version of Zope and the same Products installed. A complete mirror.
The correct way to upgrade a site is to move the Data.fs file. For more information, go to:
http://plone.org/documentation/manual/upgrade-guide
Installing Plone v3.2 on Mac OS X 10.5
Installing Plone v3.2 on Mac OS X 10.5
Instructions to install Plone v3.2 on Mac OS 10.5 Server and client.
Plone is a Python-based, multi-platform content management system. If you’ve stumbled on this document not knowing what Plone is, please take a look at the project site: Plone.org. The current recommended method of installing Plone is with the Unified Installer. The Unified Installer will download and install the necessary components for Plone to run.
In most cases the Unified Installer will suit your needs. However, if you require more fine-tuned control over the base components, or are looking for a better understanding of the stack which forms Plone, this document will lay the groundwork to deploy Plone on Mac OS X 10.5.
Before installing Plone you should take some time to think about your system and how you’re going to be using Plone. If you are using buildout, you are likely setting up a production or development environment. Consider mapping out your needs (services such as authentication, backup, and product installations) and infrastructure necessary for the installation.
These instructions will work on both Mac OS 10.5.x client and 10.5.x Server. They assume you know how to create users and have a basic understanding of the command line. Where appropriate, I will reference online documentation that has helped me with my deployment.
What you will need:
- A computer running Mac OS 10.5 Server or client.
- Mac OS X Developer Tools
- Python 2.4.x
These instructions cover the following steps
- Preparing To Install
- Creating Plone User Account
- Creating Plone Root Directory
- Installing Python v2.4
- Housekeeping and Setting Proper Paths
- Installing “Easy Install”
- Installing PIL & ZopeSkel
- Installing Plone
- Additional Steps
Preparing To Install
The initial steps to installing Plone are done in your administrator account. If you haven’t done it already, install the Apple xCode Developer tools that came with your installation of 10.5. If you want to check for the most recent version, go to Apple’s Developer Website and sign up. You can download a free copy and install it immediately.
If you are not logged in as your administrator, then do so.
Creating Plone User Account
Before you begin, you need to create a “non-privileged” user account that will be used to both launch and maintain your Plone buildout. This document does not go into user creation, but the key point here is that the account should be a staff account with no elevated privileges. For the purpose of these instructions, I will call the user account and store its home directory in /Users/plone.
Creating Plone Root Directory
Plone can be installed in any directory on your filesystem. If this is a merely a local install for your own development you could easily install it somewhere such as /Users/Shared. However, if this install will be for production services you should consider installing it on a non-system drive. The only requirement is that the user must be able to access the folder. So on a system with two drives, say: systemDrive and dataDrive, the following commands would create a working directory for your Plone buildouts:
sudo mkdir -p /Volumes/dataDrive/ploneBuildouts
sudo chmod 750 /Volumes/dataDrive/ploneBuildouts
sudo chown plone:admin /Volumes/dataDrive/ploneBuildouts
Note: Do not think of your ploneBuildouts as a typical web server. The files do not need to be world readable as it is the user that accesses and serves out the contents of the zodb files. You could also easily create a Plone development group that contains your Plone developers/administrators and grant them limited access to restart and troubleshoot the instance via the sudoers file.
Installing Python v2.4
Mac OS 10.5 comes pre-installed with Python v2.5. Unfortunately, Plone requires Python v2.4. We will have to download and install version 2.4 as an alternate install. This is quite easy and only takes a few minutes.
Note: When compiling code on Mac OS 10.5, it is always best to install your custom-built binaries in alternate locations on the filesystem rather than installing over the Apple installed versions. Doing the latter could break some dependencies and, in some cases, it is possible that Apple’s Software Update may overwrite your custom-built binaries. Install in locations such as /usr/local or /opt.
Open Terminal and enter the following commands:
ls /usr
If the ls command does not list a directory called local you will have to create it and some subdirectories with the following commands:
sudo mkdir -p /usr/local/include
sudo mkdir -p /usr/local/lib
sudo mkdir -p /usr/local/bin
The first time you run sudo you will be asked for your administrator password. Go ahead and enter that and press return.
Next you will need to get the Python source code. Typically I compile code from a working directory that I download the source to. (If you don’t have a working directory and want to create one mkdir ~/working from Terminal will create it for you.
From Terminal cd into your working directory: cd ~/working. Using curl, download the source code from Python.org.
Note: You may want to check to see if any newer, stable versions of 2.4 exist and download accordingly.
In Terminal enter:
curl -O http://www.python.org/ftp/python/2.4.6/Python-2.4.6.tgz
Since this is a compressed file we will need to uncompress it:
gnutar -xzf ./Python-2.4.6.tgz
GNUTAR will create a folder called Python-2.4.6. CD into it: cd ./Python-2.4.6.
The following command will compile and build Python-2.4.6 on your system. Each command will take a few minutes to complete and report any errors if there are any:
./configure MACOSX_DEPLOYMENT_TARGET=10.5 --disable-tk
make
sudo make altinstall
Once sudo make altinstall completes, Python v.2.4.6 will be installed on your system but will not affect any applications that might use the default install of v2.5.
You can now log out of your administrator account and login to the account. All the remaining work can be done remotely via ssh.
Housekeeping and Setting Proper Paths
Before continuing, we need to do a little housekeeping in the account to make sure the proper versions of Python are accessed and that any Python egg extensions are deployed in the correct location.
Login to the account either remotely or locally.
The default user shell used by Mac OS X 10.5 is bash. We will need to create a .profile file for bash to read and adjust its PATH and set the PYTHONPATH. Use the text editor of your choice.
Note: If you insist on using a GUI text editor, I suggest TextWrangler or Smultron. I prefer emacs from the command line as it generates a backup file in case you make a mistake. It is always a good idea to create backup files to fall back on should a modification go wrong. The .profile file needs to be saved in the root folder of your home directory.
emacs ~/.profile
PATH=~/bin:/usr/local/bin:${PATH}
export PATH
export PYTHONPATH=~/Library/Python/2.4/site-packages/
Note: To save your file in emacs and exit use the following key combinations: ^x^s ^x^c
The next file to create is .pydistutils.cfg
emacs ~/.pydistutils.cfg
[install]
install_lib = ~/Library/Python/$py_version_short/site-packages
install_scripts = ~/bin
Finally, we need to make the directory Python will store its eggs in:
mkdir -p ~/Library/Python/2.4/site-packages
Logout of the account and then log back in. To check that your PATH is set up correctly type:
which python2.4
If /usr/local/bin/python2.4 is returned your path is set correctly.
It’s also a good idea to check your PYTHONPATH variable:
echo $PYTHONPATH
This should return the full path to the site-packages directory we created. Depending on where you specified the home directory to be, it may be something like this:
/Users/plone/Library/Python/2.4/site-packages/
The PYTHONPATH variable tells Python2.4 where to install or find any eggs necessary to operate.
Installing “Easy Install”
Easy Install is a utility that Python uses to download, build, install and manage Python packages. The utility is well documented on the developer’s website: Python Enterprise Application Kit.
Create a working directory to install your Python packages from and CD into it.
mkdir ~/pythonInstallScripts
cd ~/pythonInstallScripts
Download Easy Install.
curl -O http://peak.telecommunity.com/dist/ez_setup.py
Once the download has finished you can install with the following command:
python2.4 ez_setup.py
This will download and install the Setuptools Python egg in the account’s ~/Library/Python/2.4/site-packages/ directory. It will also create a directory in the home folder called bin. If you cd ~/bin you will find the easy_install binaries when you ls the directory:
easy_install easy_install-2.4
You will see two versions of easy_install. You need to use the version of easy_install specific to the version of Python you are running. In our case, this is easy_install-2.4. If you don’t trust yourself to remember this you can remove execute permissions on easy_install and move it elsewhere or delete it and create a virtual link.
cd ~/bin
chmod 440 easy_install
mkdir deprecated
mv easy_install ./deprecated/easy_install.dep
ln -s ./easy_install-2.4 ./easy_install
Note: Apple has its own version of Easy Install in /usr/bin. The path we set above should grab the new version, however it’s a good idea to check using which easyinstall. I recommend specifying easy_install-2.4 to leave out the guess work._
Installing PIL & ZopeSkel
Now that you have both Python v2.4 and Easy Install in place, you need to install PIL and ZopeSkel. To do so, type the following commands:
easy_install-2.4 --find-links http://dist.repoze.org/PIL-1.1.6.tar.gz PIL
Note: You will need to download the Unified Installer and use the included PIL: PILwoTk-1.1.6.3.tar.gz
easy_install-2.4 /path/to/PILwoTk-1.1.6.3.tar.gz
easy_install-2.4 -U ZopeSkel
It will download and install all necessary files for Zope to operate.
Installing Plone
Once you have installed ZopeSkel, you are ready to install Plone. CD into the directory you wish your plone deployment to live. In our case it is /Volumes/dataDrive/ploneBuildouts.
cd /Volumes/dataDrive/ploneBuildouts
Your Plone instance will need a name for the directory it is stored in. For purposes of this documentation, we’ll call it demo. At the command prompt enter:
paster create -t plone3_buildout demo
You will be asked a series of questions. For now the default answers will suffice, but be sure to set a non-trivial password for your Zope root admin user.
Selected and implied templates:
ZopeSkel#plone3_buildout A buildout for Plone 3 projects
Variables:
egg: ploneWeb
package: ploneweb
project: ploneWeb
Enter plone_version (Which Plone version to install) [‘3.2.1’]: 3.2.1
Enter zope2_install (Path to Zope 2 installation; leave blank to fetch one) [‘’]:
Enter plone_products_install (Path to directory containing Plone products; leave blank to fetch one) [’‘]:
Enter zope_user (Zope root admin user) [’admin’]:
Enter zope_password (Zope root admin password) [‘’]:
Enter http_port (HTTP port) 8080:
Enter debug_mode (Should debug mode be “on” or “off”?) [’off’]:
Enter verbose_security (Should verbose security be “on” or “off”?) [‘off’]:
Note: Be sure to set a non-trivial password for the admin account.
Note: If you specify a HTTP port other than 8080, you should verify that the port is open in /etc/services and not in use by another service. If not, you’ll need to append the port information to the /etc/services file.
Once paster has finished, cd into the demo directory and run the bootstrap.py script.
cd ./demo
python2.4 ./bootstrap.py
Note: The bootstrap.py script needs to be run only once per Plone instance.
The bootstrap script will build the rest of the files necessary to install Plone. When it has completed, you must run the buildout.cfg file created by the bootstrap script to install Plone.
./bin/buildout -v
Note: To customize your Plone installation, you can modify the buildout.cfg file to include products that extend Plone’s capabilities.
Once buildout has completed you can launch your Plone instance by running the following command:
./bin/instance fg
Note: The fg flag tells Plone to run in the foreground, posting debug information to the console. It’s a good idea to test your install in debug mode to make sure Plone comes up cleanly. If you wish to start Plone in daemon mode, use ./bin/instance start.
Plone should now be up and running. To connect to your instance, open a web browser and connect to: http://yourHostName:8080/manage
This will take you to the Zope Management Interface. Login with your admin account. In the right hand side of the main content window, you’ll see a drop down menu labeled: Select Type To Add. Select Plone Site and click Add. A dialog will appear, enter the following info:
ID: Site container name, think of this as the directory holding your site. This will appear in the URL path.
Title: Your Website Name
Description: Optional Information Describing the site.
Once you fill out this information click the “Add Plone Site” button and your site will be created. To visit your site point your web browser to: http://yourHostName:8080/ID where ID is the site ID you set when you added the Plone Site.
Additional Steps
Now that you have a standard install of Plone. You can begin modifying the setup by editing the buildout.cfg file and/or adding products to the Products directory.
Some third-party Products for Plone require additional libraries to be bound to Python, or installed as packages to Python; this is beyond the scope of this document at this time.
Some excellent sources of information include:
Plone CMS: Open Source Content Management
Weblion
Zope.org
Python Programming Language
This documentation wouldn’t have been possible without the excellent tutorials at PSU’s Weblion and Plone.org.
Remove highlighting of search terms in Plone
If you haven’t noticed already, go to Google and do a quick search for your Plone site. Then click on your site. Plone will then highlight all of the searched terms.
This can be helpful, but also distracting. Plone will try to match the highlight color with the over all color scheme of your site. However, if you want to disable this feature, here’s what you do:
- Go to the ZMI → portal_skins → plone_ecmascripts → highlighsearchterms.js
- Hit Customize
- add return false; just before function highlightSearchTerms(terms, startnode) { and function highlightSearchTermsFromURI() {
- Then hit save and you’re done!
The adjustment below will permanently turn off highlighting for your site. On the other hand, if you only want to temporarily turn off the highlighting, simply remove “/?searchterm=mySearchTerm” from the end of the URI in the browser’s address bar.
Is there a permission that allows a user edit content that s/he does not own in Plone?
For Plone 2.x, 3.x
Question:
I notice that for a piece of content, both the Owner and the Manager can edit it. Naturally, I assumed that there a permission that allows the role Manager to be able to edit any content it does not own.
However, after I assign ALL the permission to a certain role, say, Reviewer, at the Plone root level (going to the Security tab after clicking on the Plone site in ZMI), a user with the role Reviewer is still not able to edit content that s/he does not own. So, it leads me to think that there is no such permission for editing content for other users? If that is the case, is the Manager role somehow “hardcoded” to be able to edit anything?
What I want to do is to have a role that can do anything (create, edit, delete) to any content of a Plone site, yet it has no access to Site Setup in Plone or whatever features that change the technical aspects of the site.
Answer:
In the ZMI, click on portal_workflow, then plone_workflow. Then click on the “States†tab on the top.
As a test, try modifying the published state. Click on “published†and then select the “Permissions†tab on the top. Then check “Modify portal content†for the Reviewer role.
Also, once you have made the changes you must update the security settings or your changes will not go into effect. This can be done by clicking on portal_workflow and scrolling all the way to the bottom of the page and clicking on “Update security settingsâ€.
Why can't I add a photo using AT Photo in Plone?
If you’ve used the product ATPhoto or ATPhoto Album in Plone 2.1, but now it is breaking in Plone 2.5, before you rip your hair out, here’s what you need to do:
- copy the code from this site: http://dev.plone.org/collective/browser/ATPhoto/trunk/configure.zcml (you might need to clean it up a bit)
- log into your server and go to your Zope folder
- next go to /instance-home/Products/ATPhoto/configure.zcml (you might want to make a backup of this file)
- remove the existing code and replace it with the one you’ve copied
- restart Zope (you can do this via ZMI)
And volia! It’s fixed.
Shibboleth For Plone
Updated as of June 25th, 2010
UCLA Shibboleth 2.1+ Guides:
Follow up with installation of WebServerAuth: http://plone.org/products/webserverauth
Does “(null)” show up instead of the login name in Plone when all is said and done?
Head over to your Apache SSL configuration (/etc/httpd/conf.d/ssl.conf) and modify your RequestHeader setting of X_REMOTE_USER to utilize the Shibboleth attribute you desire:
@RequestHeader set X_REMOTE_USER %{SHIBUCLALOGONID}e
@
The most up to date instructions for the Shibboleth plug-ins for Plone are available from Ithaka.org:
http://tid.ithaka.org/shibplone.pdf
Here are older ones
Thanks to Alan Brenner for creating these plug-ins and all the help.
http://tid.ithaka.org/software
Thanks to Datta Mahabalagiri at UCLA AIS
All my paths to files are for OS X
Please connect your Service Provider to www.testshib.org to make sure your installation is solid before connecting to UCLA
native.logger and shibd.logger should be set to DEBUG instead of INFO…
they are located here:
/opt/shibboleth-sp/etc/shibboleth/shibd.logger
/opt/shibboleth-sp/etc/shibboleth/native.logger
…for the log files located here
/opt/shibboleth-sp/var/log/httpd/native.log
/opt/shibboleth-sp/var/log/shibboleth/shibd.log
Check that you have the correct Attribute Acceptance Policy for the UCLA Identity Provider
/opt/shibboleth-sp/etc/shibboleth/AAP.xml
Verify you have the correct metadata for the UCLA Identity Provider
/opt/shibboleth-sp/etc/shibboleth/ucla-metadata.xml
mine is in the md namespace
Setup your Shibboleth.xml like so:
shibboleth.xml
here is my example vhost in my httpd.conf, it isn’t that pretty.
or check out what Alan Brenner did
Make sure your Service Provider is receiving attributes correctly though a simple phpinfo() page or this page that can display Shibboleth attributes
Here is mine
https://test.psych.ucla.edu/secure/
Here is the code I found on google
Check Attributes Page
First Install
ApachePAS plugin
http://plone.org/products/apachepas
Then Install the Shib Plugins
AutoUserMakerPASPlugin
ShibbolethLogin
ShibbolethPermissions
from here
http://tid.ithaka.org/software
configure AutoUserMakerPASPlugin in the ZMI at /psych/acl_users/AutoUserMakerPASPlugin to look like this
http://www.psych.ucla.edu/shibfiles/autouserconf.jpg
I’m only using the first two HTTP_REMOTE_USER1 and HTTP_SHIB_DISPLAYNAME you can ignore the rest of the “User Setup Headers”
make sure you put whavever “User Setup Headers” you are using down below in the “User Mapping Headers”
Configure Shibboleth Login at /psych/acl_users/ShibbolethLogin to look like this
http://www.psych.ucla.edu/shibfiles/shibloginconf.jpg
When you login to your site select the “Log in with a UCLA user id” link
That’s it. Kinda rough.
I don’t have a logout function yet.
I haven’t gotten around to using ShibbolethPermissions yet but maybe this might get you going:
http://tid.ithaka.org/software/shibbolethpermissions/
Gotcha’s
“Session Creation Failure” errors were from having the wrong SessionInitiator in my shibboleth.xml
“Rejected Replayed Assertion ID” were from incorrect Host and Path in the RequestMapProvider
Good Luck
How do I get started with designing new/existing layouts in Plone?
Taken from various posts on the Plone mailing list (http://www.nabble.com/Plone-f6741.html)
Stan McFarland wrote:
“The short answer is that you can make Plone look any way you want with a combination of template customization and CSS. You just need to learn how to do it. Andy McKay’s “The Definitive Guide to Plone” is a good place to start, as well as plone.org.â€
J Cameron Cooper wrote:
“The best way is to start with the Plone pages, which have a fairly standard and general template, and customize them with CSS.
If you want to work an existing design into Plone, you will have to do some slightly trickier stuff. (Which, basically, is replacing main_template with your own structure, though preserving the “signature”
of main_template.)â€
Peter Fraterdeus wrote:
“I highly recommend that you read the docs section in plone.org as a starting place for ‘skins’ customization, and best practices for building a “site product” which will instantiate your customizations.
“After that, it’s probably best to have a good look at the way that the “main_template” is constructed and how the various layers of CSS are used to modify the look of the site. (on your *nix box, try “locate CMFPlone/skins/plone_templates/main_template.pt” or find it in the ZMI).â€
Matt Bowen wrote:
“Plone uses Python for logic, Zope Page Templates for layout, and the Zope Object Database. If you don’t know Python, you’ll want to learn it — without it, you will be limited in your customizing. People seem to like Dive Into Python [http://www.diveintopython.org/], but there are lots of good tutorials online, and it’s a very nice language. ZPT you’ll pick up from the book and the tutorials.
Finally, definitely check out the many, many good plone videos on Plone.org, at http://plone.org/about/movies and http://plone.org/events/conferences/seattle-2006/presentations/session-videos.
There is a lot of good stuff there about all aspects of customization.â€
Backing up and packing Plone's database file (Data.fs)
Backing up the database
See “Backup Plone” and “Backup and recover Data.fs in linux” in Plone’s documentation.
Additional notes:
- Recent versions of Repozo can compress (gzip) the backup files in addition to doing incremental backups.
- When doing full backups, Repozo behaves exactly as using cp to copy Data.fs, except it uses ZODB’s code to determine where the last finished transaction is and therefore do not copy unfinished transactions at the end of Data.fs.
- Zope’s ZODB can use multiple “storages” (think of it as something like database backends). It comes with FileStorage (i.e. storing everything in Data.fs). DirectoryStorage is an alternative that is supposingly easier and faster to back up incrementally.
Packing the database
Packing a database throws away old object versions (generated by undo actions) from the database. To pack a database:
Go to Zope’s admin panel, under Control Panel → Database → [database name, e.g. main], choose how much undo info to keep, and click “pack”. Note: Data.fs.old will contain a copy of the database file before packing.
(There is a Zope product called PloneMaintenance that can do scheduled backup, although I have not tried it yet.)
Zope/Plone usage statistics
Since a Zope access log (Z2.log) has the same format as an Apache access log, Apache log analyzers will probably work for Zope/Plone too. I have tried AWStats and Webalizer and they both worked w/o needing to set anything special. I prefer Webalizer because:
- It’s fast. (We have a 700 MB log. Webalizer took 70 seconds but AWStats took 10+ minutes.)
- It’s easy to use. (No configuration was needed in my case.)
- Output is in the form of a bunch of static files (HTML, PNG), so no need to set up a CGI script just to view the stat.
Should I use plonecustom.css when changing the layout for my Plone site
As stated in plonecustom.css, if you are going to be making heavy modifications to your layout, you should modify each CSS file accordingly (base.css, portlets.css, etc.).
plonecustom.css can be used for light modifications or any custom classes and id’s you create.
Changing number of displayed news/events in Plone portlets
Find out which version of Plone you are running. Versions prior to 2.5 keep their portlet code in Zope Page Templates and can be modified easily. Plone 2.5 uses a new programming method called Views that complicates things. Versions after the 2.5.x series are not covered in this guide since they haven’t been released yet, but working with these versions will likely be the same as Plone 2.5.
Versions prior to 2.5
Go into the ZMI and navigate to /portal_skins/custom. If you already have a customized portlet_events or portlet_news, change the one you find. Otherwise, we’ll need to begin customizing a fresh copy. Go to /portal_skins/plone_portlets. Select the appropriate portlet you want to change (either portlet_events or portlet_news) and customize it.
Look for a line near the top of the file beginning with tal:define="results. This TAL define statement goes on for several more lines. Look for the end of it, which has an expression looking like: [:5]. The number after the colon controls the number of events to display, and you can change it to whatever you like.
Version 2.5 and later
Because Plone 2.5 uses Views, the code that does the searching for news or events is part of the Zope server itself. You can modify this file directly if you only have one Plone site and don’t think you’ll be changing it frequently. However, this is not the best method, just the simplest.
Directly modifying Zope
Note: this will affect all Plone sites on your server. The code is found at: instance_home/Products/CMFPlone/browser/portlets/events.py (or news.py) in the root of your Zope install directory. Look for the code that specifies sort_limit, and change it to the number of items you want to show. Then look for a line that ends with [:5] and change the number in brackets also to the number of desired items. Save the file and restart your Zope server.
Modifying the ZPT
If you have more than one Plone site, and want to change the number of events on one site without affecting the others, this method is best. By borrowing some code from the old Plone version, we can make the needed changes. Customize /portal_skins/plone_portlets/portlet_events (or portlet_news) if you don’t have a customized copy already.
Look for the first tal:define tag and remove it (all 4 lines, or 3 lines for the events portlet). Now replace it with this code:tal:define="results python:here.portal_catalog.searchResults(portal_type='Event', end={'query': DateTime(), 'range': 'min'}, sort_on='start', sort_limit=5, review_state='published')[:5];"
(If you’re changing the news portlet, be sure to set portal_type='News Item' and remove the end= part.)
Change both the number after sort_limit= and the number in brackets at the end to be the number of items you want to display.
If you changed the events page, now you need to replace all occurrences of events_link with string:/events, and replace prev_events_link with string:/events/previous. (These are the default names. If you changed the names of the Events or Previous Events pages, you’ll need to use their new URLs here.)
If you changed the news page, replace all occurrences of prev_events_link with string:/news. (Again, this is the default name. If you changed it, use the correct URL for the News page.)
Customizing the portlets in other ways
You can change sort order, sort criteria, and other things by altering the parameters to the searchResults function that we used. See the ZCatalog help page for more information.
Search across multiple Plone instances
If you have multiple Plone instances and you would like the search feature to search across the instances instead of only the one you are performing the search in, there is an add-on called PloneRSSSearch and it is available from the following site:
http://ingeniweb.sourceforge.net/Products/PloneRSSSearch/
Another alternative is to use External Site Catalog but it is more general:
http://ingeniweb.sourceforge.net/Products/ExternalSiteCatalog/
How can I undo changes in Plone?
Plone has a feature that lets you undo changes you make to Plone-managed pages and other items. To access it, log in, and in your personal toolbar (usually at the bottom of the screen) there will be an “undo” link. If your site’s templated has been customized so that the undo link is no longer there, you can access it via http://your.plone.site/undo_form.
The undo screen is easy to use. Simply check the box next to any change you want to undo, and press the “undo” button at the bottom. You can undo nearly any Plone action, even logins! (Not terribly useful, but maybe you can think of a use for it.)
The Plone undo feature is meant to nullify recent changes. It is not a long-term archiving tool. Depending on your version of Plone, the undo history may be wiped whenever the Zope server is restarted, or when its database is compacted. For keeping important revisions permanently, Plone 3.0 will have a versioning feature. Until that time, you should make regular backups of your site, relying on the undo feature only for short-term revisions.
Zope has its own more sophisticated undo feature inside the ZMI. To get to it, navigate to any object, and then click the “Undo” tab at the top of the screen. You can undo changes in just the same way as the Plone undo page. You can also view particular revisions in the object’s history by clicking the “History” tab. Keep in mind that you cannot undo changes made to Plone objects in the ZMI – you must use Plone to undo Plone changes.
How do I remove the icons in Plone?
This will allow you to remove the navigation icons that appear in Plone’s navigation portlet.
- go into ZMI (Zope Management Interface)
- go to Root Folder of your site
- click on portal_css (CSS Registry). There you’ll see a long list of all the CSSes affecting your site
- disable generated.css
Additionally:
- under “Condition” put the following: not: portal/portal_membership/isAnonymousUser
(This will allow the icons to appear to users who are logged in.)
How do I change the header image in Plone?
Enter the the Zope interface by adding /manage to the end of your URL.
Go to the folder ‘/portal_skins’ and the subfolder ‘/plone_images’. Click on ‘logo.jpg’ Click on Customize and you will be directed to the /custom folder where you can upload your logo image.
For more info: http://plone.org/documentation/how-to/custom-logo
If you have already changed the logo image and would like to change it to another, start in the folder /portal_skins/custom, click on logo.jpg and upload the new image.
Why are my excluded Plone items still showing up in navigation?
Plone comes with a useful way to hide certain items from the navigation menu. On the page’s properties tab, you can select “exclude from navigation” and the item won’t show up anymore in the navigation bar or site map.
… at least, that’s what you would think. You’ll notice that if you navigate to the page you excluded (by following a link or typing in its URL directly), it will show up in the navigation again!
The fix involves some Zope template code:
- Open up the ZMI, and customize /portal_skins/plone_portlets/portlet_navtree_macro if you don’t have it customized already.
- Look for a line of code about 20 lines down that says:
tal:condition="python: bottomLevel <= 0 or level < bottomLevel-1"> - Change the line to read:
tal:condition="python: (bottomLevel <= 0 or level < bottomLevel-1) and (not item.exclude_from_nav)">
Now your item will never show up in the navigation tools as long as it’s excluded.
Plone and Zope Screencasts
Collection of screencasts demoing Plone functionality and ease of development in Zope 3.
How to add new slots in Plone
This document describes how to add an additional portlet slot to the two that exist already (left and right).
http://plone.org/documentation/how-to/add-slots
Restricting Plone portlets to show up only on certain pages
Sometimes you may want certain Plone portlets to only show up on certain pages. This guide will walk you through doing exactly that.
If the portlets already appear on your site, you’ll need to remove the portlet calls from the site properties page. In the Zope Management Interface, click on the name of your site at the top of the left-hand navigation bar. Then click on the properties tab at the top of the right-hand pane, and you’ll see a list of properties. The two important ones are left_slots and right_slots. These contain lists of portlets you want to show up in the left and right panes, respectively, of your site. Remove the lines referring to the portlets you want to appear only on certain pages. Remember to click the “Save Changes” button near the bottom when you finish.
To get portlets to appear conditionally, we are going to manually add in code to the main template that references the portlets. If you have a customized main_template file in your custom folder, edit that. If not, create a customized version of main_template, found in /portal_skins/portal_templates. Find where you want the portlets to appear, and insert this code in the appropriate spot:
<div tal:condition="python: context.id in ('welcome', 'news')">
@
</div>The first div element is used to conditionally filter the pages that the portlet shows up on. Replace ('welcome', 'news') with a Python-style list (that is, strings separated by commas) of the IDs of the pages where you want the portlet to appear.
The second div calls the portlet code. Replace portlet_news in the above path expression with the name of the portlet you want. The text inside the div (in this case, “News”) is just a placeholder and can be anything you want.
You only need one outer div (with the tal:condition code), provided your conditional portlets are going to go in the same area. Just add an inner div with the appropriate metal:use-macro attribute for each portlet. Calling portlets in this way also gives you the freedom to place them anywhere you like, not just in the pre-defined left and right parts of the screen.
Say you only want the News portlet to appear and nothing else, you can use a filler portlet, one that you know is not in use. For example: here/portlet_related/macros/portlet.
But what about the pages you that you didn’t the filler to show up (for example, you have the portlet set to show up on the left hand side, but for the pages without the portlet, the text should be flushed left). It’s a little tedious, but go to the folders in the ZMI that you want the filler portlet to be removed from. Go to the Properties tab. At the bottom of the form, add a property called left_slots, with lines as the type and no content. Press add. Also, anything that is a child of the folder will also carry this property.
Can Plone display content from another site inside it?
Yes, there is a product that will do exactly this. It’s called windowZ. Just use the quick installer to set it up, and you can add Window objects through the Plone interface. Window objects don’t have their own content, but rather a URL that points to the content you want to display.
Additionally, the external content becomes searchable within Plone’s powerful search tool. However, if the content is constantly being updated (i.e. a Blog) this will not be automatically updated. Also, the external content must be of fixed width and height because WindowZ does not support dynamic data.
How can a rotating banner image be done in Plone?
The first step is to create a Python script that will serve up the image you want. This article assumes that you want a random image from a folder to be chosen. Python-savvy readers can use more advanced techniques, such as making a list of images to load in the same order, etc.
Through the ZMI go to /plone_skins/custom folder, and add a Script (Python) object from the drop down menu. Give this script a name (this example uses “randimg”) and put this code into it:
from random import choice# Import a standard function, and get the HTML request and response objects.from Products.PythonScripts.standard import html_quoterequest = container.REQUESTRESPONSE = request.RESPONSERESPONSE.setHeader('Content-Type', 'image/jpeg')# Get the current folder's contents, choose an image and return itimages = context.objectValues(['ATImage'])return choice(images).data
Now that the script is in place, you can test it by pointing your browser to http://your.plone.site/images_folder/randimg. (Replace images_folder with whatever your random images folder is called.) It will work just like a normal image file on a web server. To add the image anywhere in your site, add the usual image HTML: <img src=“/images_folder/randimg”>. Every time the page is reloaded, a randomly-selected image from images_folder will be shown.
If you are using images other than JPEGs, you will need to change the setHeader call so its second parameter reflects the image type you’re using. For example, image/gif or image/png.
Also, the objectValues function retrieves only the file types you ask it to, in this case “ATImage”, which means images uploaded through the Plone interface. Images uploaded through the ZMI have a different file type, “Image”. This is an important distinction, so change the parameter if you need to. Note however, all content should be added through Plone and not through the ZMI. All content management should be done in Plone. Working with the ZMI in this fashion can result in unforseen problems. You have been warned. An alternative is to leave the parameter to objectValues blank, so that it returns all objects in the folder. However, if you use this option, make sure your random images folder has only images in it!
Update from Joel Burton on Plone.org
Using ‘objectValues’ will actually retrieve each image from the folder, even though you only want to use one. Not very efficient. It also is making no checks for things like effective/expiration date.
Better would be:
images = context.randomimages.getFolderContents({'portal_type':'Image'})return choice(images).getObject().data
Overall, though, I’d recommend a different strategy: rather than having this script pretend to be the image, I’d have a script that returns a randomly-selected image tag. This will allow you to get a good image tag (w/height, width, alt text, etc.) from a randomly-chosen image. This would look like:
from random import choicereturn choice(context.randomimages.getFolderContents({'portal_type':'Image'})).getObject().tag()
Then, rather than having code like <img src="myscript" />, you’d have your Page Template say <img tal:replace="context/myscript" />. This will give you a good image tag of a randomly-chosen image.
How do I make dynamic dropdown/pullup menus in Plone?
There is a Plone Drop Down Menu product (also called qPloneDropDownMenu) that creates navigation tabs for you that have a drop-down menu behavior. The product page above has complete instructions on using it.
- Make a copy of /portal_skins/qPloneDropDownMenu/drop_down.css into your custom folder.
- In the custom file, add bottom: 12px; into the style for #portal-globalnav li ul.
Note: your pixel mileage may vary. If your menus end up floating too high (or low, sinking into the navigation bar itself) try altering the value for the bottom attribute. You can also try using values measured in em, so that it changes depending on the font size.
How do I enable the advanced mode of the TinyMCE editor for Plone?
The TinyMCE editor is a feature-rich WYSIWYG editor for Plone, similar to Kupu. However, many of TinyMCE’s best features are hidden away in so-called “advanced mode”. Installing TinyMCE is straightforward – install it like you would any other Plone product.
To enable advanced mode:
- In the ZMI, go to /portal_skins/tinymce/tinymce_wysiwyg_support. Make a copy into “custom”.
- Edit the file in custom. Near the top there is a line that says: <script type=“text/javascript” charset=“iso-8859-1” tal:attributes=“src string:${portal_url}/jscripts/tiny_mce/tiny_mce_init.js”> </script> — Delete this line or comment it out.
- In its place, add this code: <script language=“javascript” type=“text/javascript”>
tinyMCE.init({
theme: “advanced”,
mode: "specifictextareas"
});
</script>
Within the body of the tinyMCE.init function, you can add other lines to change the appearance of the toolbar, change its location, add more buttons, etc.
Here is a reference of all the settings for the TinyMCE editor:
http://tinymce.moxiecode.com/tinymce/docs/reference_configuration.html
Pay special attention to the function theme_advanced_buttons<1-n>_add: you can use it to add more buttons to the toolbar. For example, to add an undo button to row 2, put this line into tinyMCE.init:
theme_advanced_buttons2_add: “undo”
A full list of available buttons can be found here:
http://tinymce.moxiecode.com/tinymce/docs/reference_buttons.html
Remember that customizing the TinyMCE editor is only possible when using the Advanced theme.
Why aren't my font colors / scripts / Flash / Java applets showing up in my Plone site?
By default, Plone employs an HTML-filtering system when it transforms Plone documents into marked-up web pages. Certain tags, such as <font> and other deprecated tags in HTML, are removed so that the generated page is closer to XHTML, which does not allow deprecated tags. Other tags such as <script> and <embed> are disabled because they present certain security issues.
While avoiding the use of these tags is certainly the preferred “Plone way of doing things”, this isn’t always an option. Certain tools such as the TinyMCE editor use <font> and other filtered tags, and won’t be displayed by default, forcing the user to change the filtering.
Instructions on changing tag filtering can be found at this Plone article. Look under the section labeled “Safe HTML”. Note that you must have Plone 2.1.2 or later in order to configure Safe HTML.
Importing existing HTML content into Plone
I have an existing site consisting of HTML files, folders and images. Now I’d like to manage that site in Plone. How can I get my existing content into Plone?
Answer: https://docs.plone.org/develop/import/index.html
How do you enable short names in Plone?
By default Plone 2.1.x generates short names for you based on the title of your document, folder, etc in the same manner https://kb.ucla.edu does.
For example, if you create a document with a title called “Plone is Great” the short name becomes “plone-is-great”. You can disable this and also allow users to choose their own short names by selecting it in Plone as admin via Site Setup → Portal Settings and selecting “yes” for the option "Show “Short Name” on Content?"
Each user must also enable this option.
To enable this options for each member of your Plone site, simply click on the “Preferences” link located at the bottom of the page and select “Personal Preference.” Scroll down and locate “Allow editing of Short Names” and check the box. hit save.
If you’re the admin and would like to give your managers permission without having to remind them to change their preferences, click on the same “Preferences” link. Then look to the left navigation menu and click on “Users and Groups Administration.” The names of your users should show up. Click on the names of the users whom you’ve assigned as managers. Scroll down and locate “Allow editing of Short Names” and check the box. hit save.
Plone 4 Tips and Tricks
Back to Table of Contents
Tiny MCE
Adding a color picker to the toolbar
Plone 4 comes installed with Tiny MCE as the default html editor. It has a WYSIWYG interface with a toolbar at the top. However, you may notice that some basic functions are missing (like a color picker). To activate the color picker, follow these steps.
1. Log in with Site Admin privileges.
2. Go to Site Setup > Tiny MCE Visual Editor > and choose the Toolbar tab at the top.
3. Scroll down until you find the Forecolor checkbox (off by default) and check it and save.
4. Next, go to Html Filtering (site setup).
5. Click the Styles tab and add the tag ‘color’ to permitted styles (Add permitted styles button) and click save.
That’s it! The next time you go to the html editor you will see the color picker icon in the toolbar.
Shibboleth
Why does Shibboleth sometimes return different names for students than class roster?
The legacy UCLA Single Sign On solution ISIS, now replaced by Shibboleth, used to prioritize data in payroll record from QDB over student record from SRDB if a student works at UCLA and their payroll record shows a different name. After the Enterprise Directory (ED) rolled out in production in November 2006, ISIS (now Shibboleth) switched its backend to ED which pulls a person’s name information based on a different logic. This ED name logic favors the name recorded in student system when different names are found in both student and payroll system for the same UID, if the person is a current student with UCLA. Therefore ISIS (now Shibboleth) no longer returns the name in payroll system as long as the person is a current student. The only case that payroll name is returned instead of student record name is that the person is a current UCLA employee but not a current UCLA student.
Exception: Students who have full-on FERPA restriction flag turned on in student system are not recognized in the Enterprise Directory because their information including names in student system are restricted for release. In such case, if they are UCLA employee at the same time, ED will recognize them as current UCLA employee but not current UCLA student, and thus return the names in payroll system.
Here’s the current name resolution logic implemented in ED:
a. If a person currently has student affiliation (meaning UID exists in V610), select the name in the order below no matter what other affiliation this person has:
- SR0 name
- SI0 name
- PP0 name
- UNX name
Note: If the name selected is found with APP_USAGE_STATUS <> ‘A’, an error message will be logged but the name still goes in ED.
b. Else, if a person currently has employee affiliation (meaning UID in payroll system with a emp_status<> ‘S’ – ‘not seperated’), select the name in the order below:
- PP0 name
- SR0 name
- SI0 name
- UNX name
Note: If the name selected is found with APP_USAGE_STATUS <> ‘A’ an error message will be logged but the name still goes in ED.
c. Else, meaning a person does not have either student of employee affiliation, go with the same order of step a.
Will Shibboleth say this is a UCLA person, so that we can limit some content to just UCLA?
Shibboleth has a very flexible attribute release mechanism, and can in theory tell an application whether a person is a UCLA person.
However, the defintion of “UCLA person” varies depending on the cotext. You can find a list of attributes Shibboleth potentially offers at:
https://spaces.ais.ucla.edu/display/iamucla/AvailableShibAttributes
Shibboleth Apache Multiple Virtual Host Configuration (using Moodle as an example)
About
Below are steps to configure a shibboleth SP to work with multiple Apache virtual hosts using a single entityID and an Assertion Consumer Service (ACS) and shibboleth’s NativeSPApplicationOverride. More information can be found here regarding NativeSPApplicationOverride.
The notations are old, but it is backwards compatible with the current version of SAML. If you find documentation that supports the newer notation, please help and update this article.
You will need to do this if you are running more than one virtual named host and each virtual host is running it’s own Moodle instance.
In this example, we will use the server names http://www.moodle1.ucla.edu and http://www.moodle2.ucla.edu with an entityID of http://www.moodle1.ucla.edu.
Note: You will need shibboleth installed and 2 instances of Moodle installed. You will also have needed to request attribute releases for the entityID and the ACS where http://www.moodle1.ucla.edu is the entityID and http://www.moodle2.ucla.edu is the ACS that is associated with the http://www.moodle1.ucla.edu entityID.
shibboleth2.xml file configuration
Below are the changes I needed to make in the default configuration file. All other settings were left as default from the shibboleth 2.1 installation.
Modifying the host name for the 2 virtual host web servers
<RequestMapper type="Native">
<RequestMap applicationId="default">
<Host name="www.moodle1.ucla.edu" ><Path name="default" authType="shibboleth" requireSession="true"/></Host>
<Host name="www.moodle2.ucla.edu" applicationId="moodle2" authType="shibboleth" requireSession="true"/>
</RequestMap></RequestMapper>
Entering entityID
<ApplicationDefaults id="default" policyId="default"entityID="http://www.moodle1.ucla.edu"REMOTE_USER="Shib-eduPersonPrincipalName"signing="false" encryption="false">
Point to Production AIS IdP
<SessionInitiator type="Chaining" Location="/Login" isDefault="true" id="default"relayState="cookie" entityID="urn:mace:incommon:ucla.edu">
h3.Pulling the MetadataProvider ID Information
<MetadataProvider id="incommon" type="XML"xmlns="urn:mace:shibboleth:2.0:metadata"url="http://wayf.incommonfederation.org/InCommon/InCommon-metadata.xml"backingFilePath="/etc/shibboleth/InCommon-metadata.xml"reloadInterval="28800"></MetadataProvider>
Setup the ApplicationOverride
<ApplicationOverride id="moodle2" entityID="http://www.moodle1.cdh.ucla.edu"/>
Save and close the file. Check the shibboleth configuration file for errors: shibd -t and restart the shibboleth service: service shibd restart
Apache Virtual Host Configuration
Note: The Moodle root for www.moodle1.ucla.edu is at /var/www/html/moodle1 and the Moodle root for www.moodle2.ucla.edu is at /var/www/html/moodle2.
At the bottom of the httpd.conf file there should be a Virtual Hosts section. You will need to uncomment and add the following lines in your httpd.conf file.
# Use name-based virtual hosting.NameVirtualHost *:80
<VirtualHost *:80>ServerAdmin webmasterATucla.eduDocumentRoot /var/www/html/moodle1ServerName www.moodle1.ucla.edu
This section allows for the use of .htaccess files to enable Shibboleth on directories<Directory "/var/www/html/moodle1">Options AllAllowOverride AllOrder allow,denyAllow from all</Directory>
This section is required by Moodle to use Shibboleth authentication along
with local authentication by only restricting the index.php file to shib auth.<Directory /var/www/html/moodle1/auth/shibboleth/index.php>AuthType shibbolethShibRequireSession Onrequire valid-user</Directory></VirtualHost>
<VirtualHost *:80>ServerAdmin webmasterATucla.eduDocumentRoot /var/www/html/moodle2ServerName www.moodle2.ucla.edu
This section allows for the use of .htaccess files to enable Shibboleth on directories<Directory "/var/www/html/moodle2">Options AllAllowOverride AllOrder allow,denyAllow from all</Directory>
This section is required by Moodle to use Shibboleth authentication along
with local authentication by only restricting the index.php file to shib auth.<Directory /var/www/html/moodle2/auth/shibboleth/index.php>AuthType shibbolethShibRequireSession Onrequire valid-user</Directory></VirtualHost>
Save and close the file and check the apache configuration: httpd -t Then restart apache. sudo /sbin/service httpd restart
Configure Moodle to use Shibboleth authentication and local login.
For this to work you need to have the require shibboleth directives only restricting the index.php file in the auth/shibboleth/ directory. You can then put a link to auth/shibboleth/index.php page in the login page and should be able to login with both local and shibboleth accounts.
#1. As Moodle admin, under Site Administrator, browse to Users → Authentication → Shibboleth.
#2. Fill in the fields of the form. The fields ‘Username’, ‘First Name’, ‘Surname’, etc. should contain the name of the environment variables of the Shibboleth attributes that you want to map onto the corresponding Moodle variable. For Shibboleth 2.1, these are set in the attribute-map.xml file.
#####################################################################
Shibboleth Attributes needed by Moodle:
For Moodle to work properly Shibboleth should at least provide the attribute
that is used as username in Moodle. It has to be unique for all Shibboleth
Be aware that Moodle converts the username to lowercase. So, the overall
behaviour of the username will be case-insensitive.
All attributes used for moodle must obey a certain length, otherwise Moodle
cuts off the ends. Consult the Moodle documentation for further information
on the maximum lengths for each field in the user profile.
#####################################################################
#3. Save the changes you made on the Shibboleth page.
#4. Browse to Users → Authentication → Manage Authentication to Enable and Disable Shibboleth login. You can control the priority of the failthrough here if you would like as well.
#5. Save the changes.
CCLE UCLAlogin.php page
If you are going to use CCLE UCLAlogin.php page you will need to edit the htpswwwroot variable and hard code the server name.
Example for www.moodle1.ucla.edu
Comment this line://$CFG->httpswwwroot = str_replace("http://", "https://", $CFG-httpswwwroot);
Enter this instead:$CFG->httpswwwroot ="http://www.moodle1.ucla.edu";
Campus Resources for Registrar Data, ISIS, Shibboleth
I am looking to develop an application and would like to have access to data such as class roster information, student info, etc. How can I obtain this data and who do I need to contact to get access to this data?
Campus Authentication using ISIS and Shibboleth
What kind of info can be retrieved using campus authentication?
That is yet to be decided but it’s worth discussing your needs with the personnel in charge of ISIS and Shibboleth.
What is ISIS?
Integrated Security Information Services (ISIS) is UCLA’s de facto common web authentication service. It provides a common interface for UCLA web applications to authenticate users using Bruin Online ID/password, UID/PIN, AIS mainframe logon ID password, or QDB logon ID/password. Furthermore, ISIS enables single user sign-on to participating campus web applications.
For general information regarding ISIS, please contact Albert Wu.
Why should I use ISIS?
Don’t think of it as using ISIS but instead as using the UCLA Login System. This allows your users to login with their UCLA Login the way they do for My.UCLA, the Library and other applications, instead of having to have a special login just for your system.
https://kb.ucla.edu/link/32
Useful Links
- Getting Started with ISIS
http://www.sscnet.ucla.edu/consortium/index.pl?GettingStartedWithIsis
What is Shibboleth?
Shibboleth is an Internet2 sponsored way for schools to federate their login systems for cross-campus courses. See https://kb.ucla.edu/link/298 for links to more info.
Should I start developing applications using ISIS or Shibboleth?
ISIS is proprietary to UCLA. Shibboleth is an Internet2 standard. Therefore, you have more future potential programming to Shibboleth. And if you are using an Open Source app it may already work with Shibboleth, and that can save you adapting it to UCLA’s ISIS. Moodle and Plone, among others, have Shibboleth modules.
For additional info on ISIS and Shibboleth
Registrar Data – Accessing Student Data
I am looking to develop an application that would be able to access class roster information, student data, etc.
Registrar’s Service Request
Provides consulting on data selection, business approaches, and support of Student Records data via a wide array of delivery methods. You can contact, Martin Bjel or Valerie Romero for more details.
https://saweb.uclanet.ucla.edu/
Use the Registrar’s Service Request (RSR) application to request any of the following services:
- Mass e-mail to students
- Student addresses for bulk mailing
- SRS reports
- Access to student data from any source
- Access to Registrar’s Office web application
What is SRS number?
SRS stands for Student Record Systems and every UCLA course has a 9 digit SRS#. Combined with Term, this provides a unique key for every course offered.
To get the SRS number for a given course:
Go to the Schedule of Classes available at https://sa.ucla.edu/ro/public/soc/.
IAMUCLA Shibboleth Set-Up Guides
Please visit our official [IAMUCLA Shibboleth site]. Our site contains detailed information on shibboleth installation and configuration.
https://spaces.ais.ucla.edu/display/iamucla/Shibboleth
There you will find links to the following :
Shibboleth Planning Guide For Both Ver.1.3 & 2.x
Shibboleth 1.3 Installation and Configuration
Shibboleth 2.x Installation and Configuration Beta Guide
Available Shibboleth Attributes
Shibboleth KnowledgeBase
Is it possible to set up a survey using Shibboleth logins?
Q: Hi, our department is looking for a way to allow voting on various topics… is there a way set up so that we can do this using people’s BOL logins? – posted by David Schiller
A: (or at least the start of one) Here are some options:
- Contact the folks at MyUCLA because they have hosted many student elections, and presumably the same process could be used for surveys.
- Moodle used http://ccle.ucla.edu and http://classes.sscnet.ucla.edu has a Questionnaire Tool and uses Shibboleth.
- Set up simple voting app in a web scripting language running Shibboleth, or if you don’t want to run it yourself, see if any of the many depts. programming with Shibboleth on campus could help. For UCLA Shibboleth docs, see IAMUCLA
- Check if this fellow at Duke managed to get Shibboleth working with SurveyMonkey: Shibboleth conversations with BlogSpot or SurveyMonkey?
Shibboleth
“Shibboleth is the standard federated authentication and attribute query service protocol in the higher education. It was designed from the ground up to support the pseudo-anonymous login scenarios required by the libraries.
Shibboleth has strong support from the Internet2. It is also on a converging path with similar commercial efforts (Liberty Alliance)."
— Taken from EDIMIassumptions.doc found on AIS website
Shibboleth Resource
- Shibboleth Set Up Guide on the UCLA IAMUCLA site
- ISIS to Shibboleth Migration Help Center
- The Official Internet2 Shibboleth Site
- Internet2 Shibboleth Support
Deprecated Pages
Presentations Related to Shibboleth
- Slides from the January 30, 2007 ISIS/Shibboleth Technical Information Session
- Slides from the September 18, 2007 Campus Web Publishers presentation
-
A very cool series of demos of how Shibboleth works
Produced by SWITCH, this is probably the best set of online demonstration/explanation of how Shibboleth works
More information about Shibboleth and ISIS, taken from a post by Albert Wu to the ISISdev mailing list:
1. What is Shibboleth?
2. Why haven’t you rolled out Shibboleth to a broader group?
3. Which is better for me, ISIS or Shibboleth?
4. What about authorization? How will that be handled?
5. How might I use data returned from Shibboleth to perform authorization?
6. What does a user see when he/she logs into a Shibboleth enabled application?
What will my Shibboleth-enabled application be able to see about that user?
1. What is Shibboleth?-——————————-
Shibboleth (http://shibboleth.internet2.edu/) is standards-based, open
source middleware software which provides Web Single SignOn (SSO) across
or within organizational boundaries. It is open source and is developed
and support by the Internet2 Middleware Group.
Shibboleht IS the next version of ISIS.
We have in the past two years, been preparing to evolve ISIS to a
standards-based protocol. Shibboleth is the right fit. Shibboleth has
been adopted by many institutions throughout the world as their web single
sign-on service of choice. It has been adopted by UC as its federated Single
Sign-on solution.
We are in fact operating a fully functioning Shibboleth Identity Provider
(that would be the “server” side of the service) parallel to the curent
ISIS 5 interface. The two are integrated. Applications can choose to use
either API and get single sign-on across applications using either.
At this time, we are working with several early adopters on deploying
Shibboleth. They include CCLE, Paul’s Plone site, MyEvents.ucla.edu,
UCLA GRID, and our own sites.
2. Why haven’t you rolled out Shibboleth to a broader group?-—————————————————————————————
There are several considerations.
First, we are ourselves learning how to deploy a Shibboleth-enabled
application. Since we didn’t write the sofware, there is a fair amount
of learning to do.
Second, Shibboleth does not offer the exact same set of features ISIS does.
In particular, it has a different concept of session management. We need to
better understand how that impacts the applicaitons.
Third, transitioning from the current ISIS API to Shibboleth will require
a fair amount of work. We want to minimize that work as much as possible for
you all. To do that, we are using the pilot program to develop a series
of support materials and to try streamline the set up process as much as
possible before we make everyone jump through unnecessary hoops.
The good news is that we are just about there. Stay tuned. :-)
3. What are the differences between ISIS and Shibboleth, and Which is better for me?-—————————————————————————————————————————
These are the key differences between ISIS and Shibboleth:
-
ISIS is a home grown system with a proprietary API. Shibboleth is developed
based on SAML (http://en.wikipedia.org/wiki/SAML)
-
ISIS is only used within UCLA. Shibboleth is used at a significant number
of institutions. More significantly, Shibboleth enables member of one instution
to use his/her credential to log in to services at another institution. Imagine
using your UCLA Logon ID to log into a UCOP, or UC Berkeley application.
It’s happening. :-)
- To use ISIS, you need to write code to call the ISIS Web Serivce. Internet2
provides standard “client” (called Service Provider) modules for Apache and IIS.
These SP modules handle all communications between your server and the Shibboleth
Identity Provider. Any information returned is presented to your application in
the HTTP headers. So all your application needs to be able to do is to read HTTP
headers. On top of that, if you only have static pages, the Shibboleth SP modules
have enough logic built-in that it can controll access to static documents by
simply editing configuration files.
-
ISIS can only provide a fixed set of user attributes. Shibboleth is designed to
be able to flexible return any arbitrary number of attributes, AND be able to
control the release of those attributes in a very granular fashion.
Which one is better? Generally speaking, if you are launching a new application,
I’d seriously consider using Shibboleth. After all, eventually, we will phase
the current ISIS API out in favor of Shibboleth. That won’t happen for a couple
of years, but if your new application will be around for at least 2 years, now may
be the time to move onto Shibboleth. We are still a couple of months away from
fully ramped up to support a large number of adopters, but if you are interested
and have an active project, we want to work with you.
Besides, while there is significant set up (at least for the first time), there
is far less coding involved on your part. It may just shorten your deployment
window.
Reason for not going to Shibboleth now:
a. You already have a set of working ISIS applications, and you have no
immediate plans to launch new projects/rewrite your applications.
change those requirements in the short term. Shibboleth works differently.
It may require some rethinking how session management is done
c. You want to wait till the full set of support material is available. :-)
At least for web applications, we expect authorization data will come
through the Shibboleth attribute response packets. As a user logs into
your application and runs through the shibboleth authentication sequence,
the shibboleth SP module eventually fires attribute requests against the
IdP. The IdP in turn returns any attribute the SP requests AND has the
authorization to see.
The technical framework for this service is available now. Our main problem is
the availability of data, and lining up proper support for managing
the release of attributes. Keep in mind that AIS does not have the authority to
arbitrarily release data. The business offices (e.g., Registrar’s Office for student
data, CHR/Payroll for employee data) need to be involved in the process.
Our main challenge now is to come up with a scalable mechanism for the offices
to efficiently manage the release of sensitive data. That process is ongoing. We
have a significant permission management system proposed in the UTIPP2 funding
cycle. Whether we get the funding to proceed there will significantly determine
the types of services we can offer moving forward.
5. How might I use data returned from Shibboleth to perform authorization?-————————————————————————————————————-
Shibboelth attributes returned to your application are presented as
name/value pairs in the HTTP header. You simply read the headers and parse
out the data you are looking for. Specifically for authorization data,
they are returned in the form or affiliation values or entitlement values.
For example, if we had the proper data, we may assert me as:
eduPersonScopedAffiliation = affiliate@ucla.edu,employee@ucla.edu,
staff@ucla.edu,alum@ucla.edu
Note that attributes can contain multiple values. Also note that the “@ucla.edu”
part is the scope of the value. so “employee@ucla.edu” means “employee of UCLA”.
As I mentioned in 4., whether we receive funding significantly impacts how much
we expand this moving forward. In theory, we can assert any amount of details
about a person that we have data for. In fact, paired with a permission management
tool for the security administrators, we can assert any custom authorization
attributes the administrators might set…
6. What does a user see when he/she logs into a Shibboleth enabled application?
What will my Shibboleth-enabled application be able to see about that user?-——————————————————————————————————————-
The best way to explain this is for you to log in to a live Shibboleth-enabled application.
If you want to see what the application sees in the header, try this little
diagnostic application:
7. How can I contact AIS if Shibboleth appears to be problematic?-——————————————————————————————————————-
“AIS help desk does not check emails over the weekend. A different group answers the help desk phone during evenings and on weekends. They route calls to the appropriate party for production outage issues. The AIS help desk extension is x66951.” (Albert Wu 09/30/2007)
Can Shibboleth log all attributes retrieved?
Please answer this question and change the tags.
In debugging Moodle login problems it would be extremely helpfulv if we could log the attributes Shibboleth delivers for each person on login.
The reason this is useful is that some Extension Students have uclaLogonID but not uclaBOLEmail and may or may not have uclaOfficialEmail or uclaUniversityID. Finding this out would help in solving login problems.
Moodle does not have the code to do the actual logging, although it does not look hard to add the code ourselves. Basically it should use Moodle’s add_to_log() function to write all “HTTP_SHIB_*” server variables to the log.
The Shibboleth Service Provider module also logs transactional details. You may consider looking into those logs:
https://spaces.internet2.edu/display/SHIB/LogFiles
Lucene
Lucene spans
Introduction
In Lucene, a span is a triple (i.e. 3-tuple) of <document number, start position, end position>. Document numbers start from zero. The positions are term positions, not character positions, and start from zero (i.e. the first token of a field has position 0, the second token has position 1, etc.). Start position is the position of the first term in the span. End position is the position of the last term in the span + 1.
For example, say document 1 has the following terms:
Term This is an Apache Lucene test Position 0 1 2 3 4 5Then “Apache Lucene” matches a span <1 (document number), 3 (first term’s position), 5 (last term’s position + 1)>.
Using spans
Span queries
You don’t have to deal with spans directly. If you create a span query, Lucene takes care of matching the spans for you. Span query cannot be parsed by the default query parser that ships with Lucene. Instead, you create an instance of SpanQuery and give it to other classes like IndexSearcher.
Direct access
You can also using the Spans class. A Span class represents a series of spans instead of a span. It is also an iterator of spans. The easiest way of creating a Span object is to use the SpanQuery.getSpans method, which returns a series of spans matched by a span query (in the form of a Spans object).
Application
Proximity search
Queries like “phrase A” within a distance of “phrase B” can be done using span queries. The API reference has an example of how to query for something like “‘John Kerry’ near ‘George Bush’”.
Word and phrase counts
The Spans interface makes it very easy to get the document count and occurrence count of a word or a phrase (actually, anything that a SpanQuery can represent) in a document set. It can be done by iterating through a Spans object. You can even count how many times phrase A is within a certain distance of phrase B in the document set.
Performance
A typical span query seems to take about twice as long as a typical phrase query, which in turn takes about twice as long as a term query. If you can get away with using a phrase query or even a term query, you might want to do so. For example, “term A near term B” can be done using a phrase query with a non-zero slop.
Lucene term documents and term positions
Introduction
Term documents
For each term T, there are (doc frequency of the term) tuples of <doc ID, freq of T in this doc>.
This information is stored in the .frq file and accessible via the TermDocs interface.
Term positions
For each term T, there are (doc frequency of the term) tuples of <doc ID, freq of T in this doc, (term freq of T in this doc) counts of positions of T in this doc>.
This information is stored in the .prx file and accessible via the TermPositions interface.
Using the information
Via Query
If you use Query classes, they get and make use of term documents and term position so you do not have to worry about them. Non-span queries other than phrase queries use term documents only. Phrase queries uses term documents + term positions to make sure that a document actually have the terms, say, right next to each other and in order. This makes phrase queries slower than term queries, i.e. searching for the phrase “southern california” show be slower than searching for required words “southern california”.
Lower-level than queries is the spans API. The Spans class is still higher-level than using TermPositions directly.
Via the interfaces
Note that the document number (returned by doc()) and frequency (returned by freq()) of a TermDocs object is undefined until next() is called the first time. This is unclear from the API reference but I have found this out by experiment.
Pure negation query in lucene
In many information-retrieval system, you can use queries like “term1 AND (NOT term2)” but you cannot use queries like “NOT term2” on their own (e.g. to get only documents that do not contain term2). At least the system returns no result even if some documents do not contain term2. This is because:
- Most of these system uses inverted indices, which are essentially “term => document list” mappings. There is no way to reconstruct a list of documents for “NOT term2” from such a mapping.
- The system can generate a set of all document and then subtract those that contains term2 from the set. This can be resource-intensive (e.g. needs O(doc count) storage and processing time) and can be misused by users.
Despite the difficulties, users of some system might need this kind of query. In Lucene, there are two ways to support it:
- When indexing, create a field (e.g. “exists”) with a constant value across documents (e.g. “true”). Then rewrite the query “NOT term2” into “+exists:true -term2”.
- Combine MatchAllDocsQuery, which matches all document, with BooleanQuery. The code will look like this:
// Create a query that matches something like “everything AND NOT term2”
MatchAllDocsQuery everyDocClause = new MatchAllDocsQuery();
TermQuery termClause = new TermQuery(new Term(“text”, “term2”));
BooleanQuery query = new BooleanQuery();
query.add(everyDocClause, BooleanClause.Occur.MUST);
query.add(termClause, BooleanClause.Occur.MUST_NOT);
…
IndexSearcher searcher = new IndexSearcher(“/path/to/index”);
Hits hits = searcher.search(query);
// hits contains only documents that do not contain term2
Why are Lucene's stored fields so slow to access
Problem
I have a Lucene index that has some large fields (about 50 KB each) and some small fields (about 50 bytes each). I need to access (iterate) one of the small fields for say 1/10 of the documents. For some reason, such operation is very slow, unreasonably so for such a small field.
Cause
Lucene provides a number of “policies” of how to access fields of a document. (See class org.apache.lucene.document.FieldSelector.) They specify when and how fields are loaded from the index. It turns out that the default is to load all fields in the document as soon as a Document is requested by, say IndexReader. (See class org.apache.lucene.index.FieldsReader, in particular, how it implements the doc(n, FieldSelector) function.) Therefore, when you load a small field, the large fields are also loaded, causing performance problem if you repeat the operation many times.
Solution
The class org.apache.lucene.document.FieldSelectorResult provides several “policies” that you can use. The most interesting one w.r.t. our problem is FieldSelectorResult.LAZY_LOAD. It basically specifies that a field is lazily loaded (i.e. loaded only when needed).
To use this policy, create a FieldSelector object.
FieldSelector lazyFieldSelector = new FieldSelector() { public FieldSelectorResult accept(String fieldName) { return FieldSelectorResult.LAZY_LOAD; }};
When you request the document from an IndexReader, pass this object too.
IndexReader reader;...// Open the index reader...Document doc = reader.document(docId, lazyFieldSelector);
Note that to get the field, use the Document’s getFieldable(String) method instead of getField(String). This is according to the API reference.
Fieldable fieldable = document.getFieldable(fieldName);String value = fieldable.stringValue();// Use the field value
Solution
Within a document, stored fields are read sequentially. (See Index File Formats.) In theory, accessing the first fields should be faster than reading the last ones.
Fields are ordered and their orders are stored implicity in the .fnm file. The order that the fields are read from should be the same as the order that you create the fields. To gain performance, create frequently used (and small) stored fields first.
Cause
For some reason, this is still slower than indexing the field and then iterate through all the terms in the field. I looked closer and found another bottleneck.
A Lucene index stores the lengths of the fields in terms of character count, not byte count; Also, a character can be more than a byte long. As we have seen, Lucene stores and processes the fields sequentially. Even if it does not load a field, it must read the whole content of a field to get to the next field. If a large field is not loaded but is before a small field that is loaded, the processing time depends on the length of both fields, not just the small ones.
Solution
The problem will not happen if the field you need to iterate is placed before the large fields, and if you ask the FieldSelector to stop at the field you want.
Say you want to iterate only field “field1”. Then create a FieldSelector that only loads field1 and stops at this field. When creating the index, remember to put the large fields after field1.
String fieldToIterate = "field1";...FieldSelector lazyFieldSelector = new FieldSelector() { public FieldSelectorResult accept(String fieldName) { if (fieldName.equals(fieldToIterate)) return FieldSelectorResult.LOAD_AND_BREAK; else return FieldSelectorResult.NO_LOAD; }};
The rest of the code should be the same.
Lucene
Lucene – Apache Lucene is a high-performance, full-featured text search engine library written entirely in Java. http://lucene.apache.org/java/docs/
Compiling Lucene with GCJ
Background
Lucene is a open-source search library written in Java.
GCJ is a Java to native-executable compilter. As shown in a LinuxJournal article, using gcj is similar to using gcc.
Versions Used
As of 1/26/08, the latest version of Lucene is 2.3.0. It needs Java SE 1.4 to compile and run. GCJ 3.3.6 doesn’t work because apparently, it doesn’t support classes in Java 1.4 (e.g. the new regular expressions classes and functions and NIO stuff). GCJ 3.4.5 and 3.4.6 works. I haven’t tried version 4.x yet.
Installing Lucene
Get Lucene’s binary. You need lucene-core-2.3.0.jar. There is another JAR file lucene-demos-2.3.0.jar that contains the demos, which are useful to check that your copy of GCJ is working.
Installing GCC
You get GCJ by installing GCC. A how-to of installing GCC 3.3.6 can guide you through that. Basically there are four steps in the process (after downloading and uncompressing the source files):
- configure (I used ./configure —prefix= —with-as=/usr/ccs/bin/ —with-ld= —disable-nls —enable-libgcj
- make bootstrap
- make check (I think this one is optional)
- make install
If you use Windows, you don’t need the steps above. Just get MinGW and install GCC from it.
Testing
Lucene comes with a pair of indexer and searcher in their demo collection. They have a page that explains how to compile and run the demo.
You can compile the indexing with the following command:
/path_of_gcj/bin/gcj lucene-core-2.3.0.jar lucene-demos-2.3.0.jar -o indexer --main=org.apache.lucene.demo.IndexFiles
That should create an executable file called indexer in the same directory. Run it and it should show the usage and exit.
When you run the indexer, it might complain that “ld.so.1: indexfiles: fatal: libgcj.so.5: open failed: No such file or directory”. Basically, it tries to find this run-time shared library but can’t find it. You’ll have to tell it where to look at. E.g. in bash, use the following command:
export LD_LIBRARY_PATH=$LD_LIBRARY_PATH:/path_of_gcj/lib
You can compile and run the searching in a similar way.
Apache log shell scripts
Return count of timestamps with most error logs.
A couple years ago an app error_log reported about 16000 errors within a few seconds. After fixing it, we wanted to sort by number of errors per second. This does that. The first column is the count.
cat /logs/httpd/ssl_error_log* | awk '{ print $1"-"$2" "$3" "$5" "$4 }' | uniq -c | sort -g- uniq -c Precedes each output line with a count of the number of times the line occurred in the input.
- On Solaris, use sort -n to get a numeric sort.
Output
5 [Mon-Jul 02 2012] 07:45:42 5 [Mon-Jul 02 2012] 16:35:18 5 [Tue-Jun 26 2012] 13:40:40 6 [Fri-Jun 29 2012] 13:44:16 6 [Thu-Jul 19 2012] 15:35:59 6 [Thu-Jul 19 2012] 15:36:27 6 [Thu-Jul 19 2012] 15:36:57 6 [Thu-Jul 19 2012] 15:39:43 6 [Thu-Jul 19 2012] 15:40:58 6 [Thu-Jul 19 2012] 15:41:18 6 [Wed-Jul 04 2012] 21:32:38 7 [Thu-Jul 26 2012] 15:06:29Count apache log hits for a given year across a bunch of virtual host logs
grep -c "/2015:" /logs/*access_log | sort -t : -k2nrOutput
/logs/brh.ucla.edu-access_log:28351/logs/harrt.ucla.edu-access_log:27078/logs/jag.ucla.edu-access_log:25690/logs/epr.ucla.edu-access_log:24894Explanation
- This script takes advantage of the default format of the Apache access log files that show date as
[12/May/2015:14:03:48 -0700] - grep -c gives a count of the number of matches for the pattern, in this case “/2015”"
- sort -t : takes the grep output in the form of
/logs/nchs.ucla.edu-access_log:40and splits it into two key fields at the colon. - Then the -k2nr parameters to sort tell it to sort on the second key, treat it as a number, instead of alpha sort, and then reverse the order, so we’ll get the largest counts at the top.
- This runs on Solaris, but on other *nix systems, you may need to use -g instead of -n to get sort to treat it as a numeric sort.
Look for bytes returned > 1,000,000
We were looking for a bug that was dumping way too much data, and we needed a way to find records that returned more than a million bytes. David Choi figured this out.
cat access_log* | grep browseinst | awk -F\" ‘{ print $1" [“$2”] [“$6”] "$3 }’ | grep browseinst | awk ‘{if ($NF > 1000000) print $0}’
Be careful when cutting and pasting the above command. The awk statement single-quotes are turning into left and right quotes for some reason, and they won’t work.
Explanation
- cat access_log* – feed contents of all access_log files into next part of script
- grep browseinst – only return lines with “browseinst”
- awk -F\" ‘{ print $1" [“$2”] [“$6”] "$3 }’ – split the line into fields delimited by double-quotes, and then only print 1st, 2nd, 6th, and 3rd fields
- grep browseinst – _watch for lines with “browseinst” again because it could have shown up in the referrer field, which we don’t want
- awk ‘{if ($NF > 1000000) print $0}’ – _if last field is greater than 1 million, print out the last set of fields
(Note: try pulling it apart and build it back up, looking at the output at each step. That’s the only way I could make sense of it.)
Output
128.97.62.186 - - [14/Jul/2010:10:25:18 -0700] [GET /?page=browseinst&term=101&lastalpha=I&instructor=2 HTTP/1.1] [Mozilla/5.0 (Windows; U; Windows NT 5.1; en-US; rv:1.9.2.6) Gecko/20100625 Firefox/3.6.6 ( .NET CLR 3.5.30729)] 200 1026117128.97.198.33 - - [14/Jul/2010:22:48:16 -0700] [GET /?page=browseinst&term=101&lastalpha=T&instructor=1207888 HTTP/1.1] [Mozilla/5.0 (Macintosh; U; Intel Mac OS X 10.6; en-US; rv:1.9.2.6) Gecko/20100625 Firefox/3.6.6] 200 1059649...Here’s an update, with partially labelled output, get those who returned more than 1,000,000 bytes, but also show the number of seconds the request took.
cat /logs/httpd/ssl_access_log | awk -F\" '{ print $1" [URL: "$2"] [BROWSER: "$6"] [REFERER: "$4"] [SECONDS: "$7"] "$3 }' | awk '{if ($NF > 1000000) print $0}'75.47.248.169 - - [27/Nov/2011:04:16:50 -0800] [URL: GET /file.php/7826/course_materials/Anthro33Lecture13.ppt.pdf?forcedownload=1 HTTP/1.1] [BROWSER: Mozilla/5.0 (Windows NT 6.1; WOW64) AppleWebKit/535.2 (KHTML, like Gecko) Chrome/15.0.874.121 Safari/535.2] [REFERER: https://.../course/view/11F-ANTHRO33-1?topic=7] [SECONDS: 16] 200 129891475.47.248.169 - - [27/Nov/2011:04:17:08 -0800] [URL: GET /file.php/7826/course_materials/Anthro33Lecture15.ppt.pdf?forcedownload=1 HTTP/1.1] [BROWSER: Mozilla/5.0 (Windows NT 6.1; WOW64) AppleWebKit/535.2 (KHTML, like Gecko) Chrome/15.0.874.121 Safari/535.2] [REFERER: https://.../course/view/11F-ANTHRO33-1?topic=8] [SECONDS: 19] 200 1578667What is Ajax web programming?
AJAX – (Asynchronous Javascript and XML) is Javascript that sends XML to a web server which then sends back updates for specific sections of the web page, instead of the old way of updating the whole page. You can get more sophisticated applications this way.
- Articles
- Apps and Examples
- http://numsum.com/ – sharable social spreadsheets
- http://www.writely.com/
- Tools and Tutorials and articles about AJAX
- Advanced RSS Ticket – DynamicDrive
- Super AJAX Programming Seed
- Frameworks
Programming articles to read
This collection of programming articles to read is highly subjective, so feel free to add your own additions and comments.
-
General
- How Microsoft Lost the API War by Joel Spolsky Sunday, June 13, 2004
- Pattern Book for Open Source in the Enterprise by Flashline – an aid to the adoption and use of Open Source software in a corporate development environment.
- Language Comparisons
-
Productivity
- Jakob Nielsen,the usability expert, says in this article Productivity in the Service Economy that improved intranet usability can help us work faster and smarter, and ultimately create new jobs.
- The Joel Test for evaluating programming teams
- The 10 Technologies that Will Help You Stay Employed
- Menlo Innovations
What is AOL Server and ACS?
AOLserver is America Online’s Open-Source web server. Originally built by NaviSoft, before it was acquired by AOL, it is the backbone of one of the largest and busiest production environments in the world. AOLserver is a multithreaded, Tcl-enabled web server used for large scale, dynamic web sites. It was revised and released as open source in 1999. Phil Greenspun, the author of Philip and Alex’s Guide to Web Publishing strongly recommends AOL server and his company built their free ArsDigita Community System on AOLserver.
OpenAcs is a tookit for building web Applications, which runs on the AOL Web Server.
- AOLServer: https://aolserver.github.io/
- OpenAcs: http://Openacs.org
- Tcl: http://aolserver.am.net/docs/3.0/tcldev.htm
- AOLserver Wikipedia page
ColdFusion
ColdFusion is the original and most common implementation of a tag and ECMAScript-based programming language — ColdFusion Markup Language (CFML) and CFSCRIPT, respectively — which is typically used in web application development for the generation of dynamic web pages. Originally a product of Allaire, in 2001 the company was purchased by Macromedia, who subsequently merged with Adobe Systems in 2005.
ColdFusion resembles a scripting language best suited for data-driven web sites. More advanced users can use ColdFusion as a productivity layer above a J2EE platform or use ColdFusion as middleware in a service oriented architecture, such as generating web services or Flash remoting.
Recently, ColdFusion has also become a layer to handle asynchronous events such as SMS and instant messaging via its gateway interface.
UCLA Schools featuring ColdFusion-driven websites include UCLA Extension, Theater, Film & Television, the School of Public Affairs and the Department of Economics.
- http://www.forta.com — website for Ben Forta, the Cold Fusion “Product Evangelist”
- http://www.adobe.com/products/coldfusion/ — Adobe’s site for CF
- ColdFusion Developers Journal
- Wikipedia’s extensive listing on the language and its history: http://en.wikipedia.org/wiki/Coldfusion
Python Resources
Python is an object-oriented programming language where indenting is important. It is used in web programming, among other things, and the very popular Plone Content Management System is built on Zope, which is built with Python.
- Research Buzz Article on Search Engine Specific for Python
- Search Engine Specific for Python
- Python Info
- Artima Developer: Best Practices in Enterprise Software Development
- A Conversation with Guido van Rossum – “In this six-part interview, Python creator Guido van Rossum gives insights into Python’s design goals, the source of Python programmer productivity, the implications of weak typing, and more.”
- Weak versus Strong Typing [in Python]
This article was originally posted on the UCLA Programmers Wiki. And thanks, Jim Williamson, for the last three links.
.NET Programming
Interested in doing .NET development? The resources below are good places to start:
- http://msdn.microsoft.com — This is THE reference site if you are doing .NET development.
- http://www.gotdotnet.com — Very useful .NET resource. I believe many members of the Microsoft .NET framework team frequent this site, making this an important resource if you are looking for some real expert help.
- Check out the workspaces at http://www.gotdotnet.com/community/workspaces/. Pretty darn neat. It’s an open source development community for those using .NET.
- Terrarium (http://www.gotdotnet.com/workspaces) — multi-player peer-to-peer .NET network game. This is not so much a game as it is a training tool for .NET developers. It’s a great way to learn OO programming and how to work with a framework.
- http://www.asp.net — Contains some very useful tools/projects/reference information for ASP.NET developers
-
ASP.NET on Apache webservers:
- http://httpd.apache.org/cli/ — Apache CLI sub-project (mod_aspdotnet). Uses the real Microsoft .NET framework… but this also means that it will only work on Apache 2 on Windows
- http://www.mono-project.com/ASP.NET — mono module for Apache; use this to run ASP.NET pages on a linux box
This article was originally posted by Jason Fong on the UCLA Programmers Wiki.
What is Haskell?
I just heard about this functional programming language named Haskell on this Ruby on Rails Podcast interview with Jim Vanderburgh
- http://www.haskell.org/
- http://www.haskell.org/haskellwiki/Why_Haskell_Matters
- Haskell Weekly News – a weekly newsletter covering developments in the Haskell community.
- Why is it so hard for imperative programmers to learn functional languages
- Why Haskell just works
- Haskell Study Plan
- Haskell Regular Expression Tutorial
- http://www.bolour.com/papers/monads-through-pictures.html
From the Haskell class at OSCON 2006.
“In their book, The Pragmatic Programmer, Andy Hunt and Dave Thomas recommend professional programmers learn a new programming language every year, as a means to gain new skills and perspectives. Haskell is an excellent “language of the year,” because its pure functional style encourages a different way of looking at common programming problems.
Haskell is a very powerful language with a reputation of making hard things easy, and is used today in open source projects like pugs, an implementation of Perl 6, and darcs, a distributed revision control system. Because it encourages bottom-up design and composition of larger systems from small generic parts, Haskell makes it easy to build complex systems that are easy to understand and suprisingly easy to modify.
Because Haskell is such a powerful language, ideas and techniques from it are leaking into more mainstream languages like Perl and Python, and it is also influencing on the design of Perl 6. Learning Haskell now can help you become a stronger programmer, regardless of your chosen programming language."
What is HTML and how can I learn it?
HTML, or HyperText Markup Language, is the basis for all web pages. Written in a text editor on one system it can be interpreted by web browsers on other systems. Some people learn it by saving a sample web page to their machine, using FILE / SAVE AS, then they edit that page with a text editor or commercial or free HTML Editor (such as Mozilla Composer or http://www.nvu.com). Then they look at it with their web browser FILE / OPEN FILE command. Once it looks the way they want it, they upload it to their own web server.
Mapping Resources
Some amazing things are happening with Google Map API and now Yahoo Map API.
- The Best Map-Making Sites On The Web
- Mapping in Google Spreadsheets – June 5, 2014 Duke Library Blog
- Get the Most out of Google Maps
- Google Map API Documentation
- Google Mapki – forum for sharing ideas, implementations, and help for the Google Maps API.
- Yahoo Releases Map APIs
- Yahoo Maps has an application gallery
- http://del.icio.us/tag/mapping
- https://kb.ucla.edu/link/98
- http://polymaps.org/ – Interactive JavaScript Mapping Library (uses SVG)
-
D3.js – with minimal overhead, D3 is extremely fast, supporting large datasets and dynamic behaviors for interaction and animation. And, for those common needs, D3’s functional style allows code reuse through a diverse collection of optional modules.
- Intro to D3.js – tutorial – added Oct. 21, 2014
- ColorBrewer: Color Advice for Cartography
This article was originally posted on the UCLA Programmers Wiki.
Perl resources
Perl is an extremely powerful, free and popular programming language that runs on many different platforms. It’s most notable features are regular expresions (used for pattern matching) and hashes (arrays indexed by text instead of just numbers).
-
Learning Perl
- http://learn.perl.org/
- Unofficial Perl Beginners Site http://perl-begin.berlios.de/
- http://perl-begin.berlios.de/cgi-bin/chiq_chaq/chiq.pl?What_The_Books_Dont_Teach_You
- Novice Perl Errors article http://www.perl.com/pub/a/2000/04/raceinfo.html?wwwrrr_20000502.txt
- Web Basics with LWP article http://www.perl.com/pub/a/2002/08/20/perlandlwp.html
- Free Programming Resources http://freeprogrammingresources.com/freeperl.html
- Larry Wall Slashdot Interview http://interviews.slashdot.org/article.pl?sid=02/09/06/1343222 He’s the creator of Perl.
- Randal Schwartz’ Web Techniques Perl columns http://www.stonehenge.com/merlyn/WebTechniques/
- Perl Mongers http://www.perl.org/
- Perl.com http://www.perl.com/
- $ENV{’REMOTE_USER’} gets Remote User variable
- Perl article introducing safer replacements for Matt Wright scripts http://www.perl.com/pub/a/2002/01/23/cgi.html
- NMS (New Matt Scripts?) http://nms-cgi.sourceforge.net/ source for the scripts referred to above
This article was originally posted on the UCLA Programmers Wiki.
Programming Securely
- Article on Validating Input from IBM’s Best Practices series
- Top Ten Web Security Flaws – OWASP
- Know your Enemy: Web Application Threats – Using Honeypots to learn about HTTP-based attacks
WSRP
-
WSRP Web Services for Remote Portals
- http://xml.coverpages.org/wsrp.html
- Overview of WSRP and JSR168 Standards – An interview with Michael Freedman http://portalstudio.oracle.com/pls/ops/docs/FOLDER/COMMUNITY/PDK/ARTICLES/overview.wsrp.jsr168.standards.interview.html
- Draft Primer http://www.oasis-open.org/committees/workgroup.php?wg_abbrev=wsrp-primer referred by Albert Wu
XML and Python
-
XML and Python
- The Zope web application framework is a mature high level framework written in Python. Its home site is http://www.zope.org/ —Jose
- A comparison of Zope and Cocoon (Apache’s Java XML Web Publishing Framework) is given at: http://www.arielpartners.com/arielpartners/content/public/topics/technology/technologyReviews/zopeVsCocoon —Jose
I am trying to develop an application using AJAX. Where do I find out more information?
You can find a quick AJAX primer at:
http://mi6.ais.ucla.edu/devbriefs/ajax-primer
What are Favelets / How can I modify my browser on the fly?
Favelets, or bookmarklets, are a quick and easy way to add functionality to your browsing experience. Favelets (as I will refer to them from here on) are bookmarks (i.e. favorites) for your browsers, but instead of storing a web or ftp address as a URL they store javascript which executes when the favelet is �opened.� These favelets alter the behavior of either the browser itself or the page you are on� and are easy to use as dragging and dropping to where you keep your bookmarks to save and then opening them to execute.
Some of the functionality these offer is covered by Firefox�s Web Developer Toolbar, Microsoft�s Internet Explorer Web Developer Toolbar Beta, or similar apps, but it never hurts to have things in another form. Most of these will work in IE 5 and above, NS 7+, and other modern(ish) browsers.
Viewing Page Elements
Westcivs XRAY and MRI are amazing for a quick check on page layout and styling.
Slime’s Favelets only has 5 favelets, but all are geared towards developers. You can choose to outline divs in a thin red border and/or tables in a thin blue one (you can customize hex values in the bookmarklet as well as display properties of an object and executing JavaScript code.
Centricle (note there are more here than are specifically mentioned) has a favelet called show specific elements that pops up a dialogue box that will let you choose element(s) to highlight and then ask for a color. In a similar vein you can try highlight element favorite which works somewhat similar but is slightly version. His ruler favelet is also rather handy for non-fluid layouts or confirming box model bugs.
The Page Info favelets collected on Pixy provides some scripts that range from “gee that�s kind of neat” to very useful. The page freshness link could either be presented as a link on a site or adapted to run and echo last altered dates automatically.
Resizing the Window
While JavaScript resizing windows can be something of a nuisance with pop up windows, it is more aggravating when it is applied by a site to the active window upon loading. However being to have your browser automatically adjust to standard resolution sizes in one click is extremely helpful in checking fluid layouts or how font size changes impact elastic (em) based ones.
Tantek is generally credited with coining the term favorites and the favelets page on his site has many favelets dealing with browser resizing. Zeldman has two customized move/resize favelets for 800 and 1024 width and fluid height. If you don�t use sidebars feel free to edit the moveTo values (I did).
Usability
Pixy has the ubiquitous validation favelets as well as some that alter CSS styling that may make the browsing experience easier on sights that don�t have strongly contrasting text or busy backgrounds.
Tantek has favelets for translating pages via babelfish and is pretty easy to modify. At the end of the favelet you will see something like (�&lp=it_en&tt=url’), you can change it_en (Italian to English) to whatever you wish, provided Babelfish supports it en_it would be English to Italian, zh_en would be Chinese to English, etc.
More Resources
In addition to further content at the sites mentioned above, check out bookmarklets.com and Bookmarklets at mvps.org/dmcritchie.
— http://mi6.ais.ucla.edu/devbriefs/favelets-are-fun
Why URLs shouldn't change
When websites get redesigned, updated or moved, the biggest mistake, in my opinion, is changing the URLs.
Here’s an essay from 1999 by Tim Berners-Lee explaining why URLs shouldn’t change. Cool URIs don’t change
Some of his other web style articles, can be found here.
Some of them are dated, but I particularly like the one on Bookmarkable Pages
How to get rounded corners on web pages
The traditional way to get pretty-looking corners for all your tables (and divs, and menus, and whatnot) used to involve setting a background image to the table or other element. While simple, this is a very inflexible solution. It is completely dependent on the conditions of the box at the time the background is created. What happens if some text in the box gets updated, or the user changes their text size or screen resolution, or any number of potential problems?
Clearly fixed static images are not the way to go. CSS fixes that. Actually, the upcoming CSS3 (still a work in progress as of September 2006) should allow you to give your boxes round corners with a single rule:border-radius: <length> <length>
The first length is the horizontal radius, the second is the vertical radius.
Unless this article is several years old, CSS3 is not out yet, and so we have to choose other alternatives. All of them involve an older version of CSS in some way.
Solutions for rounded corners fall into 3 categories:
- Those that use images for the corners
- Those that use no images but do use Javascript
- Those that use no images or Javascript
The first option is probably the easiest way to go for most cases, and it allows you to do more than just rounded corners. For example, you could put other decorations in the corners. While it sounds like the same solution as the old background image one, this option is different. It only uses images for the corners, using a solid color for the rest of the box, meaning the box itself can be resized without having to redo the images. These solutions usually work well on all browsers. The main drawback is that it still is dependent on images, so if you want to change the box color, you need to re-create the corner images.
The second option eliminates the need for images, but requires that users have their Javascript enabled. The power of Javascript means that a lot of advanced effects can be done without needing to upload images to your server with every change. Some browser quirks in their Javascript mean that not all solutions will work well for all browsers.
The last option uses some unusual browser tricks, and is not necessarily equal on all browsers. Nevertheless, it is extremely simple to set up. In the past, solutions using this option tended to look blocky and rough around the edges, but there are some very advanced solutions now that make use of anti-aliasing. Beware of browser incompatibilities, however.
A very good listing of rounded corners solutions can be found here:
http://www.smileycat.com/miaow/archives/000044.html
a:visited property not working in Firefox, but working in IE
When the a:visited property is customized to use a certain property (i.e., change its color when a link has been visited) with CSS you may experience the following scenario:
Let’s assume you’ve set the following property for visited links in your CSS.
a:visited {
color: #999999;
}
It works in great IE (surprising for a change :) ), but for some reason it doesn’t work in Firefox. Furthermore, other people using Firefox on other computers apparantly are finding that the visited links DO change color. So this is specific to certain machines.
Solution:
You need to update your settings in Firefox. Go to the following:
Tools > Options > Privacy > History
Remember visited pages for the last [ ] days
If that’s set to zero, than the browser keeps no record of which pages
have been visited and hence never uses the :visited styles. So set this to 1.
The Document Object Model (DOM) and what it's good for
If you develop for the web, you may have heard the term “Document Object Model” or “DOM” thrown around. You might have even used it without realizing it. The DOM is an object structure that represents web pages. It’s primary use is in Javascript, though it can crop up in other places too. Because Javascript itself is just a language, it relies on the DOM to give meaning to objects such as “window” and “document”. Without the DOM, you would have a lot of cool functions at your disposal, but nothing to use them on!
Most good Javascript references also include a layout of the DOM because it is so vital to using Javascript. However, it can be useful to see the different browser “flavors” of the DOM by itself. Here are a few resources:
- The official W3C DOM
- Gecko (Mozilla, Firefox, Netscape) DOM Reference
- Internet Explorer DOM Reference
- A nice cross-browser comparison of DOM feature availability
As stated earlier, DOM is more than just Javascript. Sometimes it can be useful to browse the DOM tree for a web page to debug problems, as you can easily see what objects fit where. You can also quickly identify where an object’s boundaries are, and how it relates to its neighbors.
Safari comes with a built-in DOM inspector, but you have to enable its Debug window to use it. Firefox comes with a DOM inspector, but is not always included by default. The OS X Firefox includes it, but for the Windows version, you must choose “Custom Install” when installing Firefox, and check “Developer Tools” when it asks you what add-ons you want. There is a Developer Toolbar for Internet Explorer which includes (amongst other things) a DOM inspector. At the time this article was written, it was still in beta, but should be usable.
Setting REMOTE_USER Apache variable in scripts
REMOTE_USER is an Apache server variable that is sometimes set on web pages. It is useful for identifying users who log in, since it can be stored in the Apache logs. It’s similar to session variables, but it’s not as easy to change.
In modperl, the simplest way to set REMOTE_USER is:$r->user("Joe Shmoe"); where $r is a RequestRec object, and “Joe Shmoe” is what we are setting REMOTE_USER to.
Note that this is the “new” way to change the user name. The “old” way looks like:$r->connection->user("Joe Shmoe");
Modperl 2.0 recommends using the first method over the latter, which is now deprecated. You may however see old code using the second method, so it is useful to be aware of it.
See the explanation of the deprecation_.
What are Microformats?
Microformats are an unofficial solution to creating small, simple, standardized solutions based on existing practices. The philosophy seems to be paying off, as rel-nofollow is supported not only by many CMS applications but also google, hcard is supported in Apple’s Mail application, “hReview”: is used in 3 Yahoo! webservices, etc. xoxo is an html outline specification similar to textile and markdown.
The Web Standards Project Dreamweaver Task Force has put together a beta plugin for Dreamweaver 8 (and theoretically MX).
http://mi6.ais.ucla.edu/devbriefs/microformats
What are some tips for making solid web forms?
Creating a form is arguably the most annoying pure (x)HTML task. This article provides resources for standards based accessibility then looks into some research into the less quantitative sides of formdom.
Meeting Accessibility Standards
For the basic nuts and bolts of making an accessible form, you can’t go wrong with checking out the relevant section of the W3C’s HTML Techniques for Web Content Accessibility Guidelines 1.0. A much more enjoyable read is the extremely informative Accessible HTML/XHTML Forms series over at the The Web Standards Project. A key step is to associate (alm)ost every input element with a label. In the example below the label is for the input type with the same id as it.
<label for="searchbox">Search this Site:</label><input type="text" id="searchbox" value="search" size="16" onblur="if (this.value == '') {this.value = 'search';}" onfocus="if (this.value == 'search') {this.value = '';}" />
The onblur/onfocus is a clean cross browser way to have the placeholder text (which is mandatory in AA / Priority 2 WCAG) remove itself when the field is selected, saving the user from having to delete the default value in the box.
Design tools are increasingly becoming accessibility friendly, as evidenced by this walkthrough for creating accessible web forms in Dreamweaver 8. HTML Tidy does it best to automatically restructure and optimize code, and it never hurts to occasionally validate your site (focusing on Section 508 which is roughly equivalent to W3C WCAG – A/Priority 1) compliance. Two convenient sites to do this are Watchfire WebXACT and Cynthia Says.
Subjective Usability
Brian Crescimanno’s A List Apart article, Sensible Forms: A Form Usability Checklist is a very user-centric article that raises a number of interesting points about form construction and behaviour. Something the article didn’t touch was the relationship of label text to their fields.
Whether to right or left align text labels for form inputs is probably a decision that depends on context. Swapnonil Mukherjee has a very compelling argument (presented in textual, pictorial, and algebriac formats) that right aligned forms require less eye movement than left aligned ones. Luke Wroblewski comes to the conclusion that (essentially) while right aligned forms save time in relation to eye movement, that is offset by the extra effort it takes to process and sort label data in them. He then gives examples of different grid structures to show how to make it easier to associate a left aligned form label with its respective field.
If you do have form labels that vary in length and rewording them would impact content, or just plain prefer right-aligned forms, quirksmode shows how to code a fairly universally rendered right-aligned form.
— from http://mi6.ais.ucla.edu/devbriefs/well-formed-forms
Technical Cheat Sheets
- This technical cheat sheet roundup by smashing magazine. has cheat sheets for Ajax, Apache, ASCII, C#, C++, CSS, Firefox, Gimp, Google, Java, Javascript, LaTeX, Microformats, MySQL, Oracle, Perl, Photoshop, PHP, Python, Regular Expressions, Ruby, Subversion, Unix, Weblog, Windows and XML.
- Web Design Cheat Sheets http://sixrevisions.com/resources/cheat_sheets_for_web_designers/ – “awesome almagamation of web design cheat sheets”, “pretty darned useful”
- http://www.cheat-sheets.org/ is attempting to be the place to go for technical cheat sheets. There’s an amazing list of programming languages and other technical and related topics, covered, including Facebook, Wikipedia and Google and their apps.
How to prevent "hotlinking" of your images on a web site
From the tutorial:
“Hotlinking” is a form of bandwidth theft. Basically, when creating a web page it is easy to link to a file (such as an image or a video) that exists on a remote (completely separate) site. Each time the web page is accessed, the file is retrieved from the remote web site.
Consider this example: You have created a personal gallery of cherished images. Someone else likes one of your images, so they post a “hotlink” to that image on a popular forum that they visit. Now that image is plucked from your web server every single time that page of the forum is viewed. It can quickly add up to thousands of requests, eating into your precious bandwidth allocation. To make matters worse, the image is so popular that it begins to appear in several other forums.
http://keystonewebsites.com/articles/hotlinking.php
How do I find what Perl modules are installed on my system?
Assuming you have perldoc installed, simply typing perldoc perllocal will give you a nicely-formatted detailed list of all the installed Perl modules.
For a simpler list that simply prints out the module names and their version numbers, there is another alternative. You must have the ExtUtils::Installed module installed in order to use it. Enter this code into a file and have Perl run it.#!/usr/local/bin/perluse ExtUtils::Installed;my $instmod = ExtUtils::Installed->new();foreach my $module ($instmod->modules()) {my $version = $instmod->version($module) || "???";
@ print “$module — $version\n”;@}
See this page from the CPAN FAQ for more details.
The Perl Cookbook contains an example program that will give an extremely thorough listing of each module (and their sub-modules) from every Perl directory you have, called pmdesc. The program can be downloaded for free at: http://examples.oreilly.com/cookbook/. It’s found in Section 12.19. This book is in UCLA’s licensed copy of O’Reilly’s Safari Online so you can read more about it there.
In a web application, how can I flash an image after a user presses a button?
We needed the ability to display an image for only a quarter of a second. This can be done using javascript. After the
tag, add these functionsfunction displayImage(){document.images[0].src = 'flashedImage.jpg'var t = setTimeout("hideImage()",250)}
function hideImage(){document.images[0].src = 'blank.gif'}
When the displayImage function is called, it will change the first image on the page to “flashedImage.jpg”. After 250 milliseconds, it will replace this image with a blank image.
<form><input type="button" value="Click to view image" onClick="displayImage()" id="displayButton"></form>
images[0] refers to the first image on the page. If you want a different image to flash, replace 0 with the appropriate number (the first image is 0, the second is 1, …).
Here is a sample page that implements this code.
CAPTCHA alternatives
If your web forms are getting spammed, and CAPTCHA isn’t a good solution, here are some possible alternatives.
- http://isc.sans.org/diary.html?storyid=1836
- http://softwareas.com/captcha-alternatives-and-end-user-attitudes
- I’ve taken to renaming our feedback pages, and then using robots.txt to prevent search engines from indexing their new names.
Jared Smith of WebAIM has compiled a series of server-side processing techniques that get rid of spam without the use of
CAPTCHA. Scripts are provided in PHP.
The scripts include:
- Detect spam-like content within submitted form elements
- Detect content within a hidden form element
- Validate the submitted form values
- Search for the same content in multiple form elements
- Generate dynamic content to ensure the form is submitted within a
specific time window or by the same user - Create a multi-stage form or form verification page
- Ensure the form is posted from your server
How to find broken links in your web site
There is a really great tool that is free to use that can check your web site for broken links. It’s called Xenu’s Link Sleuth and is a simple installer for Windows. It’s very easy to use and prints useful reports as well. There is a nice FAQ if you have questions about its use.
For more info, go here: http://home.snafu.de/tilman/xenulink.html
Short description:
Xenu’s Link Sleuth™ checks Web sites for broken links. Link verification is done on “normal” links, images, frames, plug-ins, backgrounds, local image maps, style sheets, scripts and java applets. It displays a continously updated list of URLs which you can sort by different criteria. A report can be produced at any time.
Additional features:
- Simple, no-frills user-interface
- Can re-check broken links (useful for temporary network errors)
- Simple report format, can also be e-mailed
- Executable file smaller than 1MB
- Supports SSL websites ("https:// ")
- Partial testing of ftp and gopher sites
- Detects and reports redirected URLs
- Site Map
How can I get standard cross browser font-sizes?
A short while ago I was overjoyed to rediscover an article that I lost track of long ago. I read a book endorsing the classic ALA Keyword Approach, but figured I’d follow up on the research a bit further, as I had an inkling that using a % in the body and em as the unit for elements and classes would be superior. The %/em avoids some opera issues, and makes base font size changes a bit more practical.
The incremental differences article shows at what points different browsers decide to scale text. Unfortunately the browsers tested were from, well, February 2003. Using the browsers on hand I worked on providing a rough update to the guide.
60%, 69%, 76%, 83%, and 89% should render fonts at the same size across all major browsers.
Using 60% is the most friendly to those used to pixel units, as 1.4em is close to 14px, 0.8em is close to 8px, etc. 76% and 83% are probably the most logical choices if you wish to keep your paragraphs at 1em and then base other elements around that.
One downside of this method is users who use a custom stylesheet to set a base font size will most likely end up with large fonts, which could make using 76% or 83% a more attractive option.
CSS code would look something like the following:
body { font-size: 76%; }p { font-size: 1em; }h1 { font size: 1.8em; }h2 { font-size: 1.6em; }li { font-size: .9em; }/** etc **/What's an easy way to set up a WAMP test environment?
Many popular Content Management Systems (CMS) run in a php/mysql environment. Their dynamic nature makes traditional develop on workstation and upload less useful, and editing live on the server is not always desirable. Luckily there are straightforward ways to set up a WAMP (Windows Apache MySQL PHP) environment on a windows test machine!
http://www.wampserver.com/ offers a solid, with a simple setup consisting of a single install wizard. It is NOT hard enough for a production environment, but it’s fine for testing or internal sharing.
http://www.uniformserver.com/ is orientated towards production environments, but has not been updated for a quite a while as of the writing of this article (though it is once again an active product).
On a UNIX / Linux system, how do I view which shared libraries a program needs?
To get a list of shared libraries that a program needs:
ldd /path/to/program
This will give you a list of the required shared libraries and the paths to the files that are being used for each requirement. If a file cannot be found for a particular requirement, it will say “file not found”. This can be caused by libraries being installed in non-standard paths. You can fix this by setting the LD_LIBRARY_PATH environment variable and setting it to the paths of any additional libraries. It’s sort of like the PATH environment variable, but for libraries.
Security Testing your Apache Configuration with Nikto
Is your Apache configuration secure? This is a helpful article to help you find out.
http://www.howtoforge.org/apache_security_testing_with_nikto
How do I easily install the software for a LAMP server
XAMPP is an easy to install Apache Distribution for Linux and Windows. The package includes the Apache web server, MySQL, SQLite, PHP, Perl, a FTP-Server …
SPML
SPML Service Provisioning Markup Language http://www.openspml.org _Mentioned 9 Jul 2003 by Albert Wu as :It is another emerging XML standard currently headed for ratificadtion in OASIS. SPML compliments SAML in that SPML provide a standard way of describing how to assign and revoke access to resources where as SAML describes how to query for (and respond to) information needed to permit/deny access to resources."
pubcookie
IMS
-
IMS The IMS Abstract Framework has been published at http://www.imsglobal.org/af/index.cfm The Abstract Framework describes the general architectural assumptions that underlie IMS specifications and other technical documents. This is a living document which is likely to evolve and be extended to include areas not covered in the current version. Fred Beshears fmb@SOCRATES.BERKELEY.EDU 17 Oct 2003
- [The highest level “formal” metadata document is here:http://www.imsglobal.org/metadata/imsmdv1p2p1/imsmd_infov1p2p1.html]
Hibernate
Hibernate [Criteria Queries in Hibernate:http://today.java.net/pub/a/today/2004/07/19/Hibernate.html] James Elliot shows you how to use simple criteria and compound criteria, apply criteria to associations, and query by example using Hibernate, in this excerpt (in PDF format) from Hibernate: A Developer’s Notebook. http://www.oreilly.com/catalog/hibernate/
eduPerson
eduPerson is an LDAP object class that includes widely-used person attributes in higher education http://www.educause.edu/eduperson/
How do I count the number of times a word or phrase occurs in a string?
Assuming that you don’t have a built-in function that does this in one shot…
Here is a trick for quickly (i.e. using minimal typing effort) counting the number of times a string occurs in a larger string:
Below is some pseudocode for searching for a string called “needle” in a larger string called “haystack” :
numOccur = (length(haystack) - length(replace(haystack, needle, ""))) / length(needle)
note:
replace(string a, string b, string c) modifies a by replacing each occurence of b with c
Why does this work? What we’re doing is finding the difference in length of the haystack after we remove all occurrences of the needle. If we divide this difference by the length of the needle, then we get the number of needles that were removed. This is equivalent to the number of occurrences of the needle in the haystack.
An Example:
The following is a SQL query for PostgreSQL that puts this to use. This analyzes a collection of article titles and abstracts and counts the total number of occurences of each phrase in a list of phrases:
SELECT a.phrase, sum((length(b.title) - length(replace(b.title, a.phrase, ''))) / length(a.phrase)) + sum((length(b.abstract) - length(replace(b.abstract, a.phrase, ''))) / length(a.phrase))FROM phrases AS a, articles AS bGROUP BY a.phrase
Django
What is Django?
According to the Django website “Django is a high-level Python Web framework that encourages rapid development and clean, pragmatic design.” Django is sometimes compared to Ruby on Rails. The two frameworks have somewhat similar philosophies. Both systems abstract the database and both provide built-in web servers for development as well as support for Apache and litehttp. Both systems utilize the Model-View-Controller architecture.
One very useful feature of Django is that it can automatically generate an entire administration site for you (see tutorial part 2 in the documentation link below).
Links / Documents
There’s a great intro to Django presentation given by one of the developers at a Google TechTalk. It is on Google Video.
Official Django Documentation includes a (currently) 4 part tutorial that gets you quite familiar with Django in a couple of hours.
How do I use Perl to create an animated gif from a large number of images?
Install this Perl module using cpan (or your favorite method for installing Perl modules):
Image::Magick
The following script will take all files in the “input” directory and create an animated gif. The order of the frames is the same as the alphabetical order of the files. The delay parameter in the final Write call sets the delay in between frames (in units of 1/100 of a second).
#! /usr/bin/perluse strict;use Image::Magick;opendir(DH, 'input');my $image = Image::Magick->new();my @files = readdir(DH);@files = sort @files;foreach my $file (@files) { next if ($file =~ /^\.{1,2}$/); print "input/$file\n"; $image->Read(filename=>"input/$file");}$image->Write(filename=>"animated.gif", delay=>"100");
~
How do I force an image to reload on a web page?
It’s easy to make an image reload just by refreshing a page in your browser. Reloading just the image without forcing the whole page to refresh is a little trickier.
This is a useful technique to use if you have a rotating image that you would like to cycle every few seconds, or for a site that does photo editing and shows the effects to the user in real time.
Here is a simple way of doing this in Javascript:
function reloadImage() {
_ if (document.images) {_
_ var now = new Date();_
_ document.images.randimg.src = “/randimg?” + now.getTime();_
_ setTimeout(“reloadImage()”, 5000);_
_ }_
}
setTimeout(“reloadImage()”, 5000);
Add this to the head element of any page you want to use it in. In this code, it assumes your image has an id of “randimg”. Change this if you need to, but make sure that the id of the image matches the id used in the Javascript. Also make sure that the src we are changing it to is the same as the src for your image. And don’t forget the question mark, it’s important! (We’re using a trick that fools your browser into thinking the image hasn’t already been cached, by adding a dummy parameter, the current time, to the URL.)
This example assumes you want the image to refresh every 5 seconds. Change the second parameter of setTimeout to anything you want, it’s the time to wait in milliseconds. If you don’t want to auto-refresh the image, remove both lines with setTimeout and then you can call reloadImage just like any other function. For example, you could add an onClick event to a button and have that button reload the image. Note that getTime is always needed, even if you’re not using the function as an auto-refresh! It’s needed for the cache trick, explained above.
If you’re using Plone, you won’t add this to any head element but rather through your Javascript registry at /portal_javascripts. Remember, this script will be on ALL your pages, so don’t give any images an id of “randimg” (or whatever you chose) unless you want them rotated.
Web Development Standards - Best Practices
For better or for worse, everyone developing web sites at UCLA abides by different rules. For those of us who build for public consumption, what are the best practices — considerate of time and maintenance limitations — to get a little closer to building better, lasting sites? How does the audience to your site play into adjusting the standards, from playing it old school to going cutting edge? Where does the CMS solution play a role in separating content editors from designers and programmers?
PROGRAMMING
- XHTML/HTML Strict, Transitional
- DOCTYPE
-
META
- Dynamic leads vs. low-maintenance tags
-
CSS
- 1.0 or Beyond
- CSS Validator
- Using H’s, or Disabling (ie. May 1st Reboot)
- Forms
- Label
- Validation / Error checking (JavaScript, PHP)
- Images
- ALT vs. Title
- Accessibility
- Embedding
- JavaScript
- Including NOSCRIPT
- Special Characters
- RSS Feeds
DESIGN
- Page Layout
- Typography
- Width / Screen Resolutions
- 800×600 vs. 1024×768+ (or users with resolutions > 744 vs. > 968, the widths minus the worst-case scenario browser chrome width of 56px)
- 960px Width
- Strict vs. Elastic
- Graphics
- Photoshop: Save for Web
- PNG and IE
- Browser Testing
- The Top 70%: IE 6, Firefox 1.X
- The Middle 20%: IE 7, Firefox 2
- The Bottom 10%: Safari, IE 5.5 / 5.0, Mozilla, Netscape, Opera, Camino…
- Backwards compatibility until…
STRATEGY
- Search Engine Optimization
-
Friendly URLs
- ModRewrite
- Heatmaps
- Search
- Options outside the Portal
Additional Resources
- Zeldman: Designing With Web Standards
- Developing with Web Standards
- Web Page Development: Best Practices
- PLUG-IN – Web Developer extension for Firefox/Mozilla
- Stats
- Google Analytics – free for multiple domains/users up to 5m pageviews/month
- CrazyEgg Heatmaps
Including sites in main UCLA search engine
The Autonomy Search Engine used by the Vignette Portal Project spiders all campus websites starting with ucla.edu, uclaextension.edu, uclabruins.com, uclastore.com, uclaalumni.net, juei.org, and uclaconferencecenter.com.
This search process is currently being used by the campus homepage and all pages within the Business and Administrative Services Portal. The algorithm weighs results according to:
- title
- meta name=“description”
- meta name=“keywords”
Of course with the breadth of content being spidered, there is much contention for the top results retrieved. For that reason, the Ultraseek engine is offered as an optional search only after the results of the first search come back.
Also, the AIS Portal Team has developed a Favorite Site table that all search criteria entered is also checked against to bring key URL sites a higher ranking. If your site does not get the prominence anticipated, please contact the AIS Portal Team (email aisportalteam@ais.ucla.edu) for inclusion into the Favorite Site routine.
For more information on the UltraSeek option, go to http://ultraseek.library.ucla.edu:8765/help/ and select “Add URL” from the navbar on the right.
One-stop Ruby on Rails packages
You want Ruby on Rails, and you want it now. The trouble is, you don’t have Apache or MySQL on your home computer. You could install and configure those huge programs, but you’re not trying to turn your desktop into a full web server. You could put Ruby on Rails onto your big production server at work, but you just want to try it out, and you may not have the priveledges to install it anyway.
Fortunately there’s a third option, that doesn’t involve complicated dependencies, hand compilation, or ritualistic chicken sacrifice (just in case you were wondering). Actually, 3 third options, depending on what platform you’re running at home. All of them are easy to set up, and they deliver everything you need for a full-fledged Ruby on Rails environment.
- Windows has Instant Rails
- Linux has ROROX
- Mac OS X has Locomotive
Instant Rails has plans to make Linux, OSX, and BSD ports, but as of this writing, they have yet to appear. These 3 packages have their own nuances, but anything that’s standard Ruby on Rails should work well on them. (Most of the differences have to do with what web and database servers they use.)
url
A URL, short for Uniform Resource Locator, is like a telephone number in that it gives a unique way of locating any web page in the world.
- URL official specification http://www.w3.org/Addressing/URL/url-spec.html
For Web Developers (or for users to request of their site)
A “friendly” URL is an address that is human-readable, void of unnecessary technical information, most common if the page is dynamically generated.
- “Unfriendly” : …ucla.edu/example.php?title=UCLA%20to%20Lead%20National%20Effort….&date=2006-07-12%2009%3A45%3A08
- “Friendly” : …ucla.edu/2006/07/12/ucla-to-lead-national-effort/
In addition, a technique called “URL rewriting” can be used to create friendly URLs and improve search rankings. A good overview of what it is, why it can be useful and how to do it: http://coding.smashingmagazine.com/2011/11/02/introduction-to-url-rewriting/
SSL Configuration Generator
This Mozilla tool helps sysadmins properly configure openSSL for various platforms.
https://mozilla.github.io/server-side-tls/ssl-config-generator/
iOS Programming
- Apple iOS Development
- Apple Developer Tutorials
- Materials for a Stanford course on developing iOS apps are available for free online.
Apache 2 Virtual Hosts File
To find the home directory (DocumentRoot) of a virtual host’s directory on an Apache 2 server, use the command less /usr/local/apache2/conf/extra/httpd-vhosts.conf to read the virtual host config file of Apache, and then search for the hostname to find the home directory of the virtual host you want on the server. It will be a multi-line entry
How to provide your own customized WAYF page
It is annoying to have a such long list in InCommon, but your users are limited to just several schools. Here is my solution:
1. Install apache-tomcat server on port 7080, the same machine runs SP but in
different port.
2. change wayfURL in SessionInitiator
http://yourdomain:7080/index.jspThe following is a sample index.jsp I am using:
<html><% String timeInMillis = ""+System.currentTimeMillis();%><body><center> <h1>University of California Grid Virtual Desktop</h1> <div class="selector"> <div class="list"> <h2>Which campus are you from: </h2> <form method="get" action="https://wayf.incommonfederation.org/InCommon/WAYF"> <p> <input type="hidden" name="shire" value="https://youdomain/Shibboleth.sso/SAML/POST" /> <input type="hidden" name="target" value="cookie" /> <input type="hidden" name="providerId" value="https://yourdomain/incommon" /> <input type="hidden" name="time" value="<%=timeInMillis%>" /> <input type="hidden" name="action" value="selection" /> <select name="origin"> <option value="urn:mace:incommon:ucop.edu"> University of California - Office of the President </option> <option value="urn:mace:incommon:berkeley.edu"> University of California, Berkeley </option> <option value="urn:mace:incommon:ucdavis.edu"> University of California, Davis </option> <option value="urn:mace:incommon:ucmerced.edu"> University of California, Merced </option> <option value="urn:mace:incommon:ucr.edu"> University of California, Riverside </option> <option value="urn:mace:incommon:uci.edu"> University of California-Irvine </option> <option value="urn:mace:incommon:ucla.edu"> University of California-Los Angeles </option> <option value="urn:mace:incommon:ucsd.edu"> University of California-San Diego </option> </select> <input type="submit" value="Select" /> <select name="cache"> <option value="false" selected> Do not remember <option value="session"> Remember for session <option value="perm"> Remember for a week </select> </p> </form> </div></body></html>
Building an OpenSocial Gadget with GWT and Hosting on Your Website
For this tutorial I use the following parameters:
$your_repository = location of your Subversion repository.
$your_namespace_dots = the namespace of your unit with dots.
$your_namespace_folders = the namespace of your unit with folder delimiters.
$your_website = the URL of a web site you control.
I also assume you have a cygwin installed and Z:\source (mounted as /z/source) as your local source location. You can adjust as necessary, use an alternative Subversion client, or omit the Subversion sections as desired. I also assume you have GWT downloaded an unpacked to C:\Source\gwt-windows-1.5.2\.
- If not already done, install subversion for cygwin.
- Set SVN_EDITOR to /usr/bin/vi.
- List the folders in the Subversion repository (to ensure credentials are set).
svn ls $your_repository - Create a folder for the project in Subversion (depending on the structure of your repository and whether or not you place your gadget withing another project which already has branch, tags, and trunk you may omit the subfolders).
svn mkdir $your_repository/YourGadget
svn mkdir $your_repository/YourGadget/branch
svn mkdir $your_repository/YourGadget/tags
svn mkdir $your_repository/YourGadget/trunk - Check this out to Z:\source\YourGadget
svn co $your_repository/YourGadget/trunk /z/Source/YourGadget - Run the GWT applicationCreator in Windows.
C:\Source\gwt-windows-1.5.2\applicationCreator.cmd -out Z:\source\YourGadget $your_namespace_dots.gwt.client.YourGadget - Add the source folder to Subversion.
cd /z/source/YourGadget
svn add src - Open JDeveloper. Add project.
- Add to YourGadget.gwt.xml, references to C:\Source\gwt-windows-1.5.2\gwt-dev-windows.jar and C:\Source\gwt-windows-1.5.2\gwt-user.jar, build.
- Test by running YourGadget-shell.cmd.
- That’s a GWT application. Now let’s make it a gadget.
- Add gadget specification to YourGadget/src/$your_namespace_folders/gwt/public/yourgadget.xml as:
<?xml version=“1.0” encoding=“UTF-8” ?>


  <![CDATA[
]]> - The gadget specification is sufficient to host your gadget in an OpenSocial container. The following 3 steps show how you can put in on a regular web page.
- Create a web page yourgadgetcontainer.html in the same location as:
<!DOCTYPE html>


Test
Test
- Create yourgadget.js as:
document.write(‘’);
document.write(‘’);
document.write(‘’);
document.write(‘’);
document.write(‘’);
document.write(‘’);
document.write(‘’);
document.write(’
document.write(’ ');document.write(' renderGadgets();');document.write(' ’);
- Create yourgadgetbase.js as:
var specUrl0 = ‘$your_website/YourGadget/yourgadget.xml’;
// This container lays out and renders gadgets itself.
function renderGadgets() {
var div0 = document.createElement(‘div’);
div0.id = “gadget-chrome-x”;
div0.class = “gadgets-gadget-chrome”;
document.getElementById(‘opensocial-container’).appendChild(div0);
}
- Compile the code.
Z:\source\YourGadget>YourGadget-compile.cmd - Copy the target from the www folder to the designated location, renaming the folder by removing $your_namespace_dots.
- Check it out at $your_website/YourGadget/yourgadgetcontainer.html.
- Add the new files to the repository and commit the changes.
svn add $your_namespace_folders/gwt/public/yourgadget*
svn commit
Calling makeRequest in GWT to Get External Data for an Opensocial Gadget and Creating an Overlay
For this tutorial I use the following parameters:
$your_namespace_dots = the namespace of your unit with dots.
$your_namespace_folders = the namespace of your unit with folder delimiters.
$your_website = the URL of a web site you control.
Since we may want to get information that’s not necessarily on the server our gadget is hosted on, cross site scripting restrictions limit us to using makeRequest to get external data. This tutorial builds on a previous one.
- Create a Java class YourRecord.java for the overlay type in the client folder (you may want to reorganize this class for reuse later) as:
package $your_namespace_dots.gwt.client;
import com.google.gwt.core.client.JavaScriptObject;
class YourRecord extends JavaScriptObject {
// Overlay types always have protected, zero-arg ctors
protected YourRecord() { }
// Typically, methods on overlay types are JSNI
public final native String getTitle() /{/;
return this.data.getElementsByTagName(“title”).item(0).textContent;
}
}
- To the YourGadget class add a reference to the EntryPoint:
public EntryPoint entryPoint = this;
In Javascript methods that call Java methods, we can usually use “this” like:
this.@$your_namespace_dots.gwt.client.SomeGadget::handleResponse(L$your_namespace_folders/gwt/client/SomeObject;)(obj);
However, we’re going to put the method call in a callback so “this” is not what we want. - Now add two methods. The JSNI method calls makeRequest and and the makeRequest callback calls the Java method which applies the overlay.
public void handleResponse(YourRecord rr) {
Window.alert(rr.getTitle());
}
native void callMakeRequest(EntryPoint ep) /{/;
$wnd[“response”] = function(obj) {
ep.@$your_namespace_dots.gwt.client.YourGadget::handleResponse(L$your_namespace_folders/gwt/client/YourRecord;)(obj);
};
var params = {};
params[gadgets.io.RequestParameters.CONTENT_TYPE] = gadgets.io.ContentType.DOM;
var url = “http://www.clicc.ucla.edu/rss/laptops.php”;
gadgets.io.makeRequest(url, response, params);
} - Add a call to the method in a suitable place. For instance, in the button’s onClick event:
callMakeRequest(entryPoint); - Compile the code, copy it to your server (don’t forget to rename the folder), and check it out at $your_website/YourGadget/yourgadgetcontainer.html.
- Add the new file to the repostory, commit then work on adding functionality to the overlay and making handleResponse do what you want with the record.
svn add $your_namespace_folders/gwt/client/YourRecord.java
svn commit
Passing Parameters to an OpenSocial Gadget Hosted in Regular HTML
Gadget parameters are UserPref’s in the gadget specification. When a user adds a gadget to an OpenSocial container they can set these when they add the gadget to the container or later once the gadget is in place using the “settings” link. We have to reproduce this in our plain HTML container by taking parameters passed to the script and setting UserPrefs directly through cookie modification.
On the web page the script is included like:
Added to this file is:
function parseQuery ( query ) { var Params = new Object (); if ( ! query ) return Params; // return empty object var Pairs = query.split(/[;&]/); for ( var i = 0; i < Pairs.length; i++ ) { var KeyVal = Pairs[i].split('='); if ( ! KeyVal || KeyVal.length != 2 ) continue; var key = unescape( KeyVal[0] ); var val = unescape( KeyVal[1] ); //val = val.replace(/\+/g, ' '); Params[key] = val; } return Params;}function setUserPrefs(term, course) { document.cookie = "gadgetUserPrefs-0=term=" + term + "&course=" +course + "; expires=-1; path=/test/CourseResourcesGadget/; domain=sandbox.library.ucla.edu";}var scripts = document.getElementsByTagName('script');var myScript = scripts[0];var queryString = myScript.src.replace(/^[^\?]+\??/,'');var params = parseQuery( queryString );setUserPrefs(params.term, params.course);
This new section parses the parameters passed to the script and sets the cookie that relates to UserPrefs.
Has anyone tried CouchDB?
Has anyone tried CouchDB? It’s a document database.
Discovered via http://reddit.com
Please add your experiences or comments or alternatives here. Thanks
"Requested URL not found" when using Apache with mod_alias and mod_rewrite
Problem: My web server is Apache. When I try to load a web page, I get an error message that says “The requested URL /some/file/on/the/server was not found on this server”. However, /some/file/on/the/server does exist in the server’s filesystem. What is going on?
Cause: One of the possibilities is that you are using both mod_rewrite and mod_alias and something is mis-configured. Some people have recommended against using both modules together and I agree. At least in Apache 2.0+, order of execution among the modules (i.e. which module runs before which) is determined by some priorities hard-coded into the modules and cannot be easily determined by the users. This makes your system’s behavior uncertain. (For mod_alias and mod_rewrite, the official documentation of Apache 2.2’s mod_rewrite seems to imply that mod_alias is executed before mod_rewrite. I’m not sure if this also applies to other versions, machines or modules.)
The Alias directive from mod_alias converts URLs into file-paths. E.g.
Alias /image/ /home/www/image/basically says that if the URL starts with /image, look for the file under the path /home/www/image/. Something interesting (and confusing) happens when it is used together with the per-directory (i.e. defined in .htaccess) RewriteRule from mod_rewrite.
Let say Alias is executed first and RewriteRule second. If the RewriteRule matches the URL, “the rewritten request has to be re-injected into the Apache kernel, as if it were a new request” (per the doc for mod_rewrite). Then the new request’s URL is actually the rewritten (by RewriteRule) form of the file path given by the Alias directive. This is probably not want you want.
Confusing? Here is an example. Let say the server’s domain name is yourname.com. The directory /var/wwwtest has three files (one.html, two.html and three.html). The main config file httpd.conf contains:
DocumentRoot /var/www/Alias /test/ /var/wwwtest/
and /var/wwwtest/.htaccess contains:
RewriteEngine OnRewriteRule two.html three.html
For the request at http://www.yourname.com/test/one.html, we expect Apache to read /var/wwwtest/one.html. The actual process:
Request: /test/one.htmlInternal Processing: /test/one.html -> /var/wwwtest/one.html (per-server Alias: match)Result: /var/wwwtest/one.html
That works as expected. Now, for the request at http://www.yourname.com/test/two.html, we expect Apache to read /var/wwwtest/three.html. The actual process:
Request: /test/two.htmlInternal Processing: /test/one.html -> /var/wwwtest/one.html (per-server Alias: match) /var/wwwtest/two.html -> /var/wwwtest/three.html (per-dir RewriteRule: match) [processing restarted] /var/wwwtest/three.html -> /var/wwwtest/three.html (per-dir Alias: NOT match)Result: /var/wwwtest/three.html
That does not work as expected and we are greeted by a 404 error. Apache thinks that the URL-path is /var/wwwtest/three.html and looks for the file under DocumentRoot, i.e. /var/www/var/wwwtest/three.html. Suppose there is no “var” sub-directory under /var/www, then you will see a line in error.log that says “/var/www/var” does not exists.
Solution: If you have to use the Alias-RewriteRule combination described above, use the RewriteBase directive in mod_rewrite together with RewriteBase. In our example, since three.html should be under the URL base /test conceptually, we add the following to /var/wwwtest/.htaccess:
RewriteBase /test
As before, for the request at http://www.yourname.com/test/two.html, we expect Apache to read /var/wwwtest/three.html. The actual process:
Request: /test/two.htmlInternal Processing: /test/one.html -> /var/wwwtest/one.html (per-server Alias: match) /var/wwwtest/two.html -> /var/wwwtest/three.html (per-dir RewriteRule: match) /var/wwwtest/two.html -> /test/three.html (per-dir RewriteBase) [processing restarted] /test/wwwtest/three.html -> /var/wwwtest/three.html (per-dir Alias: match)Result: /var/wwwtest/three.html
Now Apache reads and displays /var/wwwtest/three.html as expected.
Suspendable Requests for LAMP systems?
The traditional way of handling dynamically-generated Web content is to have the Web server use multiple threads, even keeping a thread pool. Then whatever program that generates the content acts as quickly as possible. As long as there are a lot of threads, they are available quickly (or pre-created) and the program does not take a long time to run (which is true for a lot of Web applications), this model works fine.
However, things are changing. People are using REST or SOAP Web services (e.g. Google APIs), AJAX, etc. AJAX has increased the number of simultaneous requests a lot. Web services, AJAX polling and Comet means that each request can potentially take a long time. Collectively, these requests can take up a lot of threads, creating a scaling bottleneck. Notice that these threads can spend a lot of time doing nothing (i.e. waiting for something else).
The upcoming Servlet 3.0 standard will support Suspendable Requests. Jetty, a Java Web server and servlet container, supports continuation that they claim is about the same thing. The principle is that if a dynamic Web program (JSP script, PHP script, etc.) has to wait for some event, the program can be put to sleep. Its thread is reclaimed by the Web server to serve other requests. When that event happens, the Web server wakes up the Web program and runs it in another thread.
On the other hand, I have not seen anything like this in PHP. A lot of systems are using Apache + MySQL + PHP setups, perhaps more than Java + Servlet setups. Does anyone know if there is anything like Suspendable Requests for LAMP systems?
Debugging Web Applications with Selenium
Selenium
Selenium is an open-source web application testing system that records and generates testing scripts that can be used for debugging purposes.
Selenium IDE is a Mozilla Firefox plugin that enables users to easily create testing scripts by directly recording user interactions with the web application.
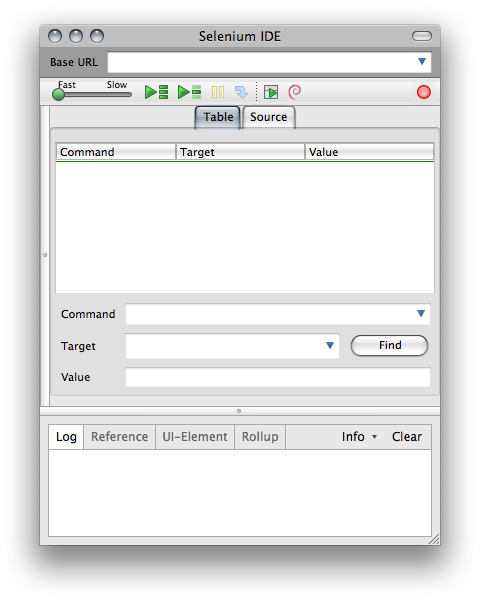
Commands are recorded as they happen, and are listed in the table. You can also go back and edit commands if you want to change anything later.
Additional commands like captureEntirePageScreenshot that can be inserted between commands at critical points where a screenshot would be helpful.
Selenium would be best used for debugging functionality after upgrades and new feature rollouts.
There is a helpful tutorial on CodeDiesel that shows some of the basics of working with Selenium.
ENVI 4.6 and 4.6.1 Java problems
ENVI 4.6/4.6.1 does not run.
This problem occurs both on upgrades from older versions of ENVI as well as on computers where ENVI 4.6 or 4.6.1 is the first version of ENVI to be installed.
Further examination of the error may report a message about Java incompatibilities, such as: _ Java Runtime Environment (JRE) or Java Development Kit (JDK) must be available in order to run Idlde. No Java virtual machine was found after searching the following locations list of locations searched_
This bug is documented by ITTVIS here:
http://download.ittvis.com/envi_4.6.1/Release_Notes.html
ENVI 4.6.1 requires that an old version of Java (5.0 Update 11) be installed to access the help files. The release notes above say “5.0 Update 11 or later”, however in SSC’s experience ENVI normally runs fine with Java 6, even 64-bit versions.
The steps:
- Download and install the Java Runtime Environment version 5.0 update 11. The JRE is a free download available directly from Sun Microsystems at: http://java.sun.com/products/archive/j2se/5.0_11/index.html
Note: If your system already has version 5.0 update 11 (or later) of the JRE, proceed to step 3 to configure IDL to use the installed version. - In many cases, the JRE installation process will place the required files in your system path, where they are available to IDL. In this situation, the IDL Workbench will now start without errors, and you do not need to take any additional action.
If you attempt to start the IDL Workbench and receive the same error dialog, proceed to step 3. - Modify the IDL Workbench initialization file to use the JRE installed on your system. You will need to modify the IDL Workbench .ini file located in the idlde subdirectory of your IDL 7.0.8 installation. Do one of the following:
- Windows Systems
Open the idlde.ini file and add the following two lines at the beginning of the file:
-vm
C:\Program Files\Java\jre1.5.0_11\bin
Macintosh Systems
The Macintosh Operating system supplies its own version of the JRE. No additional configuration should be necessary.
Linux Systems
Open the idlde.linux.×86.ini file and add the following two lines at the beginning of the file:
-vm
/usr/java/jre/bin
where the second line is the directory that contains the file javaws on your system.
ENVI 4.6 or 4.6.1 Help does not work
Most commonly seen on a Windows x64 machine running Java 6 64-bit— ENVI and IDL (64-bit) both load fine, IDL Help loads fine, but ENVI Help does not start.
The problem is only partially documented by ITTVIS, here:
https://kb.ucla.edu/link/1168
http://download.ittvis.com/envi_4.6.1/Release_Notes.html
The fundamental issue is that ENVI 4.6 and 4.6.1 require an old version of Java to run the help files (5.0 Update 11 is mentioned).
SSC has had success getting ENVI 4.6 and 4.61 running on 64-bit Windows system with Java 6 64-bit, but the common issue is that ENVI Help does not start. There is no error message most of the time. IDL Help does start.
The reason that ENVI 4.6 and 4.6.1 Help does not run is that, not only does it require Java 5.0, it specifically requires Java 32-bit to be installed.
Reference:
http://forum.inforest.gr/index.php?topic=11.0
To correct this problem:-——————-
If attempting to start ENVI 4.6.1/4.6 Help on Windows fails with an error or you receive no response try the following steps. Note that administrative privileges may be required to complete these steps.
1. Download and install the Java Runtime Environment (JRE) version 5.0 update 11 32-bit.
Note: If your system already has JRE version 5.0 update 11 32-bit (or later), proceed to configuring ENVI Help initialization file to use the installed Java version.
Note: 64-bit Windows may only have a 64-bit JRE installed, but not a 32-bit JRE. The IDL workbench, IDL Help and ENVI Help always require a 32-bit JRE. If you encounter the error “JVM terminated. Exit code=-1”, it may be caused by the missing 32-bit JRE. In that case, it will be necessary to install a 32-bit JRE on the system and then configure the help system as described below.
A compatible version of the JRE is a free download available directly from Sun Microsystems at:
http://java.sun.com/products/archive/j2se/5.0_11/index.html
C:\Program Files\ITT\IDL708\products\envi46\help\eclipse\envihelp.ini ( ENVI 4.6.1 )or
C:\Program Files\ITT\IDL706\products\envi46\help\eclipse\envihelp.ini ( ENVI 4.6 )
and add the following two lines at the beginning of the envihelp.ini file:
-vm
C:\Program Files (x86)\Java\jre1.5.0_11\bin
where the second line should show the path to the actual directory that contains the file javaw.exe on your system.
After modification, the resulting contents of the “envihelp.ini” file might would look like this:
-vm
C:\Program Files (x86)\Java\jre1.5.0_11\bin
-nosplash
-application
com.rsi.idldt.helpApplication
-data
@user.home/.idl/itt/envihelp-46
Mobile Web Resources
Resources for developing mobile web applications.
Introduction to the Mobile Web by MIT
https://spaces.internet2.edu/download/attachments/10520416/MIT_Mobile_Web_2_0_Overview.pdf?version=1
This should be your first starting point. Excellent resources on mobile web strategy, implementation and development. MIT’s framework is an excellent model to follow.
Developing the MIT Mobile Web
http://www.slideshare.net/shubeta/developing-the-mit-mobile-web-presentation
Mobile Design and Development by Brian Fling
http://www.mobiledesign.org
If you are on campus, you can access that for free via Safari books:
http://proquest.safaribooksonline.com/9780596806231
An excellent resource that provides great insight, background and information on creating mobile websites and applications. The book is very thorough and covers everything from basic design design and development principles to more advanced topics such as markup and and styling techniques.
Mobile Web Design Trends for 2009
http://www.smashingmagazine.com/2009/01/13/mobile-web-design-trends-2009
A great article that details mobile web design trends and strategies.
Provisioning and Managing Windows Clients
For those looking for ways to deploy and efficiently manage the full life cycle of Windows clients (and servers) you might want to try the two MS System Center products listed below.
There is overhead involved in terms of setting up and maintaining a server to host these systems but it should pay off in the long run if your environment is a good fit for this solution.
MS System Center Configuration Manager helps you provision new and existing clients without the need to use a third party imaging software or the constraints of traditional system images. You can create multiple vanilla Windows OS images “linked” to third party applications and deploy them from the server, if the client is already part of the system, or through PXE boot if it is new hardware. You can also push and repair applications, among other things.
This link has general information about MS SCCM:
http://www.microsoft.com/systemcenter/en/us/configuration-manager.aspx
This link has an easier to read list of the major features of MS SCCM.
http://www.microsoft.com/systemcenter/en/us/dynamic-desktops.aspx
MS System Center Operations Manager is geared more towards daily system monitoring and management, mostly of servers but also applicable to clients.
This link has general information about MS SCOM
http://www.microsoft.com/systemcenter/en/us/operations-manager.aspx
Do you know of anyone at UCLA using Drupal right now?
Yes. Me amongst others.
Drupal currently supports the Semel Institute www.semel.ucla.edu, and uses Organic Groups to host 60+ center and program sites; the UCLA Family Commons (www.uclacommons.com) was developed in-house by Center for Community Health
School of Public Affairs www.publicaffairs.ucla.edu used an external developer to implement their current site.
Scope of environment variables in shells and shell scripts
A environment variable defined in a shell (or a shell script) stays defined everywhere, including inside new shells (or shell scripts) executed within the shell, until the shell (or the shell script) terminates or the variable gets unset explicitly. E.g.
script1.sh contains:
export VAR1=testing
bash script2.sh
script2.sh contains:
echo $VAR1
Then executing script1.sh gives the following:
bash-3.00$ bash script1.sh
testing
bash-3.00$ echo $VAR1
bash-3.00$ echo $UNDEFINED_VAR
bash-3.00$
If a parent script defines a variable and then a child script redefines it, the child sees the new value but the parent retains the old value. E.g.
script1.sh contains:
export VAR1=testing
bash script2.sh
echo $VAR1
script2.sh contains:
VAR1=overwritten
echo $VAR1
Then executing script1.sh gives the following:
bash-3.00$ bash script1.sh
overwritten
testing
bash-3.00$
Free/open source information retrieval libraries
What are they and why using one
Information retrieval libraries are software libraries that provides functionality for searching within databases and documents within them. In particular, this often refers to searching text document for combinations of words and/or phrases.
Database software such as MySQL are very good at storing and managing data but many of them are poor at searching text. One can bundle an information retrieval library with database software to add good searching capability to databases. Take websites for an example. The main database can handle insert/update/delete/view operations of articles and the search library can handle the in-site search engine.
The choices
MySQL
Although mainly a database server, MySQL actually has built-in full-text search functions.
How it runs
Full-text search is different from “LIKE” and “RLIKE” operations. For the former, MySQL breaks down the text into words, removes stopwords and operates at the word level. The columns can be full-text searched by MATCH() … AGAINST syntax. See MySQL’s doc for details.
Supported queries
- Word and phrase search
- Word prefix search (word*)
- Simple boosting (marking a word/phrase as having an increased/decreased contribution)
- Boolean operations (AND, OR, NOT)
- Default or customizable stopword list
- Sorting (scores are returned as floating-point numbers so the result can be sorted by that “field” using ORDER BY)
Data storage
For MyISAM tables, full-text indices can be created for CHAR, VARCHAR or TEXT columns. A column can be full-text indexed by creating an index of it with the type FULLTEXT. MySQL creates, updates and stores the full-text indices automatically in the .MYI file along with other indices.
Performance
Indexing is fast (~4 minutes for about 30000 documents). However, searching is slow, as each query takes seconds (from less than 1 second up to about 35 seconds in our test).
Resource usage
Full-text search is part of MySQL server so mearsuring its resource usage is hard. We haven’t noticed increased memory usage when full-text queries are used though.
Sphinx
Sphinx is relatively new and written by a single programmer (Andrew Aksyonoff). Features are added in an ad-hoc matter and are limited. But it’s very fast (probably faster than anything else out there) for both indexing and searching. For a majority of document-retrieval systems (e.g. websites, knowledge bases), Sphinx probably has everything they need.
How it runs
Sphinx is written in C++. Other programs can link against Sphinx and use its functions. Alternatively, Sphinx provides a search daemon (searchd). Programs can talk to it and query against its indices using socket communication.
There are APIs for PHP (standard), Ruby (see UltraSphinx) and Java (standard). The APIs provide functions in these languages that when called, serialize and send the queries to searchd (and then receives answers and unserialize the result).
There is a plug-in (storage engine to be exact) for MySQL 5 called SphinxSE. You can query against a Sphinx index just like querying a MySQL database.
There is no plug-in architecture within Sphinx yet. If you want to extending its functionality, you have to modify the source and re-compile.
Supported queries
- Word and phrase search
- Boolean operations (AND, OR, NOT), although nesting is not supported
- Word-word proximity search (i.e. a number of words within a distance of each other)
- Multi-field query
- Grouping of records by date on fields that are defined as UNIX timestamps (like SQL’s GROUP BY)
- Sorting by fields, ascending or descending, single or multi-field
Data storage
Sphinx stores integers (including UNIX timestamps, which Sphinx has special support for). Although Sphinx indexes strings, tokenized or not, it does not store them. Therefore, the documents have to be stored in MySQL. The work flow for searching is like this:
- Translate a system query into a Sphinx query.
- Give Sphinx the query and get back a list of document IDs.
- Ask MySQL for the document records with the given document IDs.
- Process the document records.
Sphinx supports updating the index, but according to the doc, it’s not faster than rebuilding the index. An alternative is to use a “main+delta” scheme, as described in the doc.
Performance
Both indexing and searching are very fast. In our case, it indexes 40000 documents (1 GB) in about 3 minutes. Queries are executed in the order of 10 ms each (although some are in the 500ms range). Queries seem to be cached and repeated queries are executed even faster.
Resource usage
Sphinx is easy on system resource. You can specify how much memory the indexer uses. The default (32 MB) satisfies our need. The search daemon uses about 10 MB of memory. CPU usage is also very low.
Lucene
Lucene is older and considered more mature. It is used in many big projects such as Wikipedia. It might take more time to fine-tune (partly because there are so many ways to do things). If you need the extra functionality, Lucene is worth trying.
Lucene In Action is a must-read if you want to use this library.
How it runs
Lucene is embedded inside the programs that use it (think Berkeley DB).
There are ports of Lucene to PHP, Ruby, C, C++, C#, Delphi and others. See Lucene’s website for details. Ports usually lag behind the main Lucene project. To use the main project with other programming languages, refer to PHP/Java Bridge (which has been renamed to VMBridge and is adding support for other languages).
For ready-to-use search-daemon-like service, refer to "Solr:http://lucene.apache.org/solr/ , which is “open source enterprise search server based on the Lucene search library, with XML/HTTP and JSON APIs, hit highlighting, faceted search, caching, replication, and a web administration interface.”
Lucene does not do specific processing such as keyword-highlighting or web-crawling. Related projects (e.g. Solr, Nutch) fill in these gaps.
Supported queries
Lucene provides the “building-blocks” for a search system. In other words, you build the system yourself, but you can build it any way you want. For example, the several primitive types of queries are sufficient to build about any kind of query you want.
- Word and phrase search
- Boolean operations (AND, OR, NOT) with or without nesting
- Span queries (a span is a [document, starting location, ending location] tuple) that can build proximity search and more
- Multi-field query
- Grouping is not build-in but you can build it yourself
- Sorting by scores, by field values or using your own function
The biggest gain of building thing at this low level is flexibilty (of building whatever you like) and the additional information about the documents and the searh process that other “ready-to-run” libraries don’t give you. For example:
- In addition to TermDocs ([term, document] tuples grouped by term), you have access to TermPositions ([term, document, position] tuples grouped by term) and term vectors (document, term, position] tuples grouped by document). Such information is very useful for doing statistics things fast (from word count to something more complex).
- You can control how Lucene selects (using Query and Filter classes) and scores (using Scorer and Similarity classes) the documents.
- You can trace how Lucene selects and scores the documents (using the Explanation class).
Data storage
Lucene supports storing and/or indexing and/or tokenizing text. Note that it treats everything as strings.
In theory, it can replace the database and still perform well on many kinds of applications. Not sure how it would perform though.
Performance
Indexing is moderately fast (about 8 minutes for the same 40000-document database) Query time varies greatly from 10ms to about 500ms. Repeated queries also take less time.
Resource usage
Lucene is more resource-intensive than Sphinx, especially on the memory side. You will have to measure the difference youself. Our Lucene service (Lucene loaded by PHP/Java bridge) process is about 100 MB all the time, though we haven’t tested how much of that memory is actually used. Java VMs usually have large startup-lags, so starting a “service” is much better than starting a new Java VM every time. However, watch for “memory leak” problem if you are going to do that. Prepared to spend some time tuning GC behavior too.
How to create a Python class from a SOAP WSDL
Using Python and SOAP to attach to a Web Service
You can create a Python class from a SOAP WSDL in 4 steps, in about 20 minutes.
- Create your Python Project
- Download and install a SOAP library for Python (this how-to will use ZSI’s soap library)
- Create a base Python class from a WSDL (either a file or a URL)
- Tweak it for your purposes!
Step One – Create your Python Class
This might be the easiest step of all- if you’re just using Python to create an application, then you’re set! If you’re using something fancier, such as a web application framework, there might some extra steps involved.
For a simple, vanilla python example, just create yourself a directory (let’s call it soapclient) where you can write files and access python.exe (or just python in a unix/unix-like system), and navigate to that directory.
Step Two – Download and install a SOAP library for Python
Here, I’m listing the steps for the ZSI (Zolera Soap Infrastructure) libraries- it has more comprehensive support for WSDL’s than the other Python SOAP libraries. If you’re in a hurry, the quick way is to use something like EasyInstall from PEAK (Python Enterprise Application Kit). NOTE: Currently, EasyInstall provides the production version of ZSI, which is 2.0rc3. If you’re using a modern version of Python, with libraries provided by either ActiveState or OS X, you’ll have problems due to dependencies. ZSI 2.0rc3 is based on the PyXML libraries, which are no longer maintained and conflict with those provided by packaged Python releases. If you are using a pre-installed or packaged version of Python, you might need to use the beta, ZSI 2.1a1, which is based on minidom and compatible with packaged Python releases. Eventually, this should work itself out!
To install from the web using EasyInstall, follow the directions to install EasyInstall from the PEAK website, then just type “easy_install ZSI”. If you’re installing ZSI by hand, download the tar.gz, and do the “configure”, “make”, “make install”.
Using EasyInstall to install the ZSI 2.1a1 release, you’ll need to just download the egg from sourceforge for your version of Python, then type “easy_install ZSI-2.1_a1-py2.5.egg”, using Python 2.5 as an example.
Step Three – Create a base Python class from a WSDL
Now, here’s the fun part! In a unix/unix-ish system, ZSI will install a small script file called wsld2py in your /usr/local/bin directory, or a wsdl2py.exe in your ActiveState Scripts directory. Using that, type “wsdl2py ”.
Let’s use the Braille Text Service from xmethods as an example, to find the Braille equivalent of UCLA.
wsdl2py —complexType “http://www.webservicex.net/braille.asmx?WSDL”
(no semi-colon, though.. that’s just a display issue in this entry)
Using ZSI 2.1, this will give you a couple of classes: ndfdXML_client.py, ndfdXML_server.py, and ndfdXML_types.py. Using ZSI 2.0, you’ll get a ndfdXML_service.py and a ndfdXML_types.py file.
Step Four – Tweak it for your purposes
Now I’m going to focus on ZSI 2.1, because it’s easier. (sorry!)
From a command line, you can start python, then you’ll get the “>>>” prompt.
Here’s the code to get the Braille text for UCLA (you just need the parts after the “>>>”):
>>> from Braille_client import *
>>> mylocator = BrailleLocator()
>>> myport = mylocator.getBrailleSoap()
>>> myrequest = BrailleTextSoapIn()
>>> myrequest.InText = “UCLA”
>>> myrequest.TextFontSize = 24
>>> myresponse = myport.BrailleText(myrequest)
>>> f = open(‘uclabraille.jpg’, ‘w’)
>>> f.write(myresponse.BrailleTextResult)
>>> f.close()
>>> quit()
With any luck, you’ll get a file named uclabraille.jpg in your project directory, with an image of UCLA in braille. Voila! You’re done!
If you’re working with your own web services, you’ll need to find what the request parameters and return parameters are… the easiest method I’ve found so far is to use the python prompt, make your requests or responses, and type “print dir(myrequest)”, where myrequest is the name of your request object! Then it’s a little bit of trial and error.
Next steps: Next, you’d want to incorporate that in something like a compiled python app if you’re building a gui, or into a website if you’re building a python based website!
Passing command-line argument into a DOS (including Windows) batch file
You can use these variables in a batch file:
%0 – the batch file’s name
%1 – the 1st argument
%2 – the 2nd argument
%3 – the 3rd argument
…
%9 – the 9th argument
e.g. Support the content of test.bat is as follows:
@echo offecho param0: %0echo param1: %1echo param2: %2echo param3: %3echo param4: %4
Then “test a b” gives:
param0: testparam1: aparam2: bparam3:param4:
Google Sitemap Generator
According to Wikipedia, "Sitemaps can improve search engine optimization of a site by making sure that all the pages can be found. This is especially important if a site uses Macromedia Flash or JavaScript menus that do not include HTML links.
“Google introduced Google Sitemaps so web developers can publish lists of links from across their sites. The basic premise is that some sites have a large number of dynamic pages that are only available through the use of forms and user entries. The sitemap files can then be used to indicate to a web crawler how such pages can be found.”
For more information on Google Sitemaps, you can go to
https://www.google.com/webmasters/tools/docs/en/sitemap-generator.html
http://www.auditmypc.com/free-sitemap-generator.asp
Articles submitted by
Mike Takahashi
Web Developer
Information Technology Services
UCLA Office of Instructional Development
Has anyone had any experience with Google Sitemaps before? Comments would be greatly appreciated.
Code Beautifiers And Formatters
“Well-documented and readable source code is essential for every collaborative project. Logically structured, well organized and nicely formatted, the code can speed up the bug hunting and help to keep the code clean, minimal and still functional. These aspects are particularly important if the code is being developed by a group of developers: in this context a common scheme for source code presentation is necessary.
You don’t have to do everything by hand; in fact, there are many tools which can save a lot of time – for you and your co-workers.
The tools and services we’ve collected below aren’t validators. They format and beautify the code; some of them can remove redundant elements. Using them, you have to make sure you have a backup, so your data can always be restored."
http://www.smashingmagazine.com/2007/07/12/time-savers-code-beautifier-and-formatter/
Configuring MediaWiki to Search for Three Letter Words
By default MediaWiki uses MySQL and the default FULLTEXT indexing uses built-in stop words and a minimum word length of four. A list of the stop words is available but are the usual thing (the, and, one_, etc.). You can set your own stop words by setting the ft_stopword_file system variable but the default stop words may be sufficient to your purposes. However, there are many three letter words which you may like to index (_SVN, RSS, FAQ, etc.). In order to do this you need to change the FULLTEXT indexing to a minimum word length of three. To do this edit the my.ini and add to the end of the [mysqld] section:
ft_min_word_len=3[myisamchk]ft_min_word_len=3
Restart MySQL, and then reindex the relevant tables. The tables are ${mw_}searchindex where ${mw_} is the table prefix for the MediaWiki instance (there will be one searchindex table for each instance). To reindex the table, log into the server and start up MySQL Administrator. Log in as root and click Catalogs, then wikidb. Select the table and click the Maintenance button. Select Repair Tables and press Next. Check the Quick option under Repair Method and click Repair Tables. Repeat for each MediaWiki instance.
Configuring Short URLs in MediaWiki
Short URLs dispense with the index.php/ part of MediaWiki page URLs. If the MediaWiki instance is located in a subfolder (http://foo.ucla.edu/wiki) then Aliases can be used. If the MediaWiki instance is at the web root (http://wiki.foo.ucla.edu) then Rewriting must be used.
Aliases
In this method, the folder for the MediaWiki instance cannot be the same as the virtual folder used for the URL. For instance, let’s say we want our base URL to be /wiki. The operating system folder should be named something different, like /w. In the MediaWiki instance’s LocalSettings.php file, the following variables need to be adjusted:
$wgScriptPath = "/w";$wgArticlePath = "/wiki/$1";
Then in Apache’s httpd.conf file the following entry must be added:
Alias /wiki "/path/to/wiki/w/index.php"
Once Apache is restarted, pages URLs become something like http://foo.ucla.edu/wiki/Main_Page. Script URLs (which are not normally bookmarked) become something like http://foo.ucla.edu/w/index.php?title=Main_Page&action=edit.
Rewriting
In the case where you want the pages to come right off the web root an alias cannot be used (since the names collide with script pages). In this case use rewriting:
RewriteEngine On
- Exclude actual file path and robots.txt (otherwise this would be a wiki page).
- An alias cannot be used because there’s not a unique path.
- Note this cannot go in the section since it would cause a loop.
RewriteCond %{REQUEST_URI} !^/robots.txt [NC]
RewriteCond %{REQUEST_URI} !^/w/ [NC]
RewriteRule ^(.*)$ /w/index.php/$1 [L]
Put this in the <VirtualHost> section of httpd.conf. If you have rewrite rules for redirecting logins in the <Directory> section and put this rule there it may cause a loop. Any regular pages you want access will require a RewriteCond entry.
The MediaWiki settings are:
$wgScriptPath	    = “/w”;
$wgArticlePath      = “/$1”;
Once Apache is restarted, pages URLs become something like http://wiki.foo.ucla.edu/Main_Page. Script URLs (which are not normally bookmarked) become something like http://wiki.foo.ucla.edu/w/index.php?title=Main_Page&action=edit.
csh and single quotes
In csh, using quotes in a quoted string can be tricky, especially if the string contains both single and double quotes. If you use single quotes to quote the string, use ‘\’’ (a single quote, a backslash followed by two single quotes) where you want to insert a single quote:
% echo 'testing'testing% echo 'test'ing'Unmatched '.% echo 'test\'ing'Unmatched '.% echo 'test\\'ing'Unmatched '.% echo 'test''ing'testing% echo 'test'\''ing'test'ing
Python and SOAP
Python isn’t especially known for its support of soap functionality, but that’s usually not a problem as most folks needing that sort of functionality are using REST or XML-RPC. However, in case where you need SOAP functionality, such as using UCLA’s ISIS service, there are a few options.
Notably, there are
- Optio’s soaplib
- PythonWare’s SOAP for Python
- ZSI: The Zolera Soap Infrastructure (used to be SOAPpy)
(here’s an outdated, but interesting comparison by IBM’s developerWorks: Python Soap )
Optio’s soaplib is a great toolkit, and easy to learn. However, it doesn’t (yet) support an easy way of handling a complex WSDL, which means a lot of headache if you’re trying to talk a complex webservice.
ZSI is a more complicated tool, but handles a WSDL gracefully (and using wsdl2py, it will create a python class for you from a remote URL, and even supports SSL!). The biggest hurdle to using it was that, up until version 2.1 alpha 1, ZSI had built off of PyXML which was a nice little XML parser, but is no longer maintained and even conflicts with built in XML parsers in modern releases of Python. However, as of version 2.1a1, ZSI is now built off of minidom, which is maintained and might even be built into your version of Python (such as in OS X 10.5 Leopard).
What is SQLAlchemy
SQLAlchemy is an open-source Python Database toolkit, which provides the following functionality:
- It maps relational databases into objects
- It manages an applications database connections
- It can create/alter a database layout if it is allowed to
The most powerful feature of SQLAlchemy is the first point: given a table description, it maps the data in tables into classes of objects, where each instance of an object is a row in the table, and can be worked with like a class or structure in code.
Example:
Given a table called “Users”, with a FirstName and LastName column. Once the columns are described in the Python code, to add a row to the users table might look like this:
joebruin = User()
joebruin.FirstName = “Joe”
joebruin.LastName = “Bruin”
joebruin.save()
Given a table called “Addresses” with two columns called “Street” and “City”. It’s related to the “Users” table above using a column named User_Id, though SQLAlchemy will handle it for you. To add a row to the address table, and link it to the Users table, it might look like this:
uclaaddress = Address()
uclaaddress.Street = “405 Hilgard Ave.”
uclaadress.City = “Los Angeles”
joebruin.addresses.append(uclaaddress)
uclaaddress.save()
joebruin.save()
Note: Even though the id column is in the Addresses table, SQLAlchemy exposes it a collection on the Users table because of the relationship.
Some of the interesting features are things like eager-/lazy-loading, poly-morphic table layouts (in other words, having a table where the rows have a “type” column, then breaking the data elements into subclasses based on that column), caching, and database-platform independence.
More Reading:
A Critical Examination of SQLAlchemy Performance
About IAMUCLA
IAMUCLA is the new name for the suite of identity management related projects and services, including ISIS, Enterprise Directory, Shibboleth, and more. It is a set of services helping campus applications manage the process of establishing “who you are” and “what access you have” in a way that is simplified, structured, and streamlined.
IAMUCLA was previously known as EDIMI.
For details about IAMUCLA, visit:
https://spaces.ais.ucla.edu/iamucla
shrinking text
This web design tip I just read is ingenious and priceless, if we can just get our clients to accept the condensed versions.
Speaking generally, Steve Krug's Third Law of Usability states:"Get rid of half the words on each page, then get rid of half of what'sleft." (Don't Make Me Think, page 45)Here's a neat trick: copy the text from a "blah-blah" page and paste itinto Word. Then, run Tools > AutoSummarize (at least that's what it'scalled in Word 2004 for Mac). Set it to reduce it to 25% of the original.I tried this with a couple of pages and was surprised at how well itworked. If we could just build this into the CMS...
This was contributed to the University and College Webmasters Digest on 26 Nov 2007 by Bill Denneen of Mount Holyoke College.
Don’t Make Me Think – Steve Krug
Google Chart API
“The Google Chart API returns a PNG-format image in response to a URL. Several types of image can be generated: line, bar, and pie charts for example. For each image type you can specify attributes such as size, colors, and labels.”
“You can include a Chart API image in a webpage by embedding a URL within an tag. When the webpage is displayed in a browser the Chart API renders the image within the page.”
“This document describes the required format of Chart API URLs and the available parameters.”
See: http://code.google.com/apis/chart/
Simplifying web-based processes with CoScripter
“IBM has a very cool Firefox-only plugin called CoScriptor which is
sort of a macro recorder for Firefox:
http://services.alphaworks.ibm.com/coscripter/browse/about
There are a variety of scripts available for perusal, use, and
editing. Scripts that get created using co-scriptor are
automatically re-archived for others to use.
It could easily be used to automate a lot of support functions of the sort:
1 – go to this site
2 – click on this button
3 – type your university ID into this text box
4 – now click on submit
3 – now type in "change your email final delivery point:
4 – etc
All the above can be scripted with CoScriptor.
Jon Udell interviewed Tessa Lau, one of the investigators about the
project (formerly called Koala).
http://blog.jonudell.net/2007/06/11/a-conversation-with-tessa-lau-about-project-koala/
The interview itself is at:
http://itc.conversationsnetwork.org/shows/detail1837.html
Very interesting concept and implementation."
Taken from email to UC-CSC list by UCI colleague Harry Mangalam.
Manual setting of filename and type in a dynamically-generated web page
Problem: Suppose you have a CGI script (PHP or otherwise), say genimage.cgi, that generates an image and sends it to the browser. If the user visits the URL of the script and tries to save the generated image, the browser might suggest “genimage.cgi” as the default filename to save to, which might lead to confusion (e.g. the OS won’t associate an image-viewing action with the file).
Solution: Have the script tell the browser the filename that it should use if the user wants to save the page. This can be done by sending a HTTP response header. Suppose the filename should be “image.gif”, then send the following header:
Content-Disposition: inline; filename=image.gif
Your script might also want to manually set the MIME type of the resulting page. If it doesn’t, either the web server or the browser might try to make a guess, which might be wrong. For exmple, you can set the MIME type to that of a GIF image by sending the following HTTP response header:
Content-Type: image/gif
Here is the code for sending both headers in PHP:
<?// Suppose you want to send a GIF file to the browser// Send the headers firstheader('Content-Disposition: inline; filename=image.gif');header('Content-Type: image/gif');// Then print the content of the GIF file// e.g.// print file_get_contents('some_gif_file.gif');?>
What characters can go into a valid HTTP URL?
Section 5 of RFC 1738 – Uniform Resource Locators specifies the format of an HTTP URL:
httpurl = "http://" hostport [ "/" hpath [ "?" search ]][definition of hostport omitted]hpath = hsegment *[ "/" hsegment ]hsegment = *[ uchar | ";" | ":" | "@" | "&" | "=" ]search = *[ uchar | ";" | ":" | "@" | "&" | "=" ]uchar = unreserved | escapeunreserved = alpha | digit | safe | extraalpha = lowalpha | hialphalowalpha = "a" | "b" | "c" | "d" | "e" | "f" | "g" | "h" | "i" | "j" | "k" | "l" | "m" | "n" | "o" | "p" | "q" | "r" | "s" | "t" | "u" | "v" | "w" | "x" | "y" | "z"hialpha = "A" | "B" | "C" | "D" | "E" | "F" | "G" | "H" | "I" | "J" | "K" | "L" | "M" | "N" | "O" | "P" | "Q" | "R" | "S" | "T" | "U" | "V" | "W" | "X" | "Y" | "Z"digit = "0" | "1" | "2" | "3" | "4" | "5" | "6" | "7" | "8" | "9"safe = "$" | "-" | "_" | "." | "+"extra = "!" | "*" | "'" | "(" | ")" | ","escape = "%" hex hexhex = digit | "A" | "B" | "C" | "D" | "E" | "F" | "a" | "b" | "c" | "d" | "e" | "f"
The “path” and the “query string” parts can contain alphabets, numbers the following characters: $-_.+!*’(,;:@&=/
They can also contain escaped forms (“%” (percent) followed by 2 hex values, i.e. %[A-Fa-f0-9]{2}, for each byte) of other characters.
Find Google Stats about your website
There is useful Google service for webmasters at http://www.google.com/webmasters/tools/. It gives you stats on broken links, internal links, problems that Google’s crawlers have with your site, what search terms people have used to find your site etc.
Really simple and just requires you to have a Google account and do some simple verification to prove you are webmaster
Google Font API
- Introducing Google Font API & Google Font Directory – Google Code Blog
- http://code.google.com/apis/webfonts/
- Google Font API – An Introduction by Alejandro Gervasio
- http://css-tricks.com/google-font-api-interview/
Setting up XAMPP for email feature development
Overview:
- XAMPP contains a package called Mercury which allows you to set up a local SMTP server which can relay messages to external servers such as Gmail. This is useful if you want to test the mailing features of moodle on your local machine.
What you need:
- XAMPP which can be found here
- Details for your SMTP server. I used Gmail which has information posted here:
- http://mail.google.com/support/bin/answer.py?hl=en&answer=13287
Configuring Mercury:
- Trying to configure Mercury takes 27 or more steps which can be extremely confusing without a guide. I found this guide to be very helpful.
- In addition to what the guide says you must add the line “sendmail_from = postmaster@localhost” to both ‘xampp/php/php.ini’ and ‘xampp/apache/bin/php.ini’ before restarting apache and mercury from the xampp control panel.
- If you’re successful, you should be able to use PHP’s mail function without error.
Configuring Moodle:
- In order to use Moodle’s email functionality, we need to configure the settings under the Administration Panel → Server → Email.
- Set SMTP hosts: localhost
- Leave SMTP username and SMTP password blank.
Sass Variables for UCLA Color Palette
UCLA color palettes converted to Sass and posted as gists on github.
Steps for Cloning a Repository in SourceTree
(Note: These are the steps for a Windows installation of SourceTree. Not sure if there are differences for a Mac installation.)
Generate/Load SSH Keys:
1. Open SourceTree.
2. Pick “Create or Import SSH Keys” under “Tools” tab.
3. Keep default settings on new window and select “Generate” and follow instructions to generate SSH key pair.
4. Save both the public and private key.
5. Open your system tray and select Pageant (the icon of a computer wearing a fedora).
6. Click “Add Key” and select the private key you generated.
7. If the repository you want to clone is on an online hosting service, then copy public key and add to your site profile.
Clone Repository:
1. Pick “Clone / New” under “File” tab.
2. Copy SSH clone URL from repository to the line “Source Path / URL”.
3. Select desired Destination Path and Name.
4. Click “Clone”.
5. You’re done! The repo may take a while to clone, so a bit of patience is required.
web scraping tools
Web scraping tools, services, and plugins: a comprehensive list
Ruby project called Upton – haven’t tried it yet but it’s from the Tumblr blog Onethingwell whose picks tend to be OK.
10 Web Scraping Tools to Extract Online Data – added April 2016. Includes use case examples.
To Scrape or Not to Scrape: Technical and Ethical Challenges of Collecting Data off the Web – April 4, 2016
Mac OS X - Local Web Development Environment Setup
My name is Alex Podobas and I’m a member of the UCLA IT Security Office. My IT security work at UCLA involves an ample amount of code review and writing web applications and I use OS X as my primary, day-to-day operating system. Recently, I wiped my computer and decided to use Homebrew as my package and dependency manager to re-install and customize my LAMP-stack (I suppose minus the “L” in that acronym), local environment for web development. The steps below will take you from a fresh install of OS X to having a running web server on your local machine in about an hour.
Notes:
1. The instructions are attached as a link on the sidebar.
2. Be sure to replace “ampodobas” with your own OS X username. To find out that username, open Terminal (Applications/Utilities/Terminal) and type “whoami”
3. I make no guarantees, warranties, representations that executing the instructions below will work as stated. I merely am echoing what worked for me.
robots.txt
Sometimes you have sections of your website that you don’t want search engines to index. That’s what robots.txt, AKA the “Standard for Robot Exclusion” was invented for. Now, 20 years later, there’s an article about common mistakes in using it.
- http://www.robotstxt.org/robotstxt.html
- http://www.beussery.com/blog/index.php/2014/06/robots-txt-disallow-20/
Cross Browser Testing
One of the problems in building a website is testing how it works on different browsers. I know there are different solutions out there, but I just heard about this one today, so I’m starting a list here. Please add other techniques or useful sites.
- http://www.browserbite.com/
- http://crossbrowsertesting.com/
- http://www.browserstack.com/
- http://designmodo.com/bcross-browser-compatibility/ – July 2012
- http://coding.smashingmagazine.com/2010/06/04/cross-browser-testing-a-detailed-review-of-tools-and-services/
- http://www.smashingmagazine.com/2011/08/07/a-dozen-cross-browser-testing-tools/
- http://www.browseemall.com/ – WIndows desktop app
- http://www.multibrowserviewer.com/ – Windows desktop app
- https://saucelabs.com/ – newest kid on the block, in the cloud, download Mac app, offers limited free account otherwise pay, open source
- http://browsershots.org/ -recommended by Stackoverflow
- Adobe Browser Lab – https://browserlab.adobe.com/en-us/index.html
- modern IE – http://www.modern.ie/
has anyone tried wolfram programming cloud?
Has anyone tried the Wolfram Programming Cloud? It “is an application of the Wolfram Language—specifically for programming, and for creating and deploying cloud-based programs.
How does it work? Well, you should try it out! It’s incredibly simple to get started. Just go to the Wolfram Programming Cloud in any web browser, log in, and press New. You’ll get what we call a notebook (yes, we invented those more than 25 years ago, for Mathematica). Then you just start typing code.”
- http://blog.wolframalpha.com/2014/06/23/wolfram-programming-cloud-is-live/
- http://www.wolfram.com/programming-cloud/
- Language Barriers – Stephen Wolfram claims he can make the world computable. Is he on to something? – Slate – by David Auerbach – March 16, 2014
Please add your experiences or comments or alternatives here. Thanks
ELK Stack
The ELK stack is an open source way to consolidate various logs gathered by logstash to a real-time search, analytics, and visualized form by way of ElasticSearch and Kibana.
From the web site—
- Elasticsearch is a flexible and powerful open source, distributed, real-time search and analytics engine
- Logstash helps you take logs and other time based event data from any system and store it in a single place for additional transformation and processing
- Kibana is Elasticsearch’s data visualization engine, allowing native interaction with all the data in Elasticsearch via custom dashboards. Kibana’s dynamic dashboard panels are savable, shareable and exportable, displaying changes to queries into Elasticsearch in real-time.
See also—
- Overview, http://www.elasticsearch.org/overview/
- Download, http://www.elasticsearch.org/overview/elkdownloads/
- Review, http://aarvik.dk/a-bit-on-elasticsearch-logstash-kibana-the-elk-stack/
Top Programming Languages
Often people in the developer world have the question, “What is the most popular programming language?” Context is key, but there are two popular lists tracking the inquiry—
- IEEE, http://spectrum.ieee.org/static/interactive-the-top-programming-languages
- Tiobe, http://www.tiobe.com/index.php/content/paperinfo/tpci/index.html
Have a favorite list? Feel free to add it above.
How to Easily Recognize Web Colors from RGB Codes
This is a very useful explanation of RGB (Red, Green, Blue) codes that are used all over the Internet, and elsewhere.
How to Easily Recognize Web Colors from RGB Codes – Aug. 19, 2014
DevOps Resources
DevOps (“development” and “operations”) is a software development method that stresses communication, collaboration and integration between software developers and Information Technology (IT) professionals.[ DevOps is a response to the interdependence of software development and IT operations. It aims to help an organization rapidly produce software products and services – loosely taken from http://en.wikipedia.org/wiki/DevOps
Microsoft Test Lab Guides
Quoting, “Test Lab Guides (TLGs) allow you to get valuable hands-on experience with new products and technologies using a pre-defined and tested methodology that results in a working configuration. When you use a TLG to create a test lab, instructions define what servers to create, how to configure the operating systems and system services, and how to install and configure any additional products or technologies. A TLG experience enables you to see all of the components and the configuration steps on both the front-end and back-end that are required for a product or technology or for a multi-product or technology solution.”
Regular Expressions
Regular Expressions are how you match text and patterns of text in a programming language, and once you learn it, it’s useful in many languages.
- Regular Expression Cheat Sheet
- RegExr is an online tool to learn, build, & test Regular Expressions
- CROSSWORDS HELP YOU LEARN REGULAR EXPRESSIONS – Jan. 31, 2016
Regular expression use cases
This article is meant to be a companion to the regular expressions resources article. Instead of telling you how to do certain things, this article aims to answer, “why would I want to do that?”
Character classes
Syntax: [aeiou] or [0-9]
Matches a single character in a set.
These can be useful when you don’t need the full power of the OR (|) syntax, because you are only looking for a small variation. For example: civili[sz]ation will search for both the British and American spellings of the word “civilization”. It’s shorter than writing civilisation|civilization.
You can use ranges to look for digits: [0-9]+
You can even combine ranges. Here’s how you would search for a case-insensitive hexadecimal digit: [0-9a-fA-F]
Negated character classes
Syntax: [^aeiou]
Matches a character NOT in a set.
Useful, for example, to detect non-alphanumeric characters: [^0-9a-zA-Z]
Here’s a more specific example, used to see if a word starts with an ‘s’ and is followed by a consonant: s[^aeiou] (this assumes you have already determined that the word is only made up of letters, as digits or other punctuation would also pass the test).
A word of caution: in the example above, you should NOT interpret s[^aeiou] to mean “match an s that isn’t followed by a vowel”. The two meanings are similar, but there are subtle differences. The above example really means “match an s and the next character, provided the character exists and isn’t a vowel”.
Negative lookahead
Syntax: 7(?!a)
This doesn’t match anything. It’s simply a conditional check. Compare this to how 7$ character isn’t really matching a 7 followed by a newline, it’s simply checking that any potential matching ‘7’ is the last character of the line. 7(?!a) tries to match a ‘7’, and the (?!a) part checks to make sure that there is no ‘a’ character after the ‘7’.
In the negated character classes example above, I told you what it isn’t used for. Well, if you actually want to match “an s that isn’t followed by a vowel”, here’s how you do it: s(?![aeiou])
Do you see the difference? With the negative lookahead, the character after ‘s’ isn’t included in the match. So if you are doing a replace, the character after ‘s’ won’t be touched. In addition, the negative lookahead version will match an ‘s’ if it’s the last character of the line, which the character class negation will not catch.
Microsoft VHD Test Drive Program
( Quoting ) " The Microsoft Virtual Hard Disk (VHD) format is the common virtualization file format that provides a uniform product support system, and provides more seamless manageability, security, reliability and cost-efficiency for customers.
Using the power of virtualization, you can now quickly evaluate Microsoft and partner solutions through a series of pre-configured Virtual Hard Disks (VHDs). Users can download the VHDs and evaluate them for free in your own environment without the need for dedicated servers or complex installations. "
html entity conversion website
If you’ve ever inadvertently pasted a block of html into a GUI text editor and ended up with a set of html encoded greater than signs and other unreadable codes, this website helps you quickly convert back.
Here’s an example:
&lt;/strong&gt; &lt;/p&gt;&amp;#010;&lt;p&gt;&lt;strong&gt;&lt;i&gt;Participation: &lt;/i&gt;&lt;/strong&gt;You are expected to complete ...
Decodes to:
</strong> </p>
<p><strong><i>Participation: </i></strong>You are expected to complete ...
Google Code Playground
There is a feature called the Google Code Playground
It is an API demo site that shows the possible AJAX calls that the Google AJAX features.

Is There Such a Thing as Free Software? The Pros and Cons of Open-Source Software
A helpful overview of Open Source Software is available in Educuase Quarterly.
Today’s higher education environment is marked by heightened accountability and decreased budgets. In such an environment, no higher education institution can afford to ignore alternative approaches that could result in more effective and less costly solutions. Open-source software (OSS) can serve as a viable alternative to traditional proprietary software (PS), but to ensure that OSS is selected and deployed effectively requires: 1) Understanding the OSS licensing model; 2) Understanding how to determine when it makes sense to use OSS; and 3) Managing your OSS use effectively.
View the complete Educause Quarterly article at:
linktext.http://www.educause.edu/EDUCAUSE+Quarterly/EDUCAUSEQuarterlyMagazineVolum/IsThereSuchaThingasFreeSoftwar/174575
Here’s another take on open source software and its utility for the UCs, from a colleague at UCI. Strategies for Efficient IT at UC
Authentication via Proxy
By: Yusuf Bhabhrawala, Project Manager, UCLA Center for Digital Humanities (CDH)
Introduction
This article describes a proposal for building a standardized authentication proxy. This proposal was written before Shibboleth 2.0 (which address many of the limitations from the previous versions). Hence the examples of CDH and Shibboleth should be taken just as that, ie. example. This type of proxy could be implemented fairly quickly by any organization and for any other authentication system as well.
Overview
The model proposed here is very widely used for providing authentication as a service. The model can be summarized using the following diagram:
- The user login request is redirected to CDH Auth Proxy along with callback URL.
- Since CDH Auth Proxy sits behind Shibboleth, the user is redirected to UCLA Logon page where they can authenticate themselves.
- The UCLA Shibboleth IDP redirects the user to CDH Auth Proxy.
- CDH Auth Proxy post’s a public token to the callback URL.
- The application uses the public token to generate a private token and requests user information from CDH Auth Proxy using it.
- CDH Auth Proxy responds with the user information.
The above approach provides a simple authentication model that can be used to implement authentication fairly quickly, develop drag and drop authentication solutions and develop wordpress, joomla, drupal, plone etc. plugins very easily. These can then be used by UCLA Humanities division faculty, students and staff without getting into the details of shibboleth SP implementation.
Technical Details
Shared Secret
The basis of this authentication model is a secret (character string/password) shared between CDH and the application requiring authentication. This shared secret is used for generation of time stamped tokens and token validations. It also ensures that shibboleth cannot be used without some kind of prior approval or record.
Shared secret is specific to a URL. It thus ties the application with its unique shared secret ensuring that tokens are not misused across applications.
Shibboleth Data
CDH will collect and pass only the following information regarding the user:
- First Name
- Last Name
- Email ID
- UID
- Department Code
This information is already available via UCLA directory and accessible by all.
Public Token
The public token is a message digest generated using the following information:
This ensures that the token is unique to the user, to the requesting application and cannot be re-used.
Private (use once) Token
The private token ensures that the user information is securely transferred from server to server and cannot be re-used.
The private token is a message digest generated by the requesting application using the following information:
Each user session is maintained at CDH Auth Proxy for 30 seconds, during which it can be retrieved by the requesting application by providing the corresponding private token, which of course, is unique to the user.
CDH will respond with the user information in a JSON format as key-value pairs, one of which will always be ‘status’. Thus the status determines if the user information was successfully received.
Intel chipset (BIOS) RAID migration
Users of Intel-based systems with Intel chipsets may encounter some systems where RAID is enabled, but users wish to add additional harddisks or migrate RAID types.
Standard Dell and HP business-class desktops such as the Optiplex 755 and 8100 Elite all support Intel chipset RAID in some or most configurations— a common setup is a two-disk RAID1 to protect from a single disk hardware failure.
A common question is whether or not the RAID1 can be migrated (most users mean expanded) to a 3-disk or more RAID5 or a 4-disk RAID10.
The answer to the former is: no. The answer to the latter also is: no.
The following link from Intel describes the migration types supported without having to destroy/recreate all data on the RAID:
http://www.intel.com/support/chipsets/imsm/sb/cs-020674.htm
The link above discusses the Intel ICH7R, ICH9R, ICH10R, the current PCH-series, and most variants in-between.
SSL Certificate and Subject Alternative Names (SAN)
This article assumes you are using InCommon-Comodo Certificate Service, and that you intend to use openssl to generate your Certificate Signing Request (CSR). If you are using other Cert providers, please check with your vendor
If your host name has multiple DNS entries or your Web site has multiple names, you don’t need a separate SSL certificate for each one. If you include “Subject Alternative Names” (SAN) in your CSR, you need only one SSL certificate. The SAN lists the names that you want your certificate to cover.
When you have no certificate, you can include the SAN information in your CSR. This process has been automated via a python script by the technical staff at UC Berkeley. More information can be found here: https://wikihub.berkeley.edu/display/calnet/CalNet+InCommon-Comodo+Certificate+Service#CalNetInCommon-ComodoCertificateService-GenFAQ
Note: If you use the python script, please customize the [ req_distinguished_name ] section in the script. For more information on openSSL input parameters, you can use the reference here: http://www.openssl.org/docs/apps/req.html. For example, if I wanted to add emailAddress to the CSR, I would edit the script and added emailAddress=xxx@xxx.xxx.xxx right below the [ req_distinguished_name ]
If you already have an SSL certificate in use, you can add a SAN to it without generating a new CSR and revoking the existing cert. In this case, contact your CERT authority to make this arrangement.
Cloud Computing
If It’s in the Cloud, Get It on Paper: Cloud Computing Contract Issues by Thomas J. Trappler in Educause Quarterly. The article’s focus is on how to mitigate the risks of Cloud Computing through the contract terms with the cloud services provider.
If you’re looking for a cloud infrastructure on which to run self-written apps or on which to
install cloud-amenable apps, there are certainly options to provide a
cloud service locally. In fact, some of the best known approaches for doing so were
UC-developed. Perceus http://www.perceus.com (spun out of LBL) is
a provisioning system that can efficiently provision 1000’s of nodes
for cloud-based operation. ROCKS (out of SDSC/UCSD)
http://www.rocksclusters.org/wordpress/ is a similar technology.
And Eucalyptus http://www.eucalyptus.com/ (spun out of UCSB) is a
cloud infrastructure very similar to Amazon’s ECC.
There was an earlier UC effort, the UC Cloud Computing Task Force. The group has finished its work, but its wiki space lives on: https://spaces.ais.ucla.edu/x/pIVIAQ . The final report is prominently linked from the home page.
The text above was paraphrased from posts in August 2010 by Tom Trappler, Harry Mangalam and David Walker to UC-CSC Mailing List
Accessibility Demonstration Videos
These videos by the National Foundation for the Blind are helpful in understanding where web apps can fall short of being accessible:
http://www.nfb.org/nfb/googleaccessibilityvideos.asp
Find Peak Hours of Your Websites with Google Analytics
Here’s a really simple way to find out the peak hours of your website if you plan on upgrading or rolling out new features.
In-Common SSL Cert Installation on Apache 2.2
The steps towards obtaining a free cert for ucla based webservers:
- Generate a CSR with a 2048-bit minimum key for each common name for which you require a cert
- Be sure that the common name(s) contain a fully qualified domain name
- Forward both the CSR and the common name information directly to incommon@noc.ucla.edu
Create the CSR and the KEY files by running the following:openssl req -new -newkey rsa:2048 -nodes -keyout SERVER.key -out SERVER.csr
where SERVER is the name of your server
Once receiving the email from NOC open the link that says “X509 Certificate only, Base64 encoded”, rename it to .CRT
now in the conf file add the following:
SSLEngine on
SSLCertificateFile /etc/apache2/certs/server_ucla_edu.crt
SSLCertificateKeyFile /etc/apache2/certs/server_ucla_edu.key
those settings are the basic and may require more directives options.
Migrate to a virtual Linux environment with Clonezilla
from IBM DeveloperWorks
How to convert a physical server to a virtual one using the open source tool Clonezilla Live
Summary: Learn how to use the open source Clonezilla Live cloning software to convert your physical server to a virtual one. Specifically, see how to perform a physical-to-virtual system migration using an image-based method.
see, http://www.ibm.com/developerworks/linux/library/l-clonezilla/
Alternatives to Google Analytics
- 7 Alternatives to Google Analytics – Jan. 16, 2012 Search Engine Journal
- http://piwik.org/ – open source alternative to Google Analytics
- http://blog.ineedhits.com/tips-advice/10-best-alternatives-to-google-analytics-245110820.html
- http://smashinghub.com/10-promising-real-time-alternatives-to-google-analytics.htm
Stanford Self-Help Web Design Resources
Stanford Self-help Web Design Resources
- http://itservices.stanford.edu/service/web/design
- Templates & Themes
- HTML & CSS Style Guide
- Accessibility
- Graphics & Art
User Testing Tools
Remote user testing apps:
Local user testing apps (requires computer and quick install):
Remote card sorting:
Click testing:
A/B testing:
Quick user feedback:
Deploying FileVault2
Best Practices for Deploying FileVault 2
White paper covers FileVault 2 with details pertinent for 10.7.x and 10.8.×. Appendix A and B are of interest as they provide technical details of the process.
How to make a Favicon.ico
You may have noticed in your web browser that some web sites have a little icon in the address bar to the left of the URL.
- Adding to your site
- Upload favicon.ico to root
- In , add <link rel=“shortcut icon” type=“image/ico” href=“/favicon.ico” />
What kind of test can SimpleTest do?
SimpleTest’s unit tester is designed to test PHP code. Also its web browser component (think of it as a fake browser from the POV of a web server) can be used to test web pages.
Web Services
-
Web Services – examples and description
- W3C Web Services Activity http://www.w3.org/2002/ws/
- FAQ http://www.oreillynet.com/lpt/a//webservices/2002/02/12/webservicefaqs.html
- Google API http://www.google.com/apis/
Eclipse
Eclipse, for most people who use it, is an Integrated Development Environments (IDE). Although it is well-known as a Java IDE, it can be used as an IDE for other languages.
Features
(Note: These features applies to Eclipse + JDT. Features for other languages may vary.)
- Code completion – Shows a list of properties and methods when you type in an object’s name
- Automatic error checking – Highlights compilation errors and warnings
- Automatic compilation – Compiles the program as soon as you save
- Built-in CVS support – checkout, update and commit functions can be done in the IDE
Shortcuts
- Code completion (ctrl-space)
- Quick comments – toggle comments on several lines using ‘//’. (ctrl-/)
- Delete line (ctrl-d)
- Goto Line number (ctrl-l as in line)
System requirement
- No installation necessary – just decompress the files
- You need Java Runtime Environment (JRE) installed to start Eclipse. If you want to compile Java in it, then you need Java Development Kit (JDK) installed.
- Eclipse platform (not SDK) and JDT together takes about 40 MB of disk space. More will be used if you install other plug-ins.
Commonly used Plugins
Other Info
Web Developer and Designer Resources
Links
- UCLA Campus Web Publishers Group
- 4096 Color Wheel – Pretty useful tool to find web-safe/web-smart colors
- Standalone versions of IE – This website provides downloads and tutorials on how to install different versions of IE on your computer. Very useful for testing your website across multiple browsers.
- University Web Developers Mailing List and FAQs – this often has very relevant queries for web admins at universities and colleges. It’s a good place to get a quick survey of how different places do things.
- Web Design Cheat Sheets – A list of most often used commands for programs and languages that web developers use most often.
- Yahoo! Design Pattern Library – Yahoo!’s thinking on common interface design issues for traditional and rich Internet applications.
- Yahoo! User Interface Library – The Yahoo! User Interface Library is a set of utilities and controls, written in JavaScript, for building richly interactive web applications using techniques such as DOM scripting, HTML and AJAX.
- UI Patterns Library -Another UI Design Pattern Library
- Patterny -UI Design Pattern Library and Tool for collecting patterns for projects shared with team
- Pattern Tap -A Popular UI Design Pattern Library submitted by web/ui professionals. Unlike most sites that just have screenshots of websites, Pattern Tap has separate galleries that focus on just website footers, signup pages, sub-navigation, form buttons, tabs, thumbnails, slideshows, and more.
- Getting Creative With Transparency in Web Design
- Designing Web Interfaces – Principles and Practices for Rich Interaction
- Designing Social Interfaces Presentation – Addresses designing for social networks
- Smashing Magazine article on Type Best Practice -Best practice for web professionals on the topic of typography
- Toolbox.cc – A collection of tools and widgets
Useful Tools/Plugins
- http://lorempixum.com/ – free placeholder images, any size
- FireFox – Please see Firefox Add-Ons for Web Developers
- Mozilla Firefox for Rapid Web Development and Testing
- IE 7 – Web Developer Toolbar
Who is using Ruby on Rails at UCLA?
Here is a voluntary list of those using Ruby on Rails at UCLA. Hopefully people will add summary comments in their sections describing what problems they had, and a link if the site is public.
Please add yourself and your project. The earlier entries have all moved onto other jobs.
Web Services Resources for Programmers
Interested in doing web service development? Here are some useful links:
- Top Ten FAQs for Web Services) – This is a pretty good primer article from the O’Reilly Network (http://www.oreillynet.com) on Web Services. Lots of useful links.
- Understanding SOAP – This recent MSDN article provides a very good overview what SOAP is all about as well as where the technology is going. If you are working with SOAP or are thinking of using SOAP, this is a must read.
- Web Services Security School – requires registration, but otherwise free.
- Online Tutorials
This article was originally posted on the UCLA Programmers Wiki.
Where can I find other programmers at UCLA?
Staff and student programmers can list themselves and their areas of expertise and interest in the UCLA Programmers Directory Note that it is restricted to UCLA IP addresses, so you’ll need a VPN from off-campus.
If you haven’t added yourself, please do. Right now we have 161 programmers listed. It’s interesting to look at the technologies they’re currently using.
What is your favorite techie interview question?
I have been told this is a classic by an interviewee:
- What is the difference between TCP and UDP?
Please add to this list.
- How do you perform a string reversal in C without using a temporary array?
As a UCLA programmer, where do I get data about electronic reserves?
The UCLA Course Management Consortium has worked with the UCLA Library staff to document how to obtains Electronic Reserves data. It is available daily, with SRS numbers. The link below provides the details.
JSR223 Scripting Pages in Java Web Applications
-
JSR223 Scripting Pages in Java Web Applications
- (Jose) Below are some links on Java scripting, PHP’s role in it, and where Zend is taking PHP. (Mike) I read a mention of connecting to Perl and other scripting languages as well.
- The PHP5 description shows how the language’s object model and naming conventions are influenced by Java.
- http://www.zend.com/php_and_java.php
Ruby on Rails Resources
Ruby is a Japanese object-oriented scripting language that is meant to make programming fun. Ruby on Rails is a web programming framework built on Ruby, but strongly influenced by the rapid development of PHP and the organization and rigor (and testing) of J2EE. It uses Model-View-Controller framework and encourages separate development, testing and production environments. It even builds unit-testing stubs automatically.
-
Introductions
- http://rubyonrails.org/
- ONLamp.com: What Is Ruby on Rails
- Rails Myths – by David Heinemeier Hansson, the creator of Ruby on Rails
-
Tutorials
- Ruby on Rails Tutorial – Michael Hartl – for Rails version 5
- ONLamp.com: Rolling with Ruby on Rails and Part 2
- Top 12 Ruby on Rails Tutorials
- UCLA Resources
-
Other Resources
- https://practicingruby.com/#public-archives
- http://rubyinside.com/ – blog
- Rubular: a Ruby regular expression editor – regex testing webapp
OpenACS (Open Community Architecture System)
-
OpenACS – (Open Architecture Community System) http://openacs.org/ is a toolkit for building scalable, community-oriented web applications. Used in [.LRN:http://dotlrn.org/]
- technical reasons to use OpenACS http://openacs.org/about/what-is-openacs
- comparison with LAMP and others http://openacs.org/forums/message-view?message_id=274218
SAML
-
SAML Security Assertion Markup Language http://www.oasis-open.org/committees/tc_home.php?wg_abbrev=security Albert Wu suggested we look at this for Authorization Service instead of creating our own xml and schema.
- OpenSAML http://www.opensaml.org/faq.html C++ and Java sample clients.
- Albert Wu – Here is a quick set of slides explaining at a very high level some of the security related XML schemas (including SAML) out there… http://www.vordel.com/knowledgebase/tutorial_xml_security/index.html
- this article talks about using xml and saml http://www.fawcette.com/xmlmag/2002_02/magazine/columns/collaboration/edejesus/default.aspx
- SAML Domain Model http://www.oasis-open.org/committees/tc_home.php?wg_abbrev=security – useful description of relationships between authentication, authorization and anything in between.
SOAP
“SOAP, originally defined as Simple Object Access Protocol, is a protocol specification for exchanging structured information in the implementation of Web Services in computer networks.” – taken from http://en.wikipedia.org/wiki/SOAP
- SOAP http://www.w3.org/TR/SOAP/
-
SOAP Version 1.2 7 May 2003 it became a W3C Proposed Recommendation. It has four parts:
- Part 1: Messaging Framework http://www.w3.org/TR/2003/PR-soap12-part1-20030507/
- Part 2: Adjuncts http://www.w3.org/TR/2003/PR-soap12-part2-20030507/
- Primer http://www.w3.org/TR/2003/PR-soap12-part0-20030507/
- Assertions and Test Collection http://www.w3.org/TR/2003/PR-soap12-testcollection-20030507/
- Press Release http://www.w3.org/2003/05/soap12-pressrelease
- Understanding SOAP article http://msdn.microsoft.com/webservices/understanding/webservicebasics/default.aspx?pull=/library/en-us/dnsoap/html/understandsoap.asp One particular thing to note in the article (see the HTTP Binding section) is that when SOAP is used over the HTTP protocol, if there is a SOAP fault, the HTTP response code is 500, not 200. Be sure to double check your ISIS client code to handle the 500 HTTP response accordingly(i.e., don’t just automatically assume you are unable to connect to the ISIS web service when the HTTP response code is 500. There may actually be useful SOAP fault error information in the response body) Albert Wu
- This article describes how to call a .NET-based Web service from a UNIX-based system and how to return a Microsoft .NET DataSet to a Perl array using SOAP: Lite.http://msdn.microsoft.com/webservices/building/default.aspx?pull=/library/en-us/dnsoap/html/soapliteperl.asp#soapliteperl_topic6?_r=1
- Five Tips for .NET Programming in Perl http://www.perl.com/lpt/a/2003/03/26/perlanddotnet.html
- nuSOAP http://dietrich.ganx4.com/nusoap/ is a set of php scripts and doesn’t need to be compiled into the PHP implementation and it’s not an extension, it’s just a
- Is there any speed difference between web services and LDAP?
- Building XML Trees with PHP http://www.devshed.com/Server_Side/PHP/XMLTrees/XMLTrees.pdf
WebDAV
-
WebDAV http://www.webdav.org
- For listings of open source and commercial clients, see: http://www.webdav.org/projects/
- For a server/client interoperability chart see: http://ftp.ics.uci.edu/pub/ietf/webdav/interop.html
WSDL
- WSDL Web Services Description Language which allows programs to read the description and automatically set themselves up to use that web service. I need it because apparently Windows apps want this to handle XML more easily. – Mike
Usability Testing
Usability testing is something that few programmers or web designers do but it can drastically improve the user experience if done early and often. In an effort to inspire us to take this on, here are some articles and links.
- Don’t Make Me Think by Steve Krug
-
http://www.useit.com/ – Jakob Nielsen’s website on usability is an excellent resource. You might want to subscribe to his listserv.
- Time Budgets for Usability Sessions – Up to 40% of precious testing time is wasted while users engage in nonessential activities. Far better to focus on watching users perform tasks with the target interface design.
- Usability@90mph High-speed method for demonstrating user testing in front of an audience by Paul F. Marty and Michael B. Twidale
- Eye Track http://www.poynterextra.org/eyetrack2004/main.htm – supports the “F”-shape
- “Left is best,” it says, at right. http://usability.gov/basics/
- Context and perspective (http://www.37signals.com/svn/archives/000211.php) and pad little links (http://www.37signals.com/svn/archives/000296.php)
- Usability Myths http://www.uie.com/articles/usability_myths/
- Reducing User Interface Friction
- Agile Development Projects and Usability – Jakob Nielsen
This article was originally posted on the UCLA Programmers Wiki.
REBOL Resources
REBOL is a messaging language for distributed Internet applications that run across all devices. (I’m interested if it can be used as a quick, lightweight way to do web services. – Mike Franks – 8 July 2004)
REBOL is not a traditional computer language like C, BASIC, or Java. Instead, REBOL was designed to solve one of the fundamental problems in computing: the exchange and interpretation of information between distributed computer systems. REBOL accomplishes this through the concept of relative expressions (which is how REBOL got its name as the Relative Expression-Based Object Language). Relative expressions, also called “dialects”, provide greater efficiency for representing code as well as data, and they are REBOL’s greatest strength. For example, REBOL can not only create a graphical user interface in one line of code, but it can also send that line as data to be processed and displayed on other Internet computer systems around the world.
- REBOL 3 open source code arrives – 12/3/2012
- http://www.rebol.com/
- http://www.rebol.org/
- http://www.codeconscious.com/rebol/
- http://www.codeconscious.com/rebol/articles/x-internet-security.html
- http://www.onlamp.com/pub/a/onlamp/2003/10/30/rebol.html
- Nano-Sheets: A Small But Mighty Spreadsheet Engine in REBOL
This article was originally posted on the UCLA Programmers Wiki.
XACML
-
XACML (Extensible Access Control Markup Language)
- spec http://www.oasis-open.org/committees/xacml/repository/cs-xacml-specification-1.1.pdf
- article on http://www.internetnews.com/dev-news/article.php/1585771
- Sun implementation http://sunxacml.sourceforge.net/ and guide http://sunxacml.sourceforge.net/guide.html
- brief intro http://www.oasis-open.org/committees/download.php/2713/Brief_Introduction_to_XACML.html
- XACML.net http://mvpos.sourceforge.net/
What is code generation?
Code generation tools seem more relevant as software demands increase. A nice vision might be to combine a standard architecture or framework with code generation tools to speed the development. There doesn’t have to be anything proprietary about this if the architecture or framework is standard and the code generator generates source code without proprietary markers.
- Weighing pros and cons of code generation
- Code Generation Network
- Code Generation in Action
- Code-Generation Techniques for Java
What can I use to do load testing or functional testing of my web server?
Here are some links to open source web server load and functional testing programs or frameworks:
ab – Apache HTTP server benchmarking tool
- Somes with Apache on some platform.
- Very easy to use. Supports parameters such as concurrency and POST data.
- It tells you how many requests succeeded and how many failed (by response code and/or timeout), the request rate, etc. However, you cannot see which ones failed and why, etc.
- No support for distributing work across machines.
Apache JMeter
- Constructs and runs test plans in its GUI. I think you can use the JMeter classes (in Java) directly, instead of using the GUI. Documentation is scarce in this area too.
- Supports distributing work across machines. Multiple machines can load the test and another machine can observe the test.
- Pretty limited in terms of running dynamic test cases: There are built-in functions (like one that gets the current time), regular expression, and JEXL, but you can’t use custom code in test cases easily.
- Sends and receives HTTP requests and responses. Not aware of browser behavior or client-side scripting.
Selenium
- 3 variants:
- Selenium: write test plans in a language called Selenese in the Selenium IDE
- Selenium RC: incorporate test plans into programs; server part is in Java but client drivers exist for Java, .Net, Perl, PHP, Python and Ruby at least.
- Selenium Grid: a version of RC that enables spreading of test load among multiple processes and/or machines
- Functional testing (all) and load testing (RC, Grid)
- Runs in actual browsers so it can be used to test browser behavior or client-side scripting. For example, you can tell the script to click on a specific element in the page, even if the element is created by JavaScript loaded at run-time.
-
FAQ of Grid states that it’s not designed for load testing.
- One of the reasons: it’s resource-intensive to run multiple simultaneous instances of actual browsers.
- Grid’s “principle author” stated that each machine should be able to run 10-20 browser instances. This is still much more resource-intensive than many alternatives. I’ve read somewhere that BrowseMob provides performance-testing service using exactly this software though.
HtmlUnit
- A Java library providing building blocks for testing. I’ve read that front-ends exist.
- Primarily for functional testing, but also used by many for load testing.
- Claims to “understand” page content and runs JavaScript including AJAX.
Simple Test
- Unit testing for PHP
- A browser class that simulates a browser’s behavior is included
- No real support for load testing beyond timing a request, as there is no concurrency (within the program at least).
Other
What is Identity 2.0 and as a web developer, why do I care?
I’m not really sure what Identity 2.0 is but here are some very interesting slide show talks about it, and it looks to be solving some very interesting web security problems.
- OSCON 2005 Keynote – Identity 2.0 – Dick Hardt – Founder & CEO, Sxip Identity
- Who is the dick on your site?
- http://identity20.com/
- Identity 2.0 article by Kate Greene
Does UCLA have free access to O'Reilly and Associates programming books online?
Yes, luckily enough for UCLA programmers, the Library maintains a subscription to O’Reilly and Associates Safari Tech Books Online service. This service allows searching the full text of many of their technical books. There is also an option to limit your search to code fragments, which is an excellent way to get sample programming code.
Update: This and other resources are available at https://oit.ucla.edu/training and you can get in via UCLA Login.
The URL is http://uclibs.org/PID/432785 and is restricted to UCLA IP addresses. That is, access is native on-campus, while off-campus access would require the UCLA VPN.
History
June 9, 2020, announcement from the California Digital Library
O’Reilly for Higher Education (OHE) now available for UC https://cdlib.org/cdlinfo/2020/06/09/oreilly-for-higher-education-now-available-for-uc/
Oct. 28, 2009 email from Anita Colby, Science and Engineering Library
The enhancements to the Safari interface took place overnight early this week, so all the campuses should now have access to the features mentioned below:
SAFARI
New Safari 6.0
Safari Books Online 6.0, scheduled to be released in October 2009, provides a major advance to the service.
- Enhanced Usability / Optimized Search – The search functionality has been optimized to ensure that users can find what they need quickly and efficiently.
- Value-Based Ratings / Customer Ratings – Safari 6.0 provides both an Amazon.com rating (where available) and a Safari Books online rating on all titles within the digital library. Now users can get the technology rating of peers, as well as a broader rating.
- A Wealth of Knowledge Tailored to User Needs / Categorization – Safari has added the ability for users to categorize the material in its digital library according to their own preferences. Whether they want marketing, technology, and business, or Linux, Java, and OpenSource, users can now create and fill their own categories.
- Improved Readability – With Safari 6.0, users have the ability to make inline notes in the actual text they are reading. They can now dog-ear or bookmark specific pages. They can make notes while reading on a given page, and they can share these notes and bookmarks with others – making Safari Books Online a more powerful learning and teaching tool.
March. 3, 2009 email from Anita Colby, Science and Engineering Library
“We have 30 seats shared by all UC campuses plus the California Digital Library staff. Our resource liaison says she hasn’t heard of any turnaways.
Oct. 27, 2005 email from Anita Colby, Science and Engineering Library
“The new contract extends from October 1, 2005-September 30, 2006 and will cover all titles from 2003-2005 plus newly released titles during the contract year. We have a contract for 28 concurrent ports for all campuses and the CDL.”
Nov. 5, 2003 email from Anita Colby, Science and Engineering Library
I am pleased to announce that a new eBook series on computer programming and technology related themes is now available to UCLA students, staff, and faculty. The entire Safari collection of O’Reilly books with publication dates from 2002 forward is now available as eBooks. You can find these books in Orion2 by author, title, or the keywords “Safari tech books online.” The disadvantage to this approach is that you loose the power of the Safari search interface; the advantage is that you only see the items available to you, not the entire Safari collection.
You can find this at http://uclibs.org/PID/432785 From a campus computer, you’ll “Welcome UCLA” on the far right. From off campus you can use BOL’s VPN Service to get a UCLA IP address. Click on Bookshelf for a list of our books.
There are only a defined number of ports for access by six campuses, so occasionally there may be no access when all ports are in use. After 10 minutes of no activity, the ports will reopen. The entire book including graphics is available to registered users for remote access at the six campuses listed, including UCLA.
Where can I find free web programming tutorials and sample code?
The first place to start for free web programming tutorials and sample code is http://www.w3schools.com/.