Linking database information through JavaScript template in Moodle Database Activity Module
Say you have two databases in your Moodle site, and you want to send data from one database to the other one to fill in a form. An easy way to do this is by sending the required data through the url and utilizing JavaScript.
Sample 1
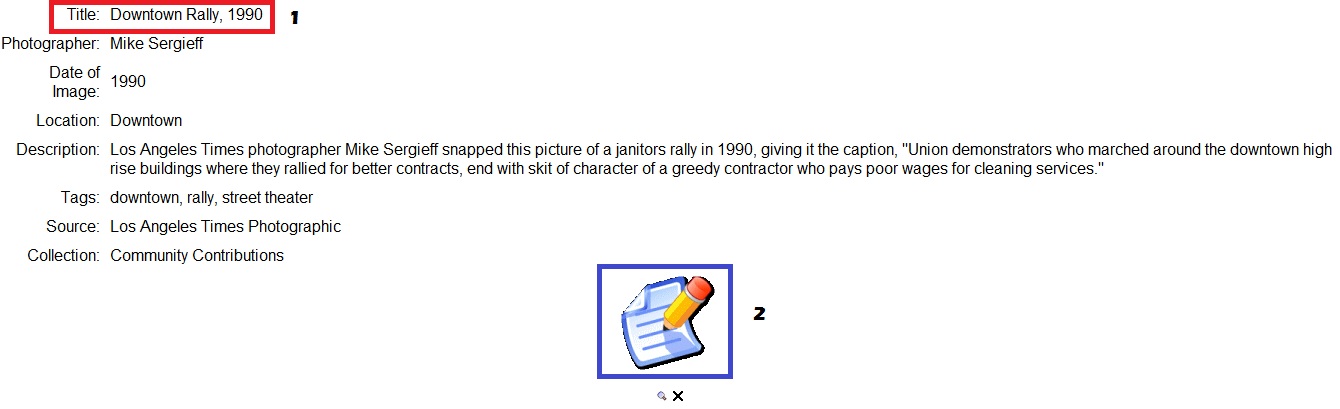
In Sample 1, lets say we want to send data like the title to another database. Through HTML and JavaScript, we turn the paper icon into a button, as you can see in Sample 2. This is an <a tag, meaning an anchor tag. Automatically, through HTML, this will lead to the link specified, meaning the href=https://classes.sscnet.ucla.edu/mod/data/edit.php?d=91&url=##moreurl##&title=[[Title]]
Sample 2
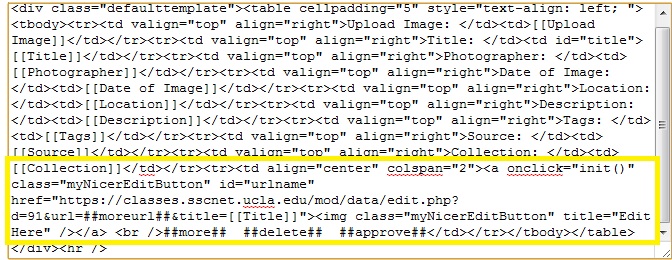
So right now, we have a paper icon that links to a specified website; however, this website is not correct because the ##moreurl## contains a string that creates an error. This is where javascript comes in, which will dynamically change the website to the correct one when clicked, explaining why the <a tag has the onclick = “init()”. When clicked, the function init() will run.
Sample 3
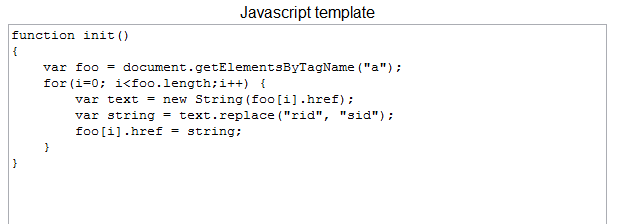
In Sample 3, we see the init() function. The first line declares that the variable foo is equal to all the elements with the tag name “a”. This fills foo with an array of all the anchor tags in the document, including the one described above in Sample 2.
Running through the array with a for loop, the variable text is defined as the anchor tag’s href, the website it links to, and then it replaces the string “rid” with “sid”. By using JavaScript, when the button is clicked, it will search through the anchor tags and replace the required string so the website linked will be correct.
Sample 4

In Sample 4, we can see the url and the displayed database. The complete url contains the needed data of the partial url, which is the ##moreurl## but with rid = sid. The title has also been sent through the url, but to place it in the database requires more JavaScript.
Sample 5
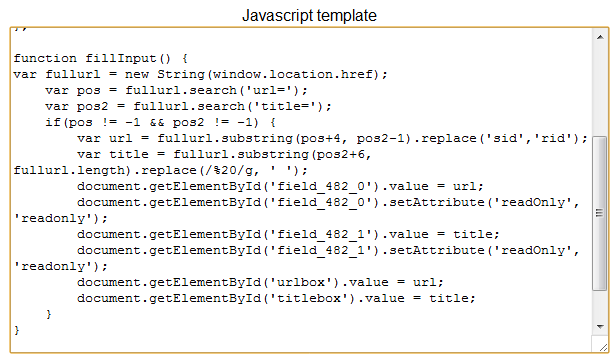
In Sample 5, the function fillInput() will take the url and parse the required information into the template in Sample 4. In this function, we want the ##moreurl## and the title — data from the previous database that was transferred over. We search for the beginning of each field in the complete url, placing values in the variables pos/pos2. If both variables are defined, meaning they were found in the url, we can get the required data through substrings.
Sample 6
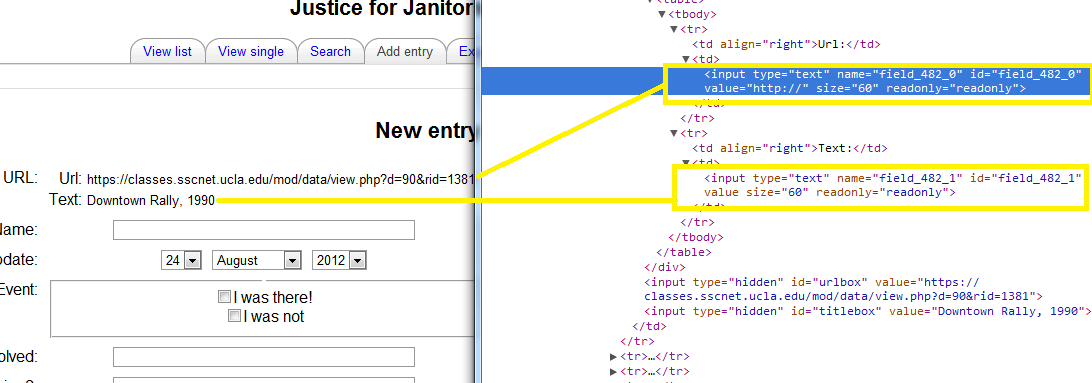
Now that we have the required data, we transfer them to the template by searching through the document. Going back to Sample 4, when we right click anywhere on the webpage, and then go to inspect element/view source, we can see the raw HTML of the page. Going over the template values in Sample 6, we see that field_482_0 is the input box for the URL: and field_482_1 is the Title: input box. Through JavaScript, we can dynamically fill in those values with the data from the url.
Thus our end result is seen in Sample 4 where we have a url with the data passed from one database to another to fill in a template!