Change Calendar Permissions in Outlook 2011
This document provides a step-by-step set of instructions on how to add change calendar permissions in Outlook 2011 for Mac.
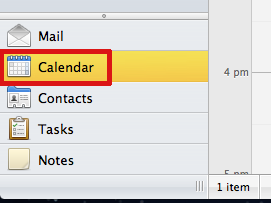
- Open Outlook and click Calendar in the navigation pane on the left side of the window.
- On the Home tab of the Ribbon, click Permissions.

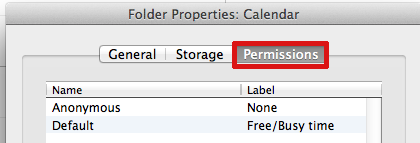
- In the Calendar Properties window, click the Permissions tab.
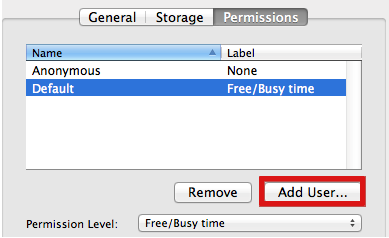
- Click on the Add User… button.
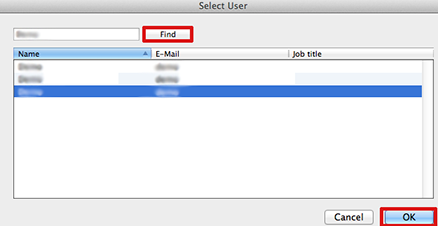
- The address book search dialog box will appear. Enter the name of the person you would like to add permissions for, click Find, select the user then and click OK.
- The person you added will appear under Name. To change their permission level from Free/Busy time (the default), click the dropdown menu next to Permission Level (see table below). Choose a level of permission to give and click OK

Permission levels:
With this permission level (or role) You can Owner Create, read, modify, and delete all items and files, and create subfolders. As the folder owner, you can change the permission levels that other people have for the folder. Publishing Editor Create, read, modify, and delete all items and files, and create subfolders. Editor Create, read, modify, and delete all items and files. Publishing Author Create and read items and files, create subfolders, and modify and delete items and files that you create. Non-Editing Author Create items (not folders), but cannot edit anything, can delete items that you create. Author Create and read items and files, and modify and delete items and files that you create. Contributor Create items and files only. The contents of the folder do not appear. Reviewer Read items and files only. Free Busy, time, subject, location View Free Busy time, subject and location. Free Busy View Free Busy time only. None No permissions.